|
|
|
|
|
| Fig.1 | Fig.2 | Fig.3 | |
|
|
|
|
|
| Fig.4 | Fig.5 | Fig.6 | |
Dental Education Lecture: From Bridge to Implant (Part II)
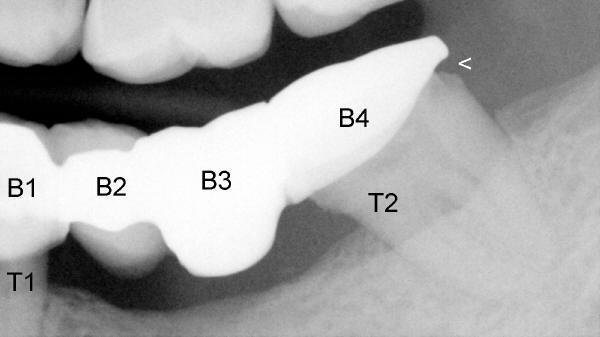
Mr. Lu has a typical Class I bridge (Fig.1 B1-4). It is supported by two natural teeth on either side (T1,T2) and carries two false teeth in the middle (B2,B3). The back surface of the natural tooth in the back (T2) has a new cavity (arrowhead). Mr. Lu has severe pain.
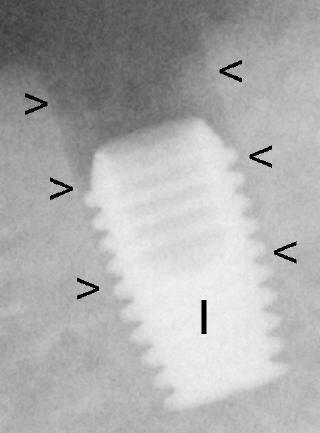
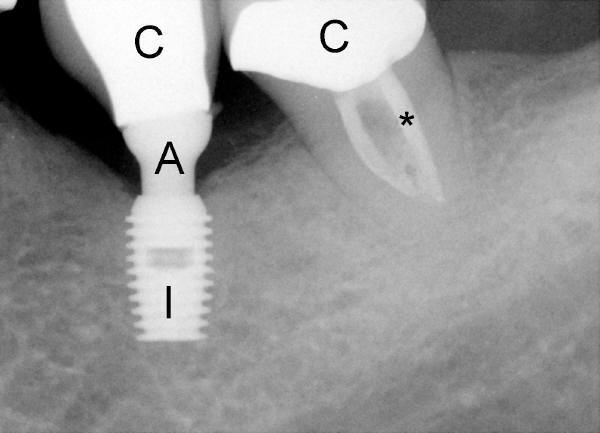
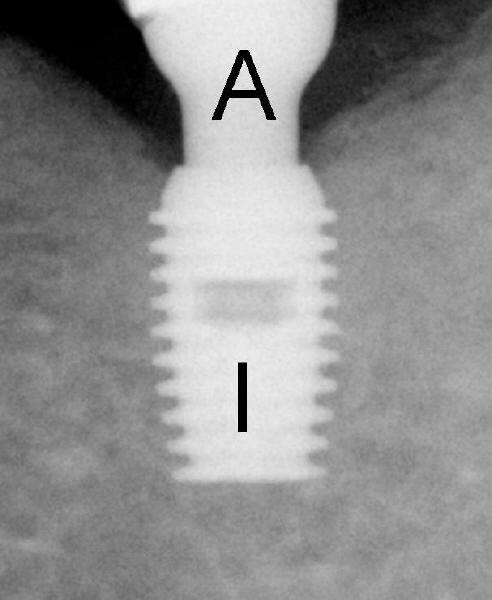
So we need to remove the three components of the bridge (B2-4), finish root canal for the back tooth (Fig.4 *) and place a crown (C). Then we place an implant for the missing tooth area (Fig.2 I). Arrowheads in Fig.2 indicate the implant bed. There is space between the implant and the implant bed.
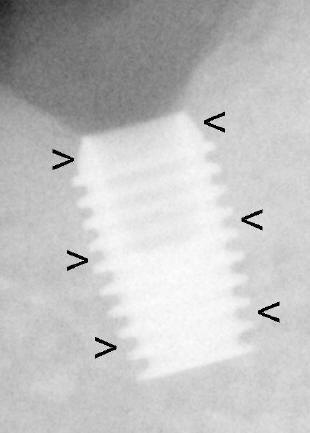
Several months later, bone grows into the threads of the implants (Fig.3 arrowheads) so the implant is now very stable and ready to take chewing loading after we install an abutment (A in Fig.4, like a post) and a crown (C). Additionally, Mr. Lu can floss between the natural teeth and implant-supported tooth.
Don't you think that it is time to celebrate the milestone for Mr. Lu?
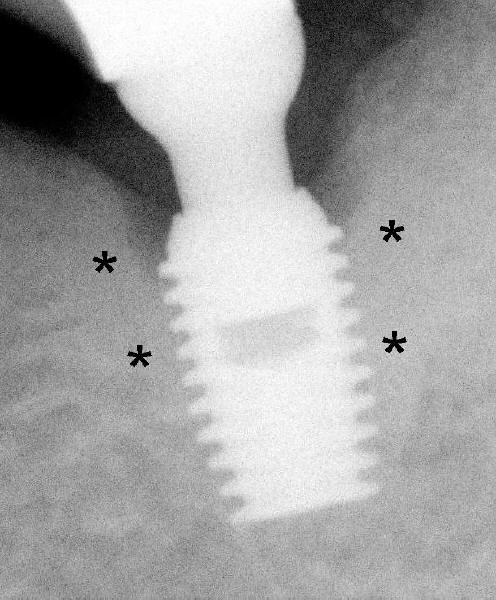
For one year and three months since implant crown cementation, Mr. Lu has enjoyed what he gets. He chews normally. New X-ray shows denser bone forms around the implant (Fig.6*, as compared to Fig.5). Fig.5 is higher magnification of Fig.4.
Xin Wei, DDS, PhD, MS 1st edition 09/16/2010, last revision 09/28/2012