|
|
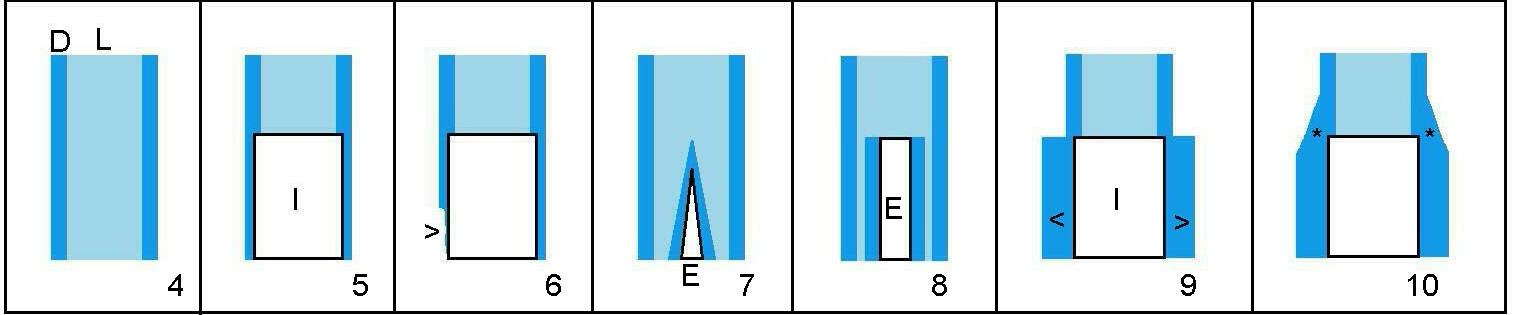
Fig.4-10: Diagrams are used to explain bone expansion and compression. Our bone looks like a sandwich. The outer layer of the bone (bread) is dense (D, dark blue), whereas the inner portion (ham/cheese) is loose (L, light blue) (Fig.3,4). The traditional way to place an implant (Fig.5 I) is to drill a hole into the bone before placement. All of loose bone and part of dense bone may be removed. Some of remaining dense bone may be gone during bone healing and remolding (Fig.6 >). The implant may be not stable. In contrast, basically no bone is removed when bone expansion is used. The bone immediately becomes denser (from light to dark blue) when a thin pointed chisel (Fig.7 E: expanding instrument) is driven into the bone. Later a thick blunt rounded chisel is pushed in; the bone immediately next to it may be compressed/condensed accordingly (Fig.8). Finally the condensed bone fuses to the outside originally dense bone (Fig.9 >) when an implant (I) is squeezed in. The bone is also expanded. There is a thick layer of dense bone all around the implant. The latter must be very stable. The bone is also expanded. In one word, the bone is stretchable and compressible. Several months later, the expanded/compressed bone heals nicely with surrounding bone (Fig.10*). The implant is ready to work. Return to main article
Xin Wei, DDS, PhD, MS 1st edition 10/12/2012, last revision 10/12/2012