|
|
|
| Fig.1 | Fig.2 |
|
|
|
| Fig.3 | Fig.4 |
|
|
|
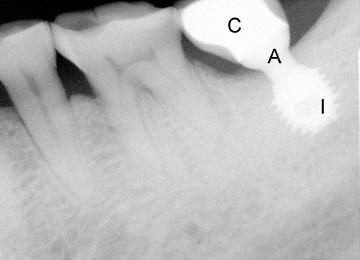
| Fig.5 |
Dental Education Lecture: Short Implant
As we discuss earlier, the root tip of the bottom 2nd molar is quite close to a nerve inside our bottom jaw, as compared to that of the 1st molar. After the 2nd molar is taken out, there is less bone available for implant placement without touching the nerve underneath.
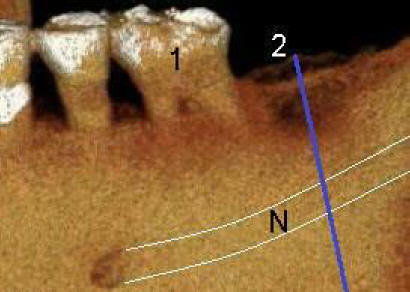
Fig.1 is a 3 D (dimensional) CT image of lower molar region with missing 2nd molar. It appears that the nerve inside the jaw is closer to 2nd molar (2) than to 1st molar (1). Let us section the jaw through the blue line to show how important to place a short implant to avoid damaging the nerve.
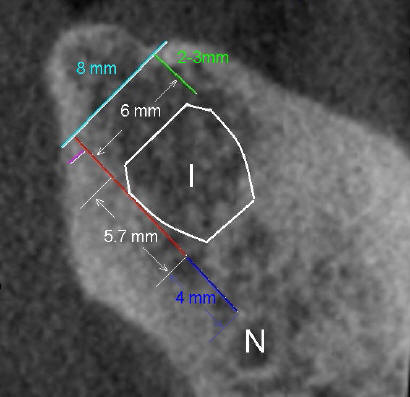
Fig.2 shows the design of implant placement (I) relative to the nerve (N). Since bone height is relatively insufficient, we plan to use a short implant (6 mm in diameter, 5.7 mm in height). In order for an implant to survive, there should be at least 1 mm of bone (pink line) on the either side of it. According to manufacture's manual, the short implant should be placed 2-3 mm (green line) below the top of the bone. After the short implant is placed, there is 4 mm of bone before touching the nerve (blue line). We should be quite safe.
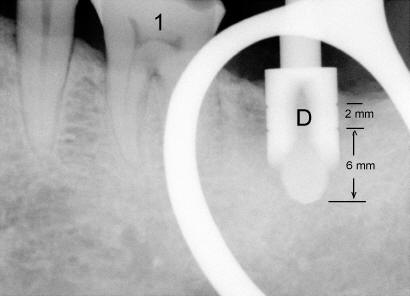
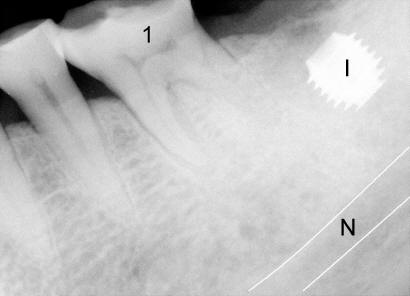
Let us do real work: placing the short implant. An implant bed is created by a drill (Fig.3 D). Unfortunately a hemostat (like a ring) drops into X-ray field. Anyway, the drill is pretty straight, parallel to the neighboring teeth (1). The drill has two marks: indicating the depth of the implant bed, which is consistent with the design mentioned above. When the short implant is placed (Fig.4: I), it is far from the nerve underneath (N). Obviously there is no sign of nerve damage after surgery. Six to seven months later, the patient has abutment (A in Fig.5) and crown (C). We will discuss more about the short implant next.
Xin Wei, DDS, PhD, MS 1st edition 03/26/2011, last revision 06/29/2011