

|
|
|
|
|
|
|
|
|
|
|
Application of Trephine bur in Sinus Lift and Implantation
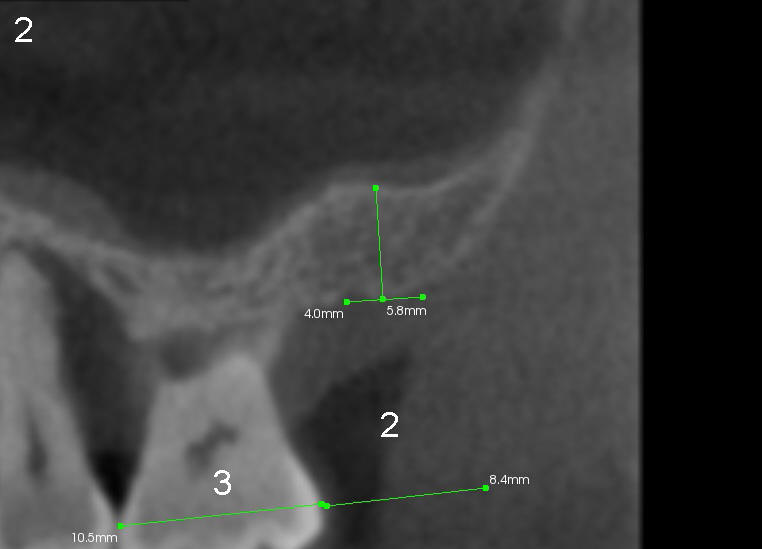
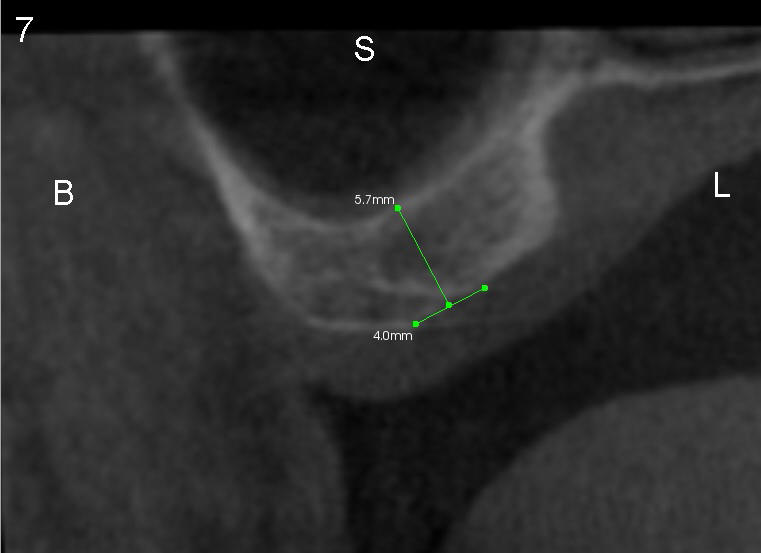
Calvin (at his 40s) has periodontitis and most likely bruxism. The tooth #2 has been lost for a while (Fig.1) with limited bone height (Fig.2 CT sagittal section, < 6mm).
Use #15 to make a ~ 10 mm incision mesiodistally. If the underlying bone is soft (tested by the tip of the blade), RT2 will be used to initiate osteotomy at the depth of 8 mm. Bone expansion kit may be used.
If the bone is tough, make a H-shaped incision. Raise the buccal and lingual flaps. Use suture for fixation of the flaps (buccal to buccal mucosa, lingual retracted with suture and a small hemostat. Use longer suture if available.
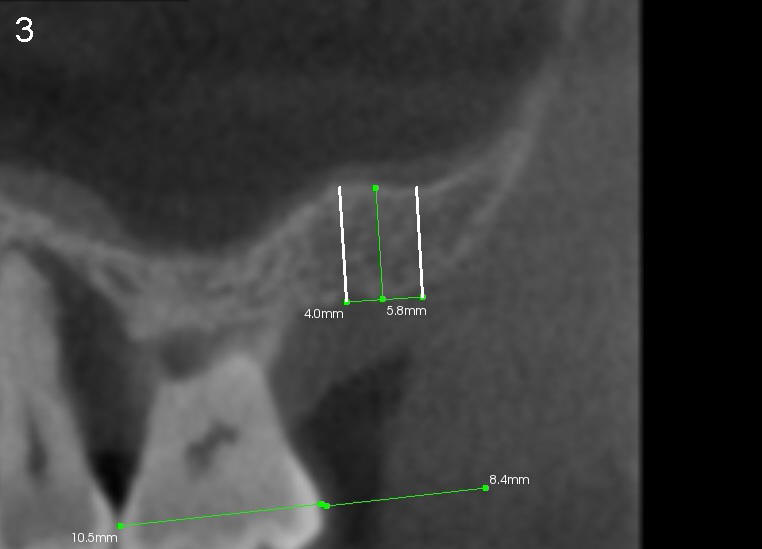
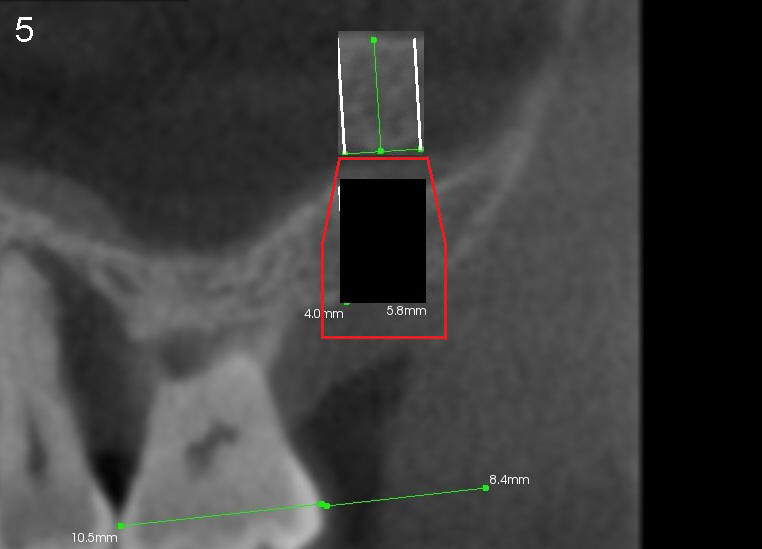
A trephine bur with outside diameter 4 mm will be used to create osteotomy and harvest the bone core (Fig.3; white lines). If the bone does not come out with the trephine bur, it will be pushed upward slowly and gently with a flat end osteotome or tap (Fig.4). When an implant is placed (Fig.5 red outline; 6x11 mm), it is covered by the vital bone above with blood supply coming from the sinus membrane.
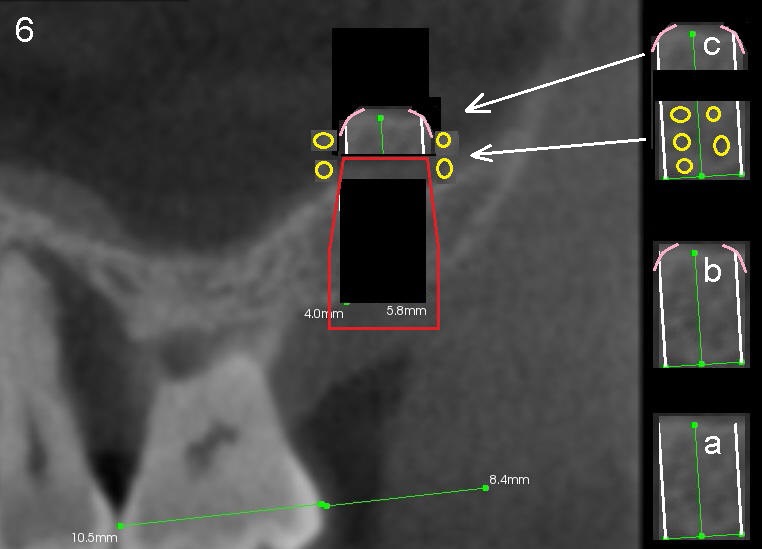
If the bone core comes out with the trephine bur (Fig.6a), the top corner will be trimmed (Fig.6b pink curved lines) so that it will not tear the sinus membrane when it returns as will be mentioned below. The bone core is to be sectioned as shown in Fig.6c. The top portion will be placed above the implant, while the lower portion will be ground into small pieces (yellow circles) with a bone mill and placed lateral (circumferentially) to the implant.
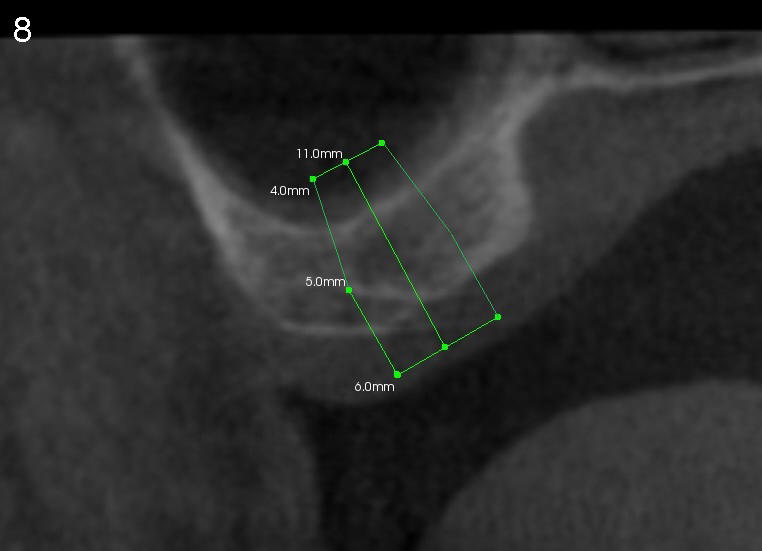
Fig.7,8 are CT coronal sections, showing #2 ridge morphology and implant design, respectively.
Assistants Sinus Lift 10-Year-Comparison
Xin Wei, DDS, PhD, MS 1st edition 09/29/2013, last revision 06/03/2018