


|
|
|
|
|
|
|
|
|
|
|
|
|
|
|
|
|
|
|
|
Immediate Implant in the Distal Socket of a Lower 1st Molar
The tooth #30 of a 64-year-old man has endo failure with large radiolucency in the mesial socket (Fig.1 (PA), 2 (CT)). The tooth is nonsalvageable. The mesial lesion is closer to the inferior alveolar nerve (I/IAN) than the distal apex. In addition, there is a connection (Fig.1,2 arrowheads and Fig.2 insert pink dashed line) between the mesial lesion and the nerve. What is the connection, as related to extraction and immediate implant?
There are three potential spaces for the immediate implant: the mesial and distal sockets and the septum. First at all, the tooth should be extracted with curettage of granulation tissue from the mesial apical lesion. The latter turns out to be difficult, since the bottom of the mesial socket has abrupt transition into a narrow neck, which look and feels like the IAN. To determine the depth of the lesion relative to the IAN, PA is taken (Fig.3) without too much information. When a radiopaque material in placed in the mesial socket (Fig.4 M), the lesion has apparently not extended to the IAN. Curettage of the remaining granulation tissue is now an easy task. Finally bleeding comes from a small hole, as indicated by arrowhead. Therefore the special structure is a branch of the inferior alveolar vessels.
As to where to place an implant, we try to engage the largest tap (8 mm in diameter) into the mesial socket without binding. The buccal plate of the mesial socket is missing. It is risky to extend osteotomy in the mesial socket. Besides, the septum (Fig. 4 S) is not as tall as the distal socket (D). It appears that the distal socket is the safest place to place an implant. Furthermore, no drill is used for distal osteotomy. Instead two osteotomes (3.5x15 and 4x15 mm tapered osteotomes) are used to expand the distal socket with intention to push the septum mesially. Since the bone density is high, the osteotomes seem not to work as effectively as expected. Then a 4.5x17 mm tap is placed at the depth ~ 14 mm with stability (Fig.5). Finally a 5x14 mm tissue-level implant is placed with insertion torque >60 Ncm (Fig.6). Allograft is placed in the mesial socket and buccal aspect of the distal socket, followed by insertion of collagen plug and membrane (Fig.7). After insertion of an abutment (Fig.8 (taken 6 days postop) *), perio dressing (P) is applied to cover the wound. There is no postop paresthesia.
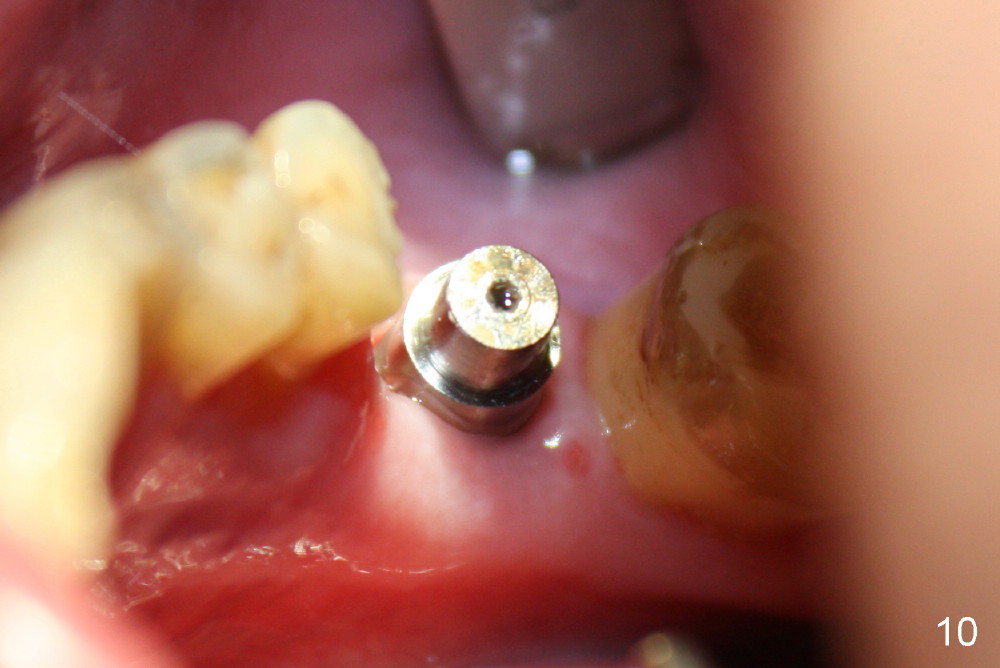
When the perio dressing is removed in office 24 days postop (Fig.9), the rough surface of the implant (R) is exposed buccally. Normally the smooth surface should contact the gingiva (S). Lingually implant/gingiva position is within normal limit (Fig.10). The patient returns for restoration 4 months postop (Fig.11,12). There is bone formation in the mesial socket and new bone appears to have grown toward the implant (Fig.11 <). A straight abutment appears to be in the middle of the edentulous space (Fig.12 A). But it is difficult to seat the crown. Three months post cementation, the patient complains of food impaction mesially (Fig.10 ^), although bone density continues to increase in the mesial socket and there is no mesial coronal thread exposure (*). Retrospectively the implant should be tried to be placed in the septum as much as possible to have a favorable restorative axis (Fig.14). The crown is re-fabricated with larger mesial contact area. It is temporarily cemented because of slightly loose distal contact (Fig.15). A few days later, the patient requests permanent cementation, because although the distal contact is loose, it is easy to remove food. Mesial food impaction is less likely, but it is more difficult to be removed.
Return to Lower Molar Immediate Implant
Xin Wei, DDS, PhD, MS 1st edition 06/15/2014, last revision 06/06/2015