|
|
|
|
|
|
Underprep
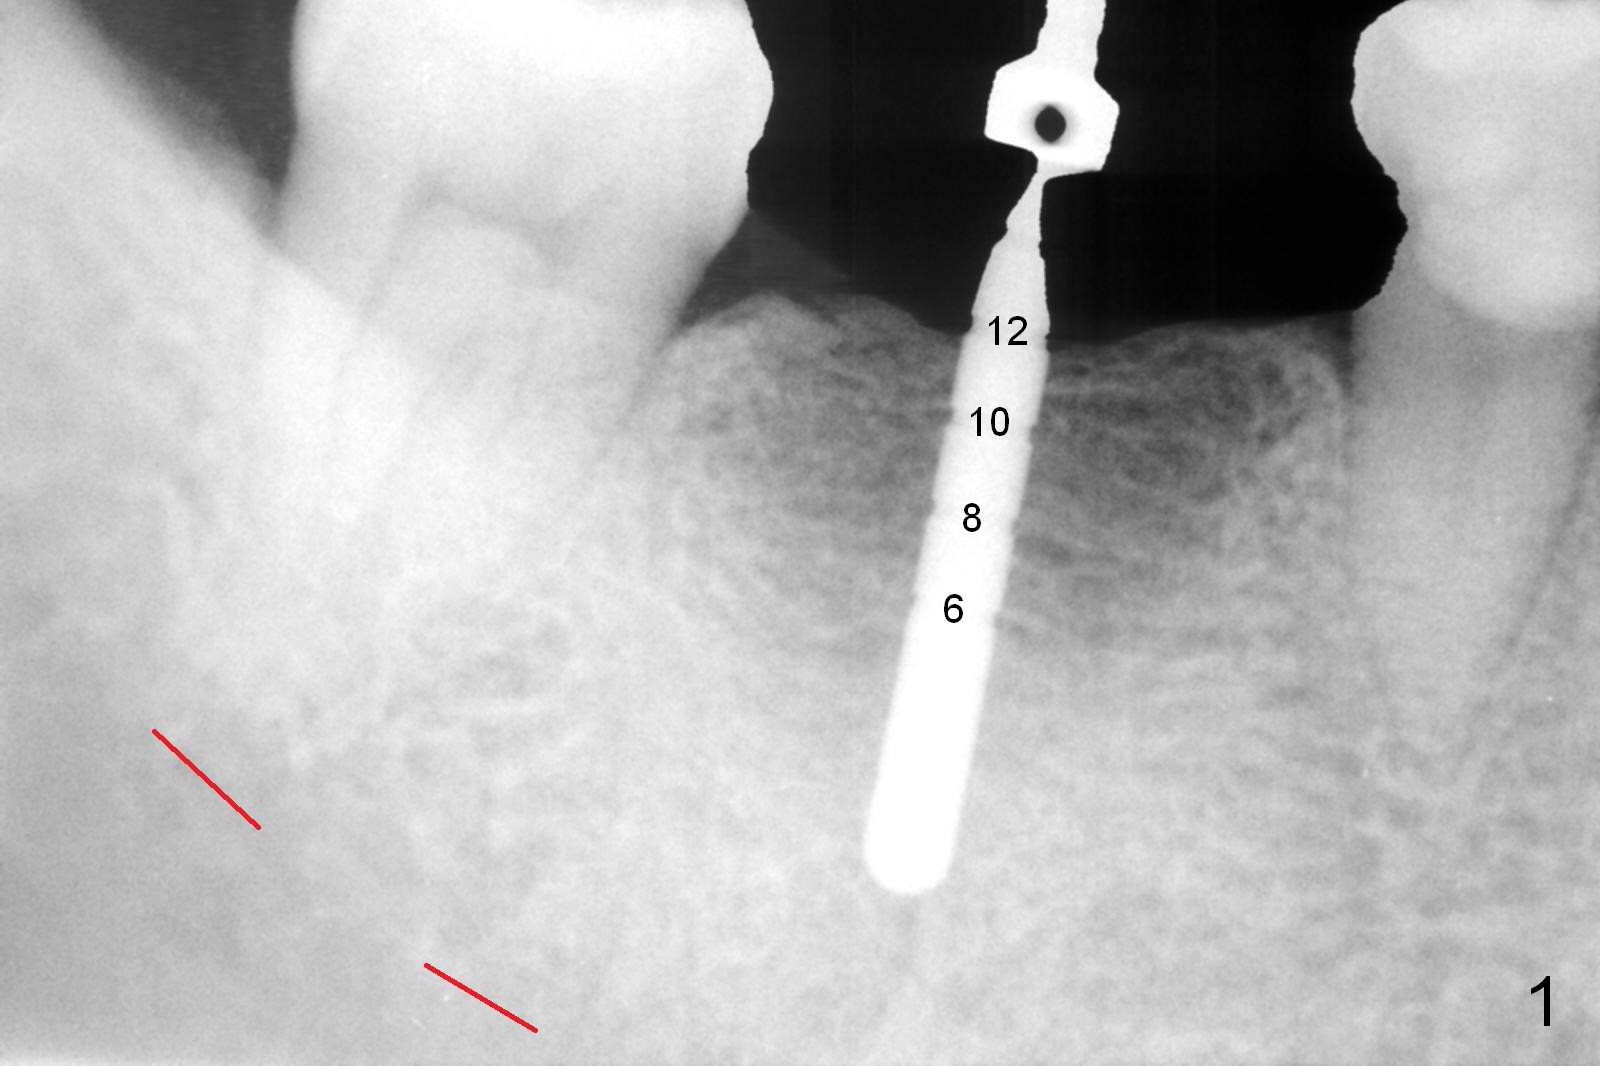
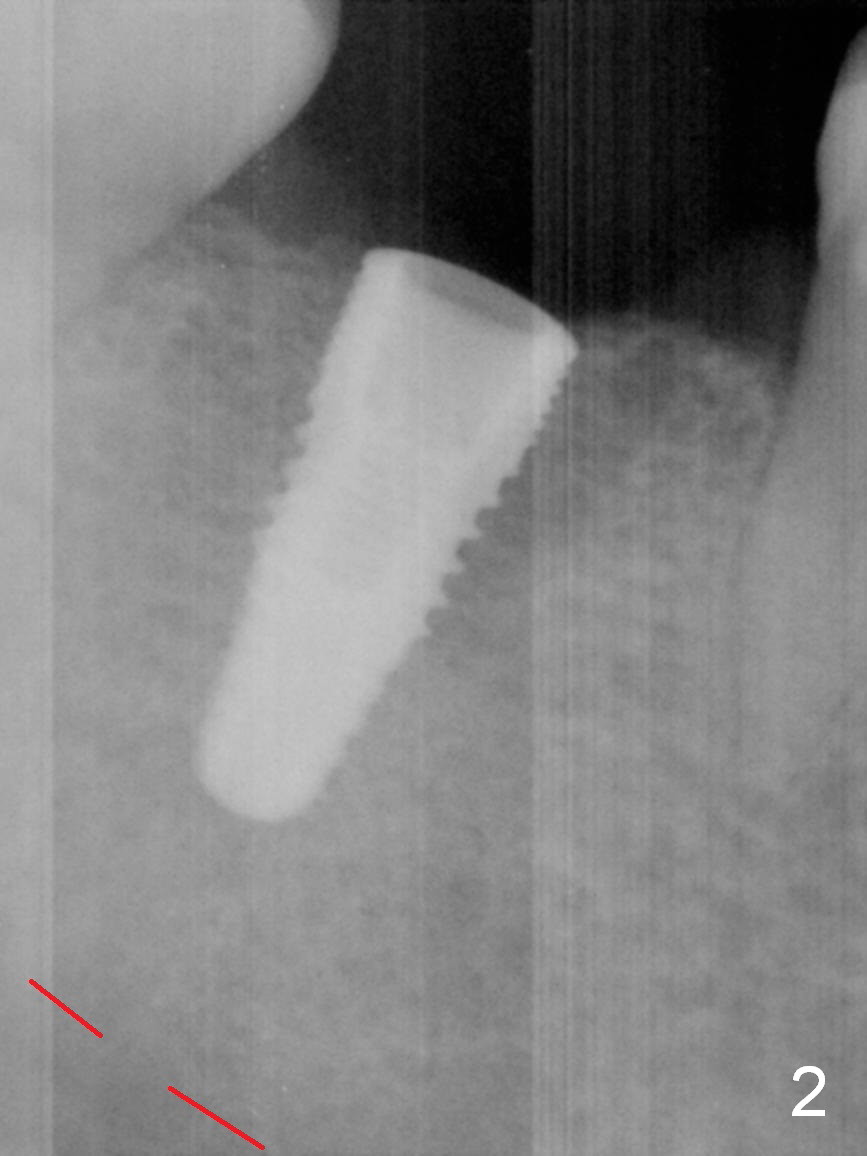
The patient is a little nervous. The initial osteotomy depth is 12 mm (Fig.1); the superior border of the Inferior Alveolar Canal (red dashed line) is invisible immediately apical to the parallel pin. It appears that the depth is appropriate. A 5x12 mm bone-level implant is placed incompletely with high torque after osteotomy using 4.5x12 mm drill. After removing the implant, the osteotomy is re-prepared with 5x8 mm and 4.1x14 mm drills. The implant is placed again (Fig.2) and seated deeper so that there is no lingual thread exposure. Autogenous bone harvested during osteotomy is placed against the buccal and lingual plates next to the implant, followed by Collagen dressing. As usual, an abutment is placed with fabrication of an immediate provisional. Perio dressing is applied for further wound protection. The patient is doing well postop.
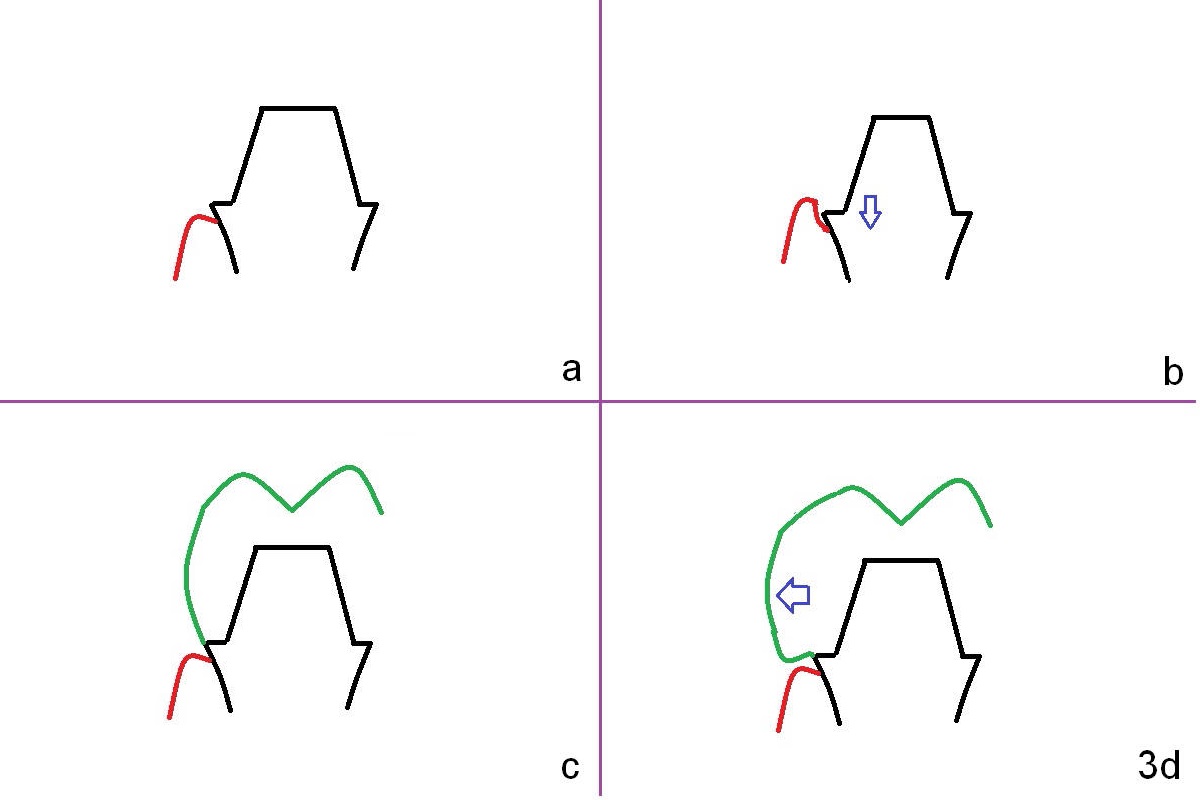
Three months postop, the patient returns for final restoration impression. The abutment (Fig.3a black outline) margin is supra-gingival (red curved line). Ideally the abutment should have been changed to a smaller one with infra-gingival margin (Fig.3b arrow). For the best oral hygiene, the margin of the crown (Fig.3c green outline) should be even with the abutment one. To have the best cosmetic effect, please make the buccal contour of the crown a little more bulky (Fig.3d arrow). When the crown is cemented, use minimal cement.
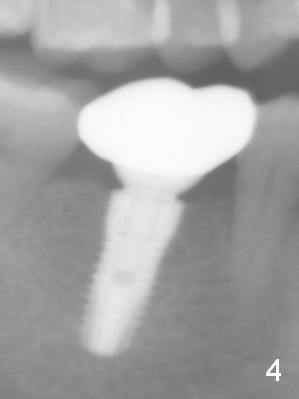
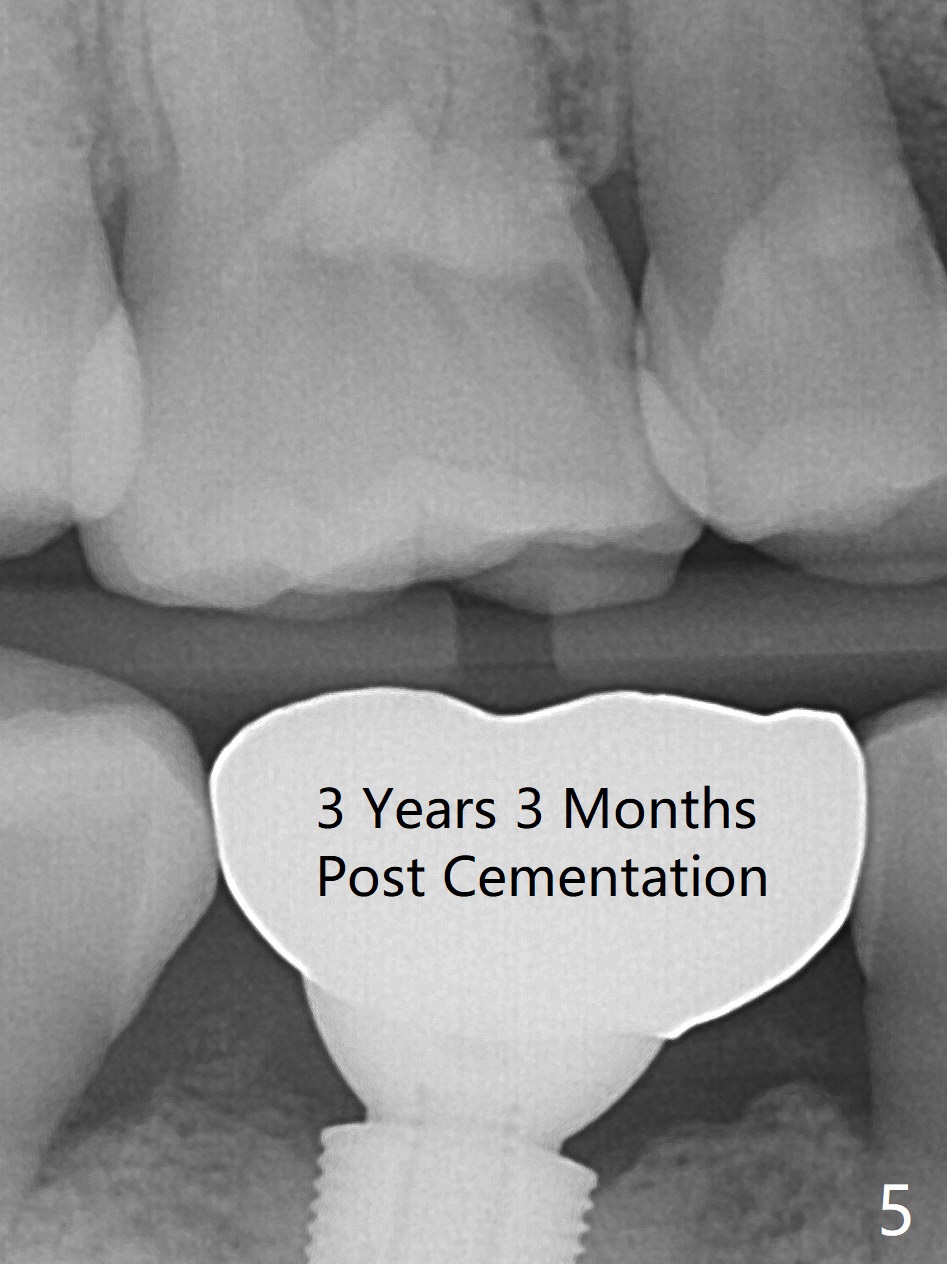
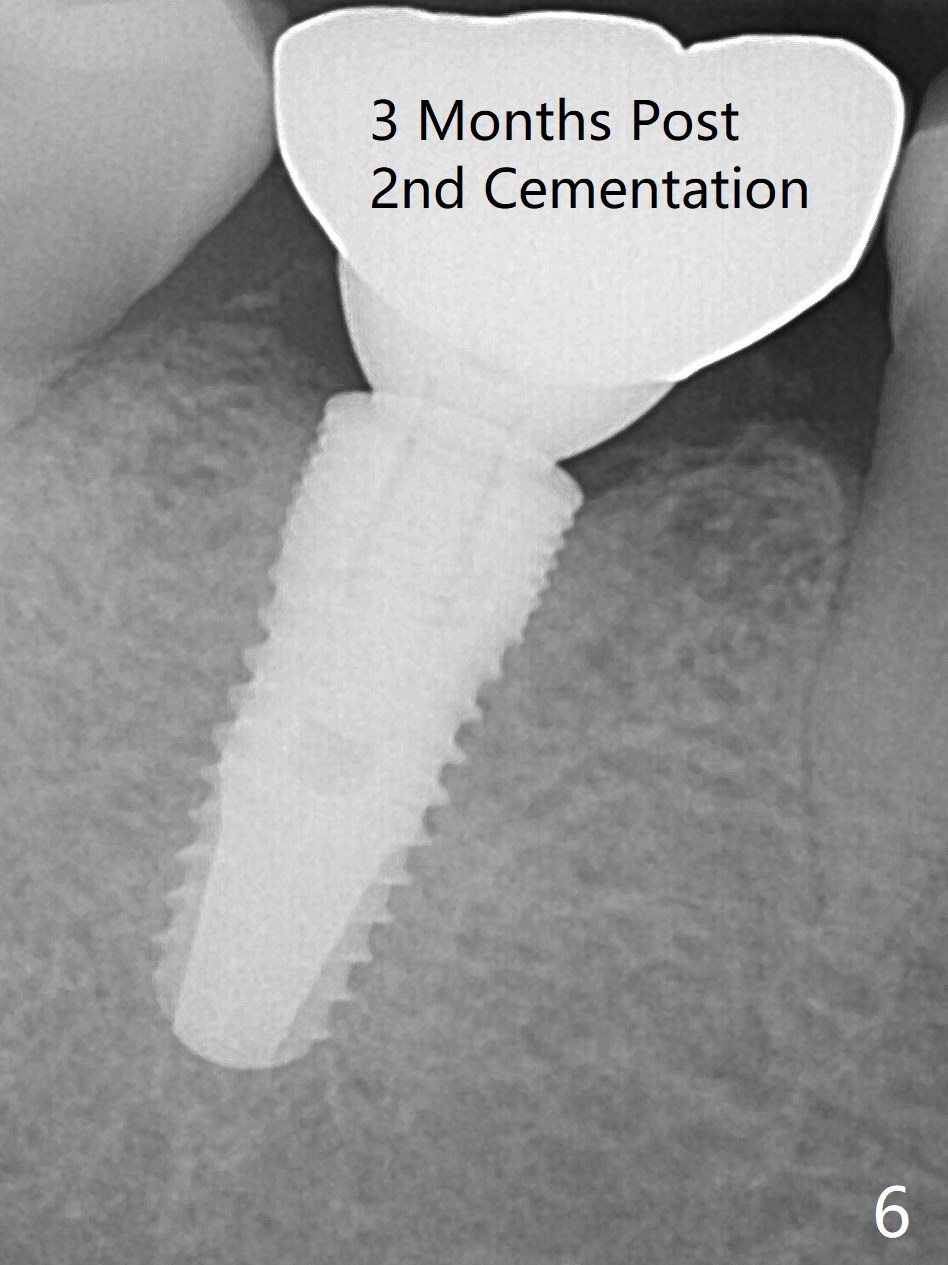
There is no bone loss 1 year postop (6 months post cementation, Fig.4 (pan)). The patient is pleased with mastication improvement. There is food impaction mesially (large mesial gingival embrasure, Fig.5, distal implant placement/free hand). After making an access hole for mesial contact repair, there is no food impaction, but the crown needs recementation 3 months later (Fig.6), as related to bruxism (severe molar occlusal wear, short crowns).
Return to
Lower Molar Immediate Implant,
Technicians
Xin Wei, DDS, PhD, MS 1st edition 10/30/2015, last revision 10/31/2019