
|
|
|
|
|
|
|
|
|
|
|
|
Bone Expansion & Condensation
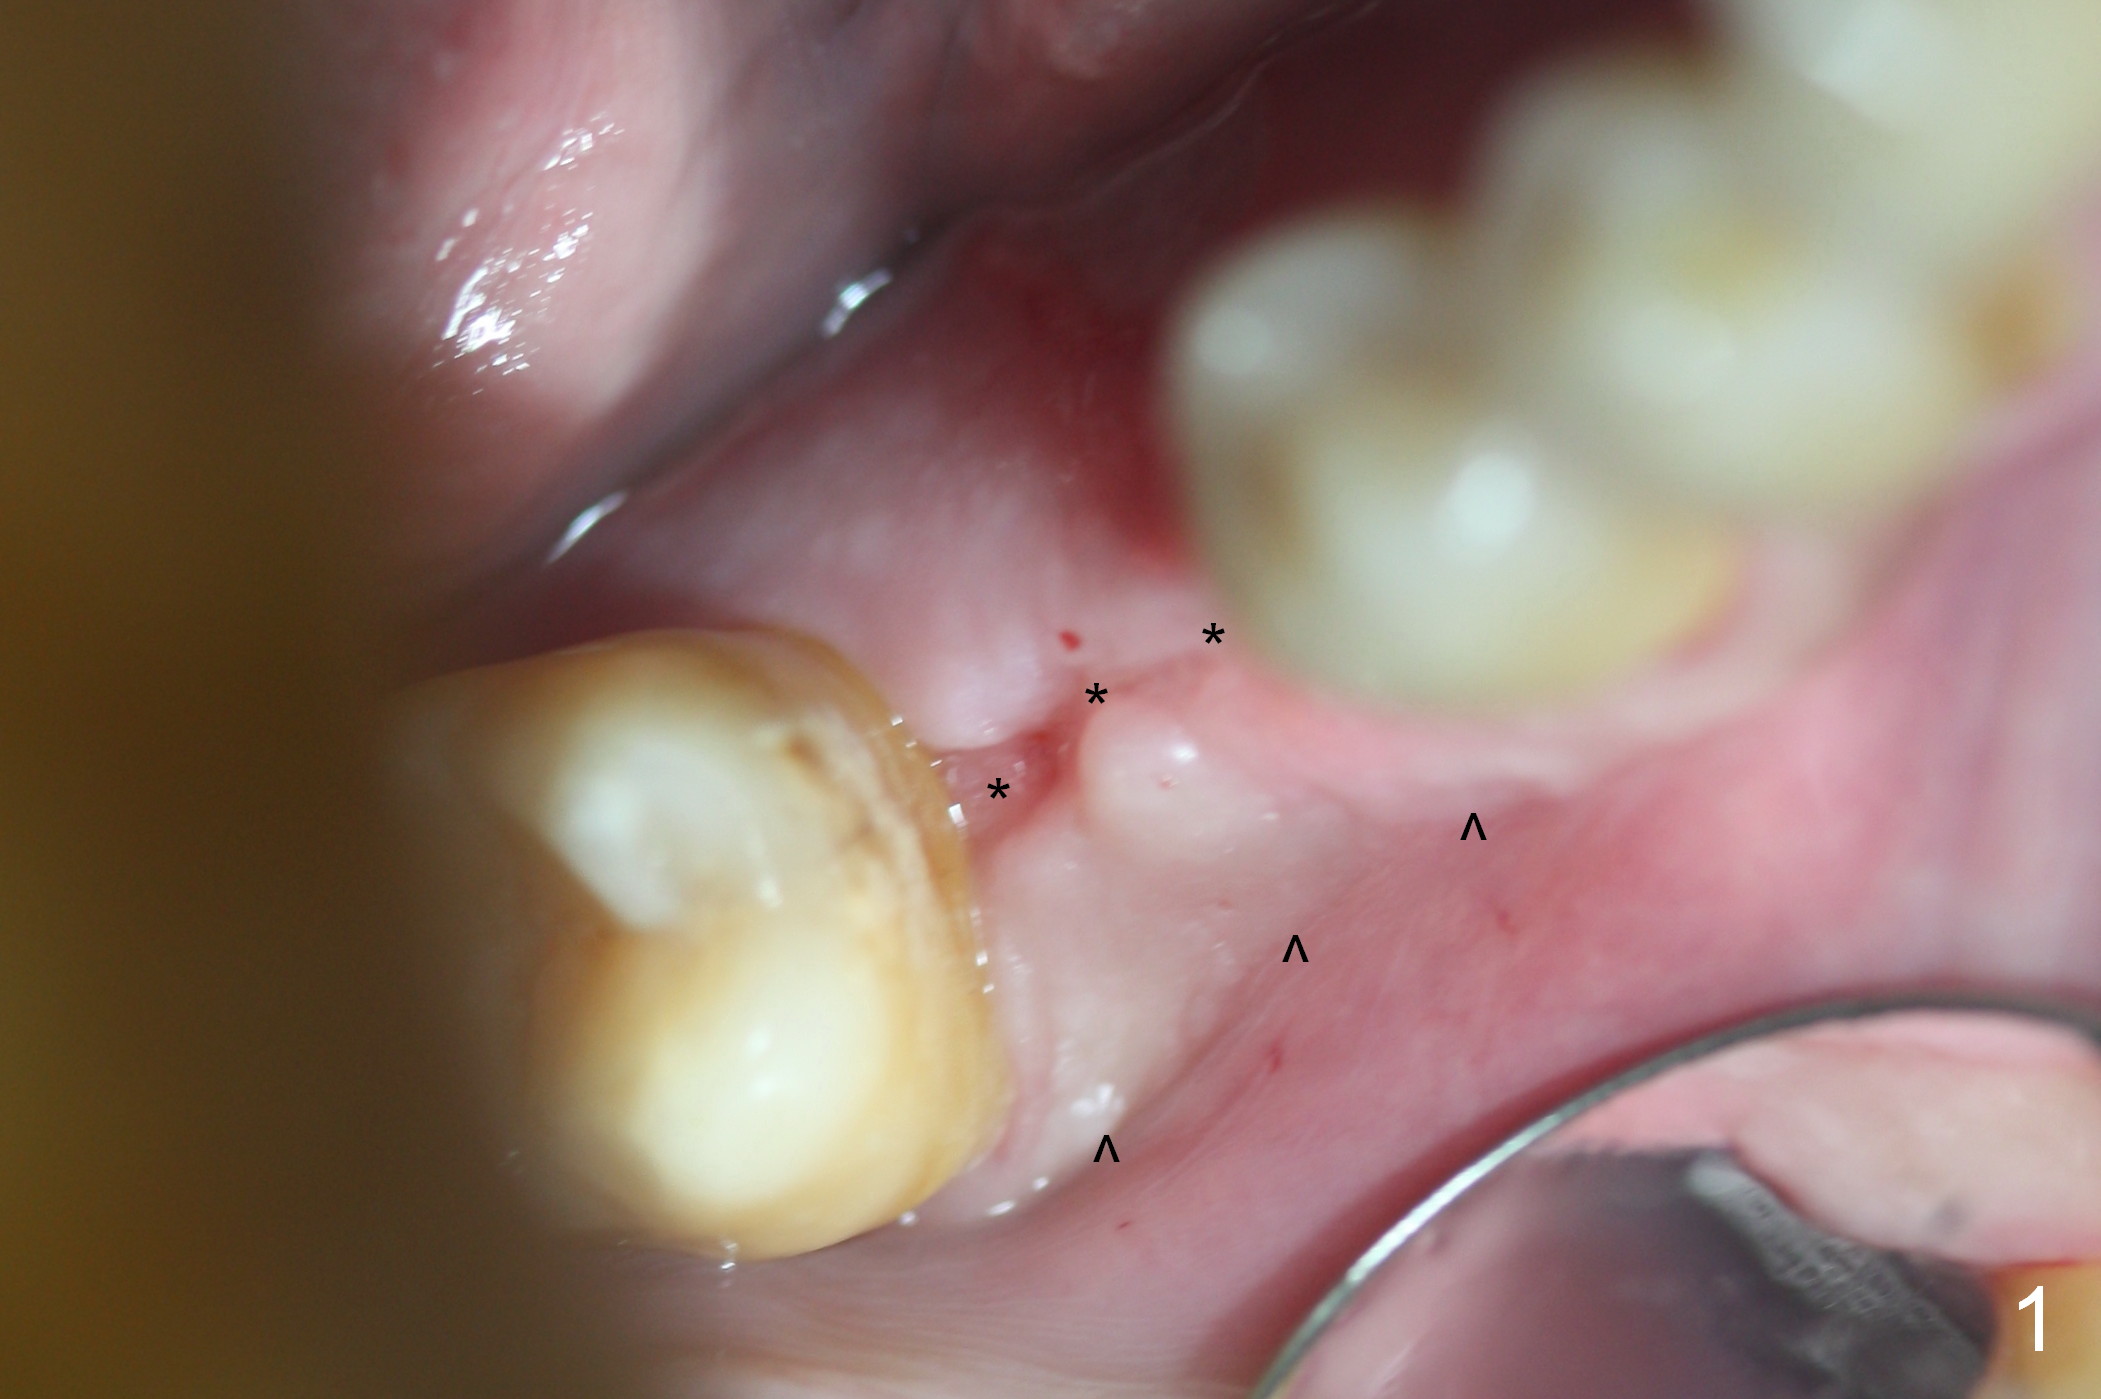
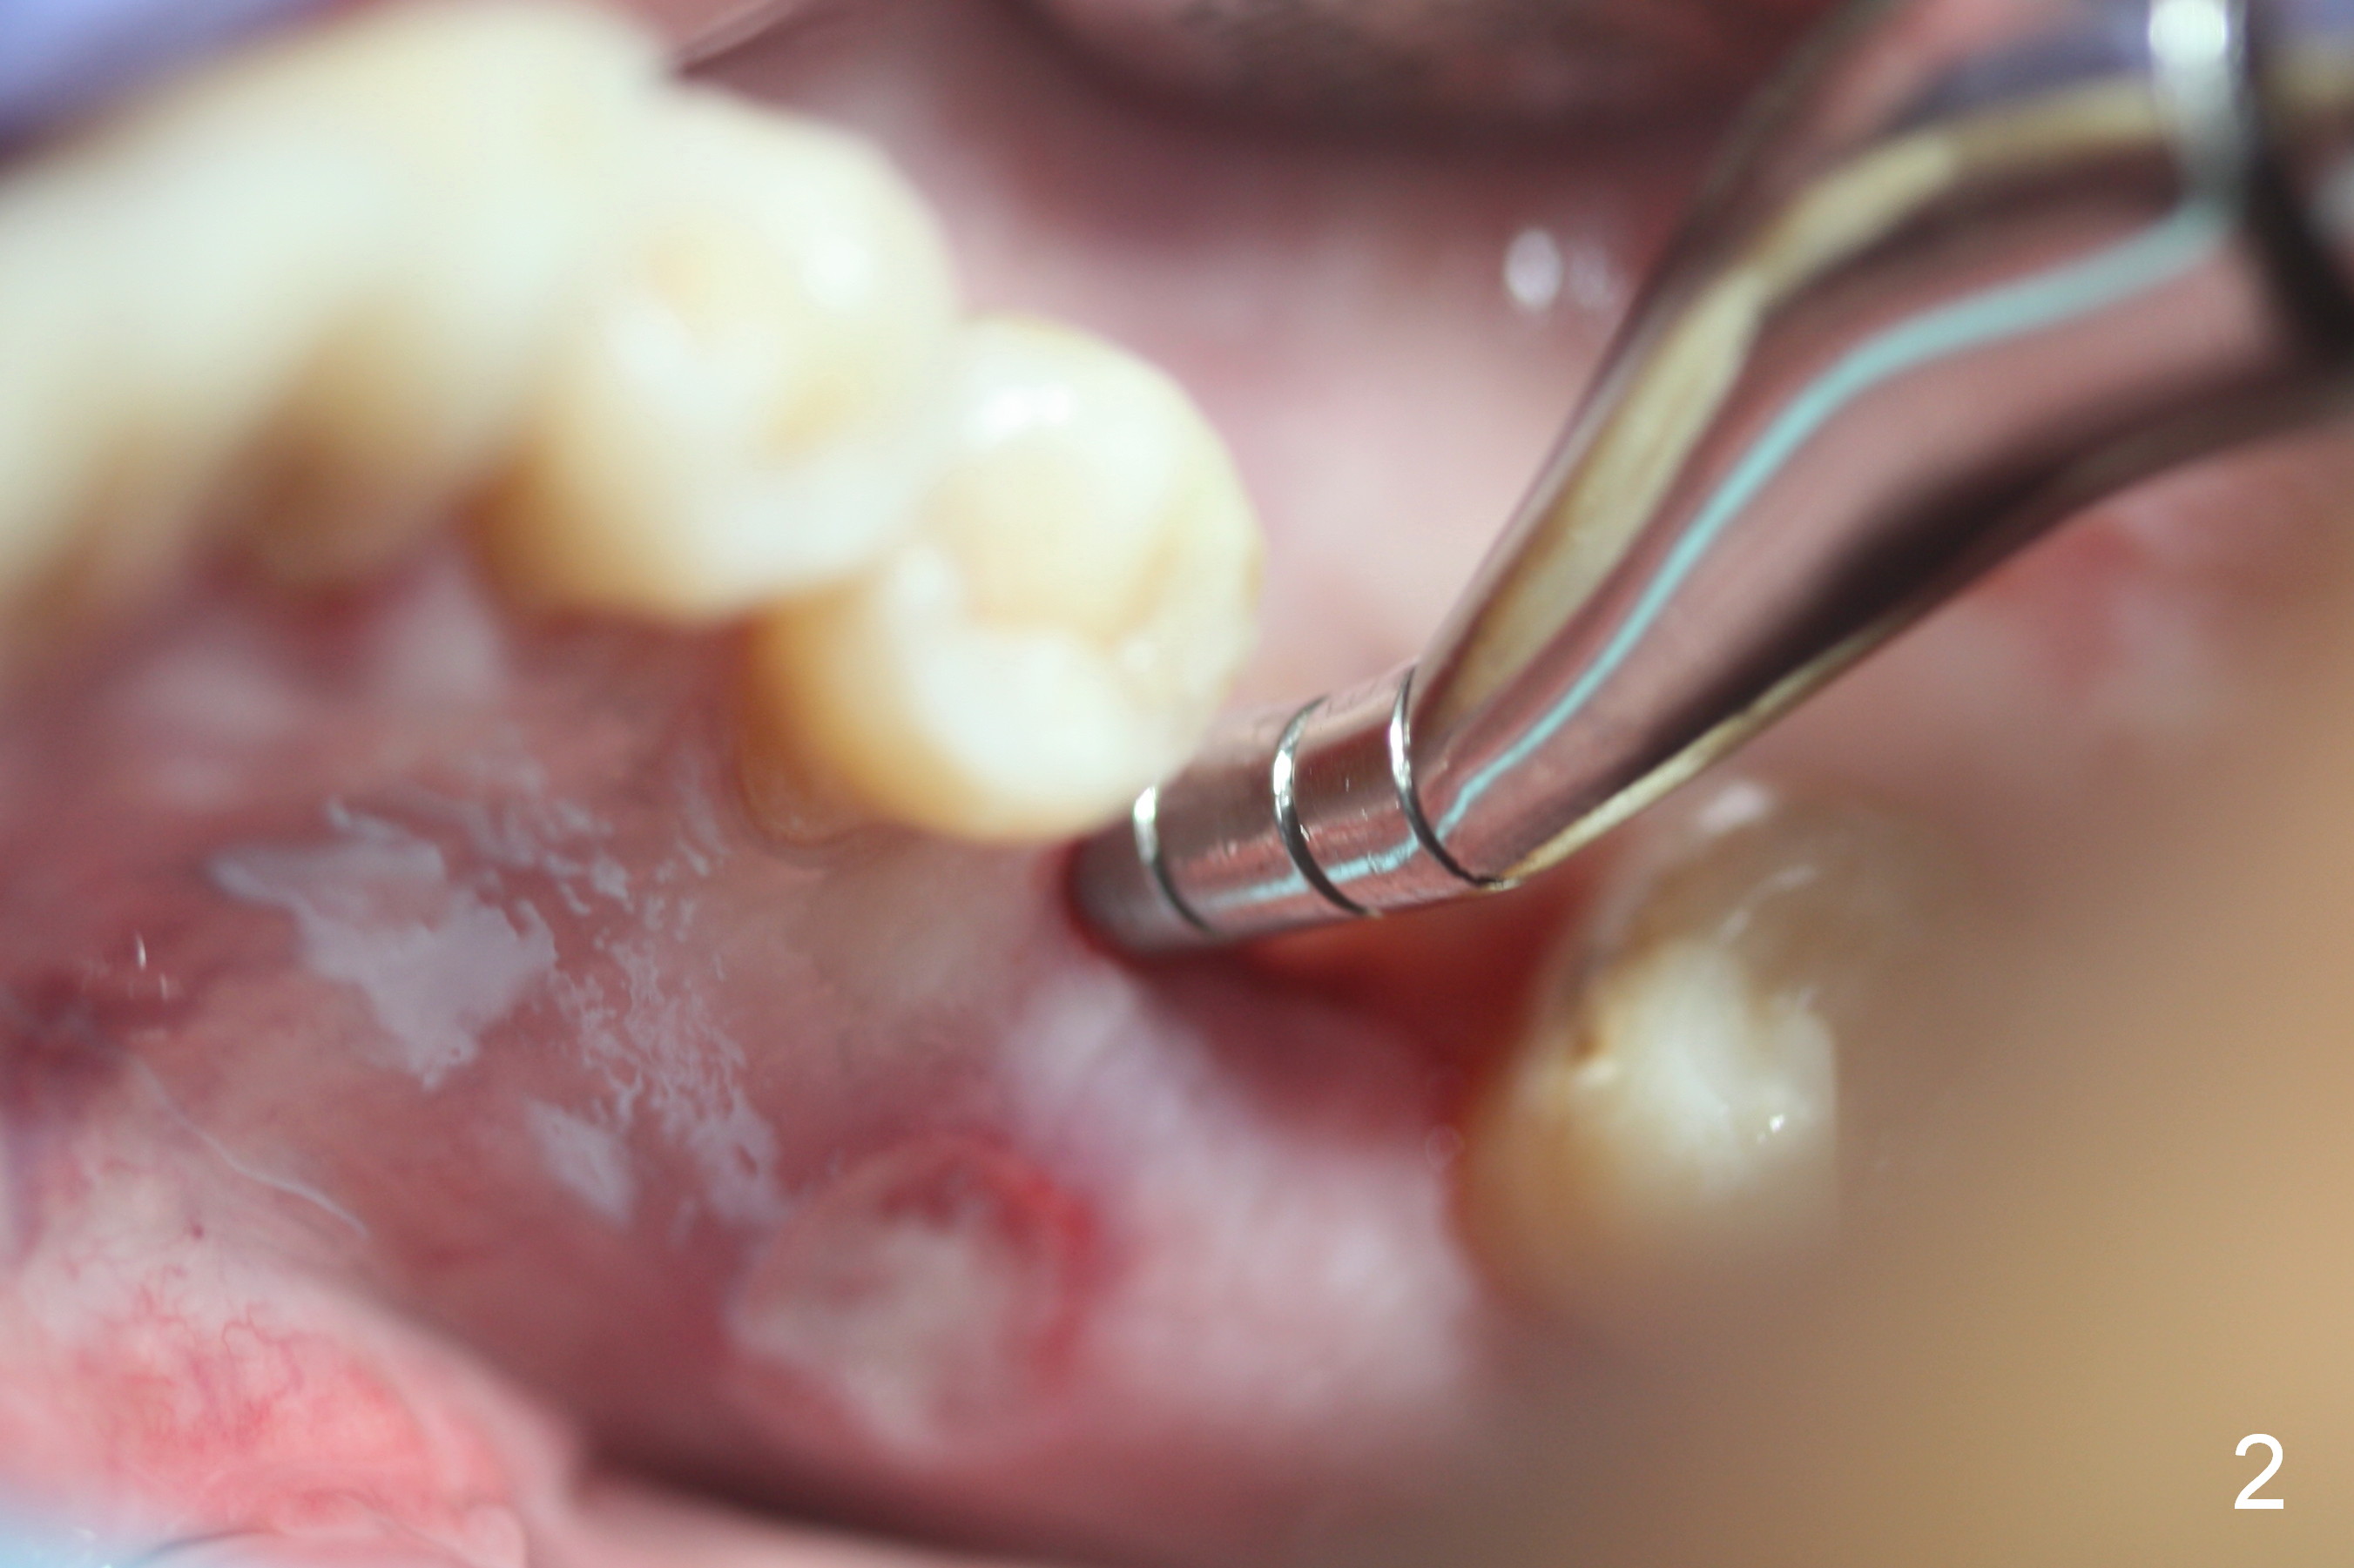
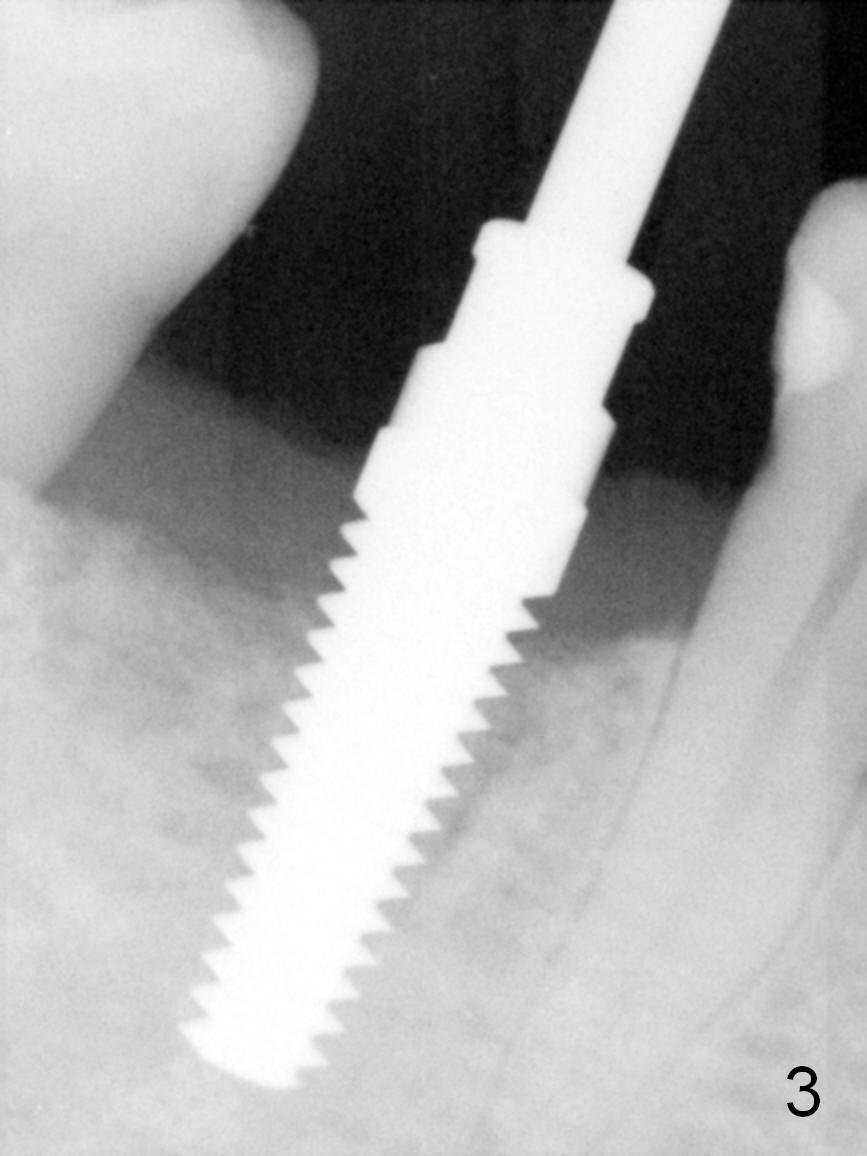
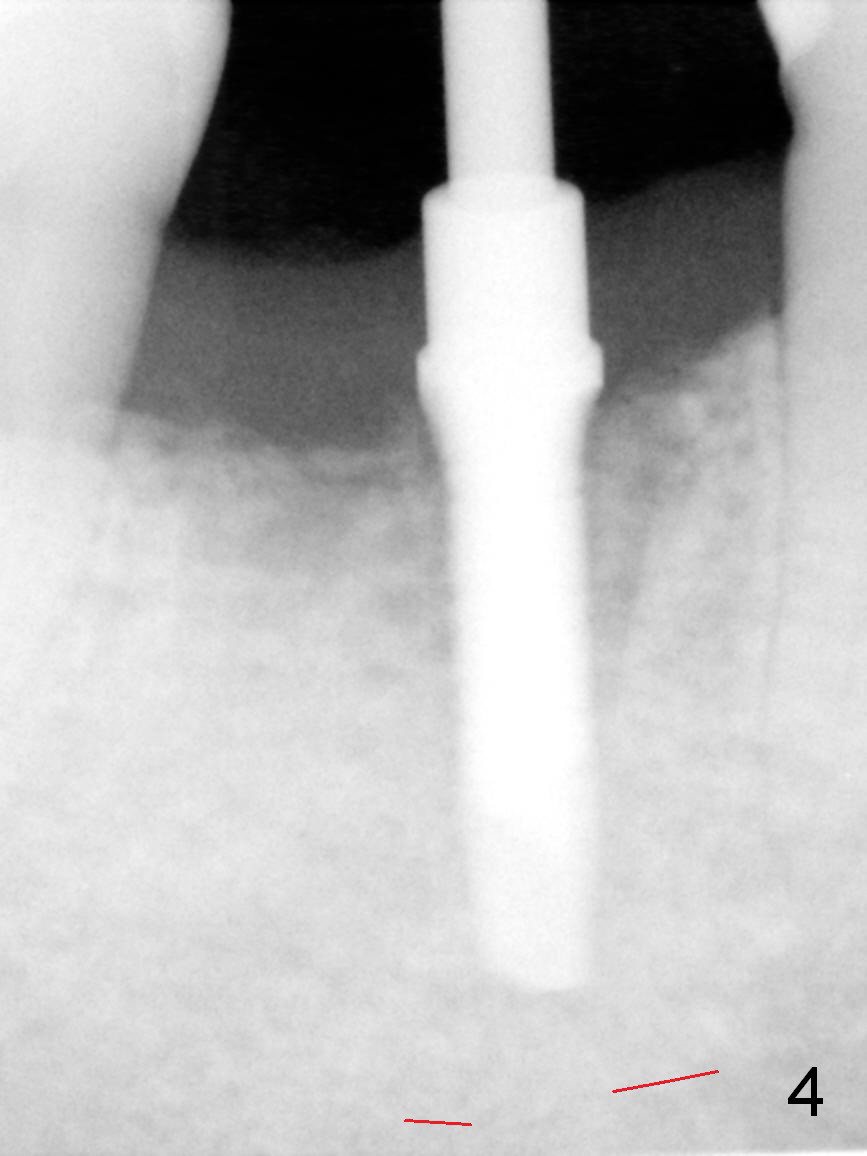
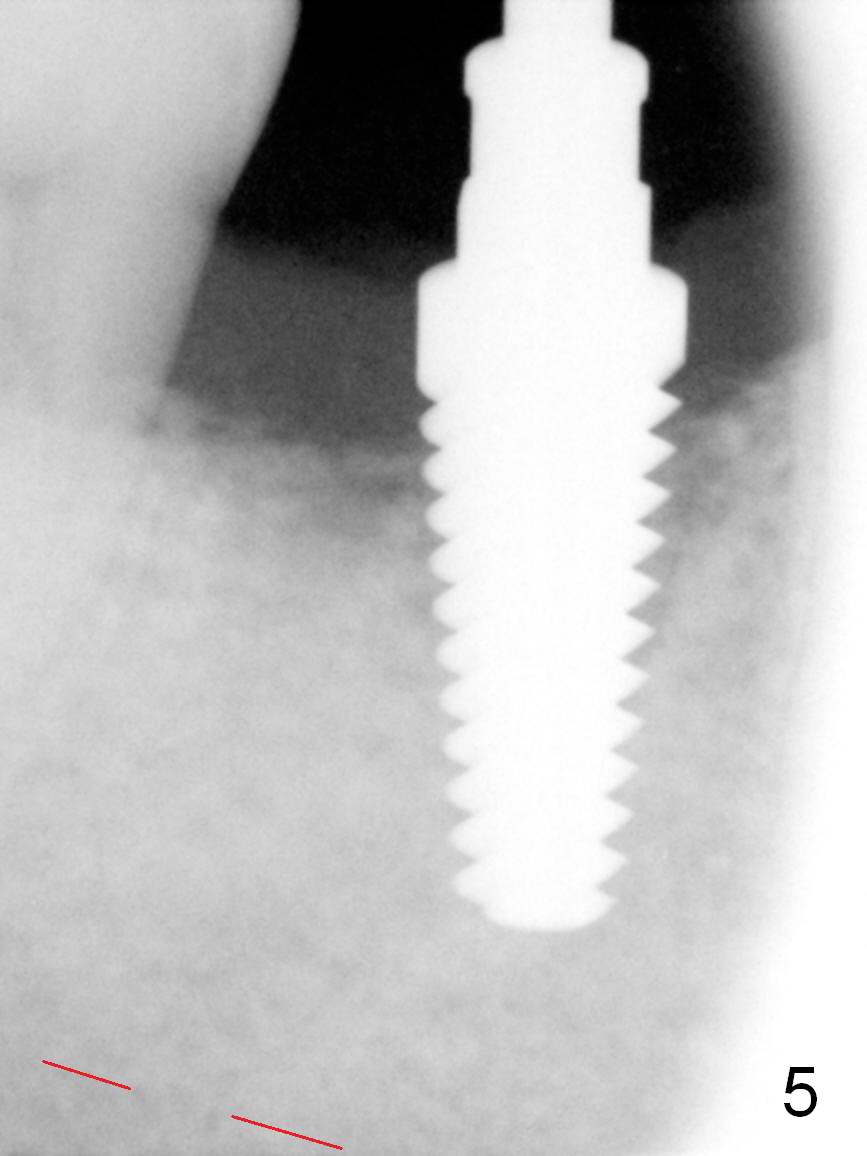
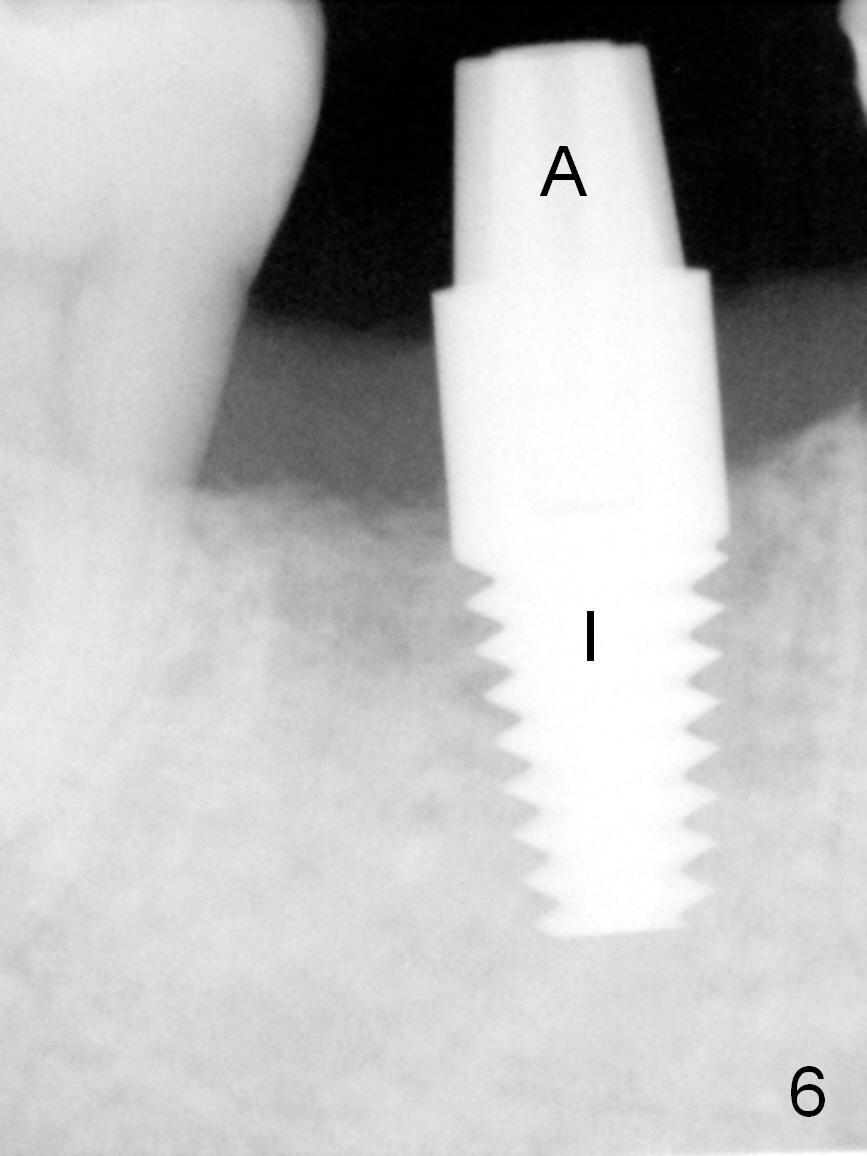
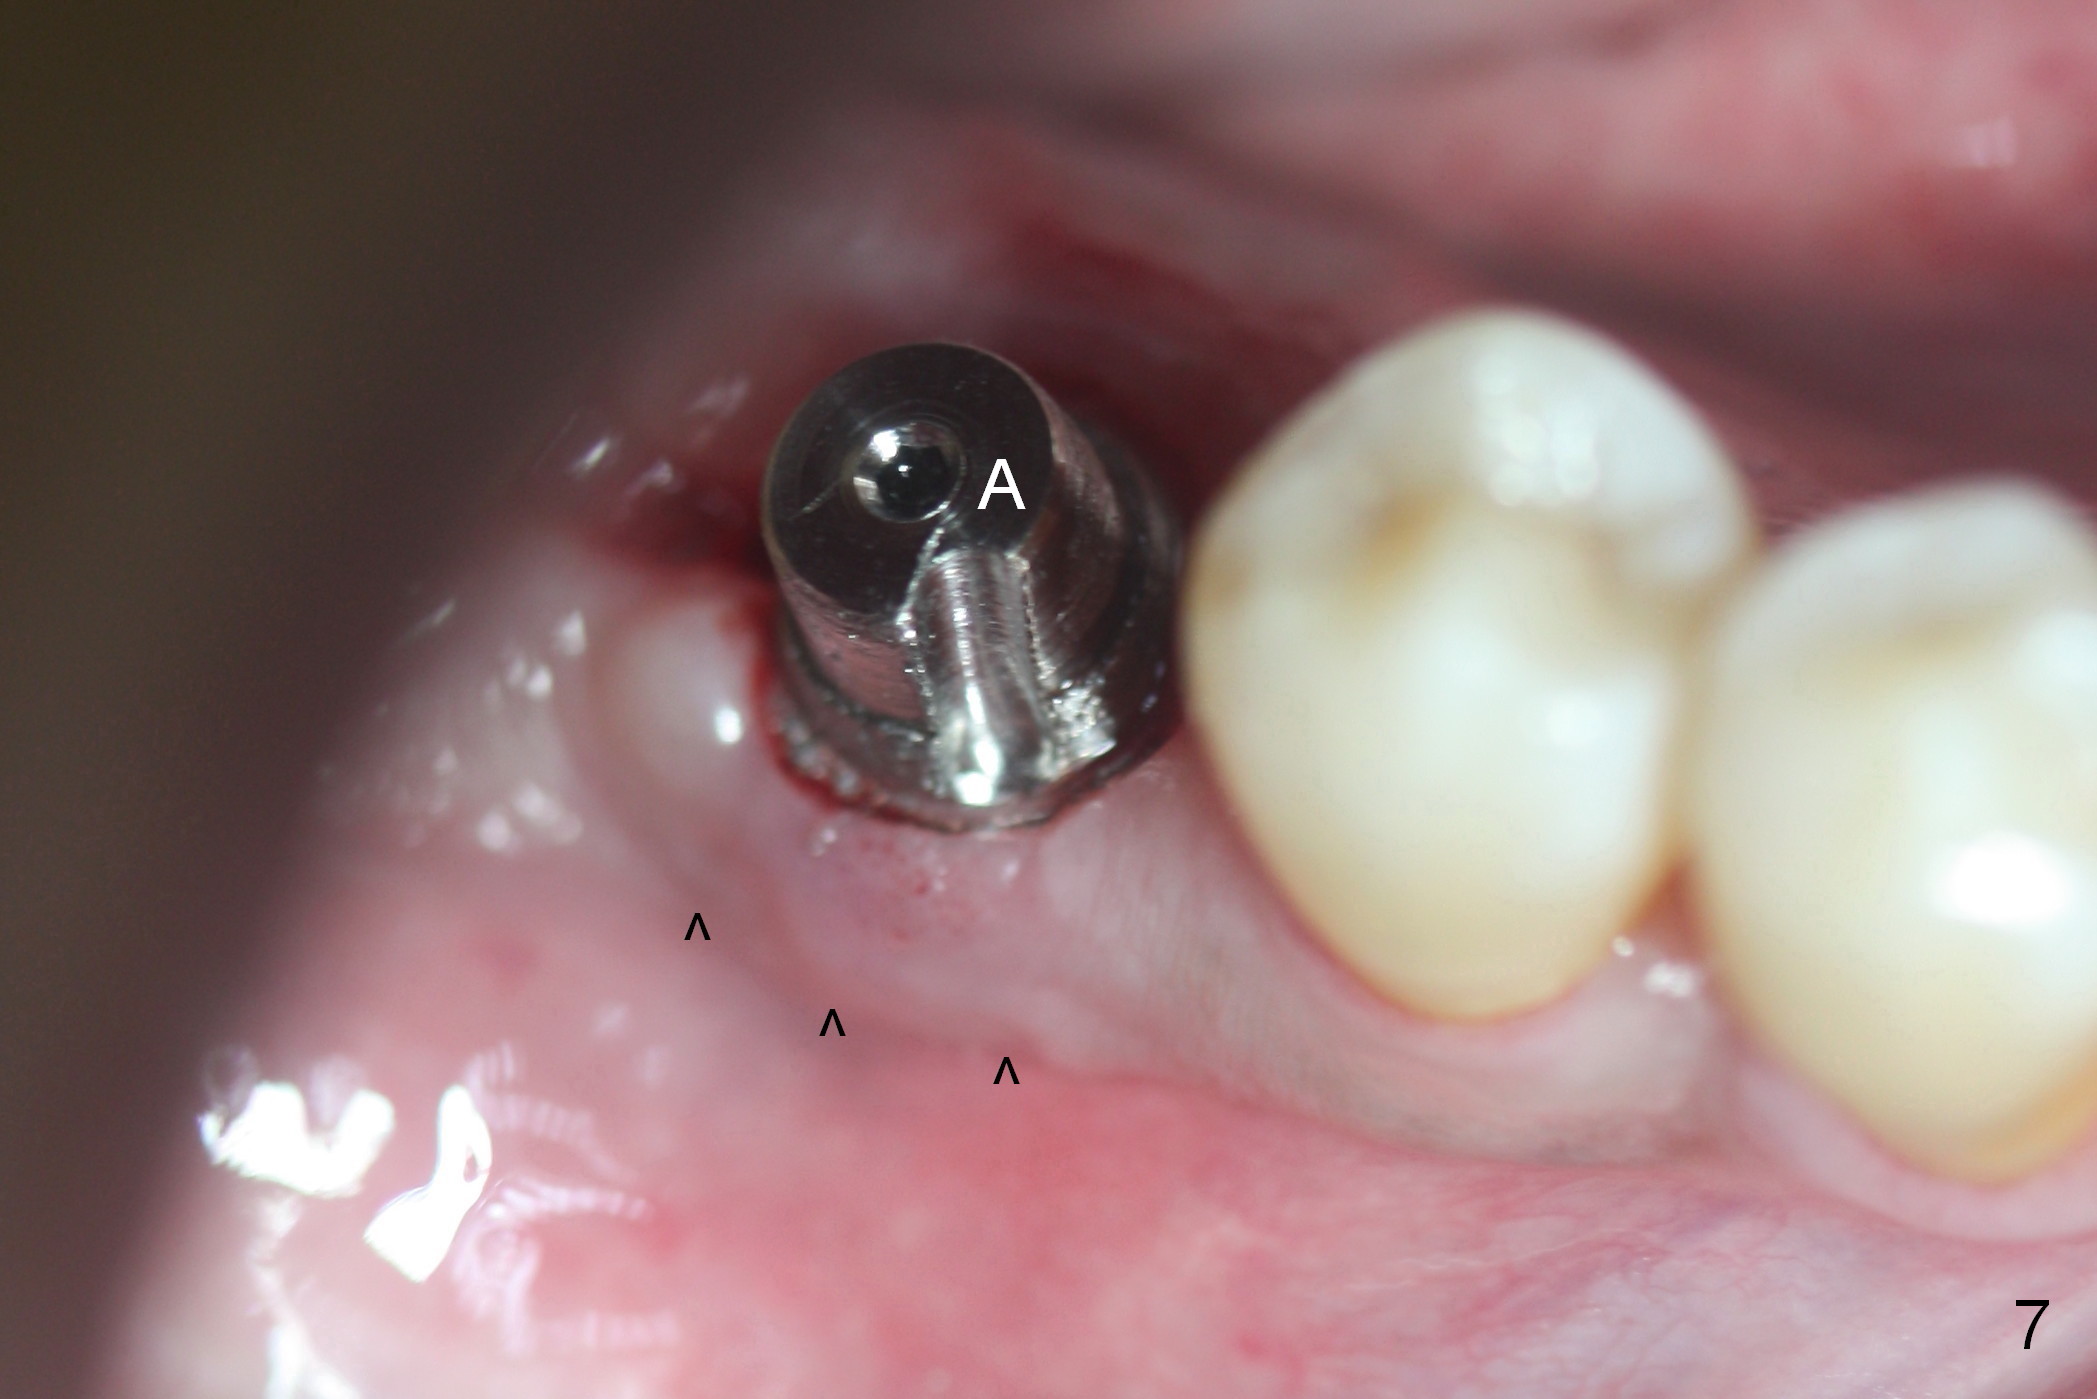
Three to 4 months post extraction, the soft tissue of the socket at #30 seems not completely heal (Fig.1 *), while the buccal plate has started to collapse (arrowheads). When a straight incision is being made along the healing socket mesiodistally, the underlying bone appears to be soft. The #15 blade is used to start bone expansion and condensation, followed by bone scalpels, bone blades and round tapered (RT) osteotomes. Fig.2 (lingual view) shows 4 mm RT in place ~ 13 mm at the gingival margin. Bone expansion continues with tapered taps: 5x17 mm one achieving stability at 14 mm (Fig.3). The osteotomy is then deepened 3 mm with 2 mm pilot drill and reamers until 4 mm (Fig.4). The reamer appears to be close to the superior border of the Inferior Alveolar Canal (Fig.4 red dashed line). It is decided to return to the shorter osteotomy (14 mm) (Fig.5: 6x17 mm tap 14 mm deep). A 6x17 mm tissue level implant is placed with >60 Ncm (Fig.6 I). Later the abutment (A: 5x5 mm) is changed to a shorter one (5x3 mm, Fig.7) for an immediate provisional. Bone expansion is evident by the bulging gingiva (Fig.7 arrowheads).
The patient will return for final restoration 6 months postop. Check occlusal clearance with 1 and 2 mm bite rings. If the clearance is > 2 mm, change to the longer abutment. If the antirotation groove is large, no cementation or bonding is necessary.
In fact, the provisional has lost, which is most likely related to the short abutment. The occlusal clearance is > 2 mm. A longer abutment is then used (5x5 mm). Since the retention groove is strong, no cementation is done. Although there is increased bone density distally (Fig.8 <), the distal gingiva is slightly erythematous. No provisional is fabricated after impression. Oral hygiene is instructed.
Return to Lower Molar Immediate Implant
Xin Wei, DDS, PhD, MS 1st edition 04/14/2016, last revision 11/01/2016