.jpg)
|
|
|
|
|
|
|
|
|
|
|
|
|
|
|
|
|
|
||
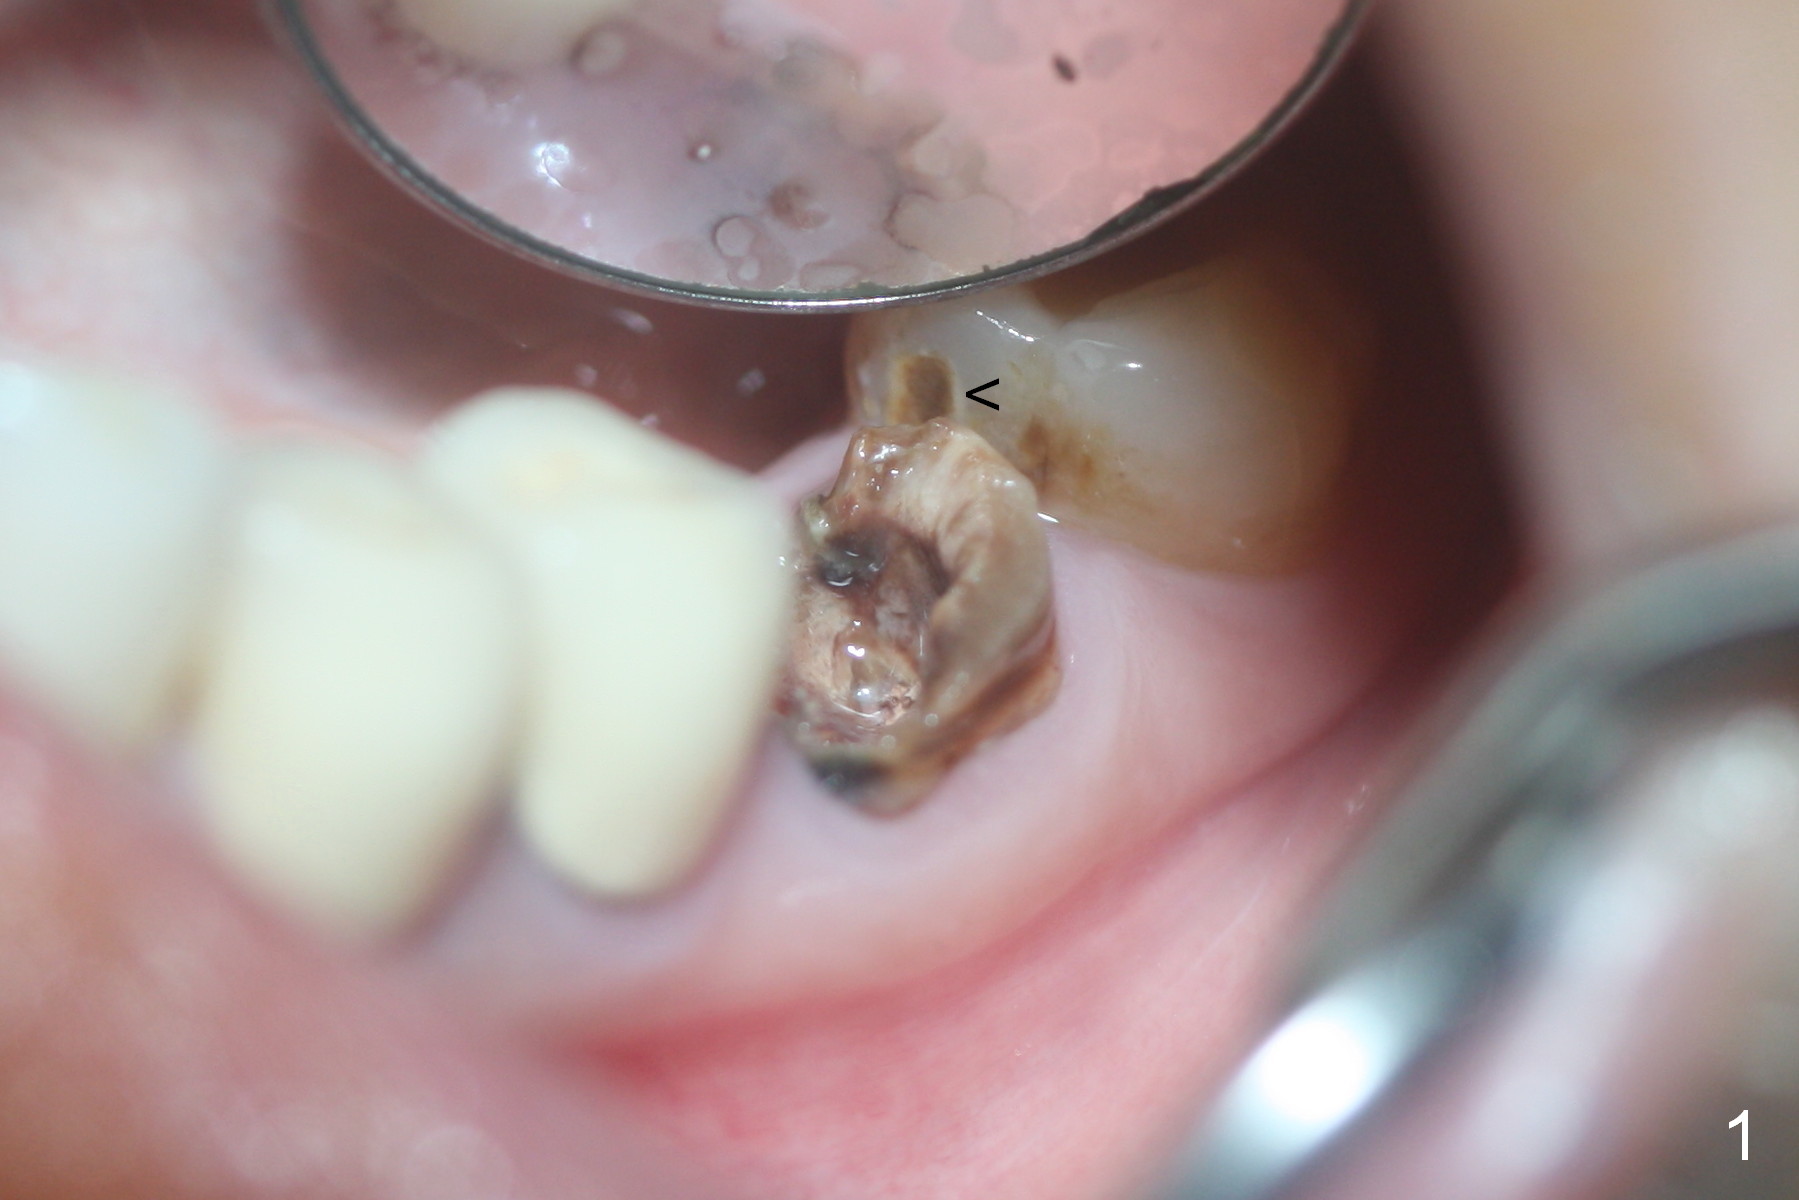
Osteotomy on Mutilated Septum
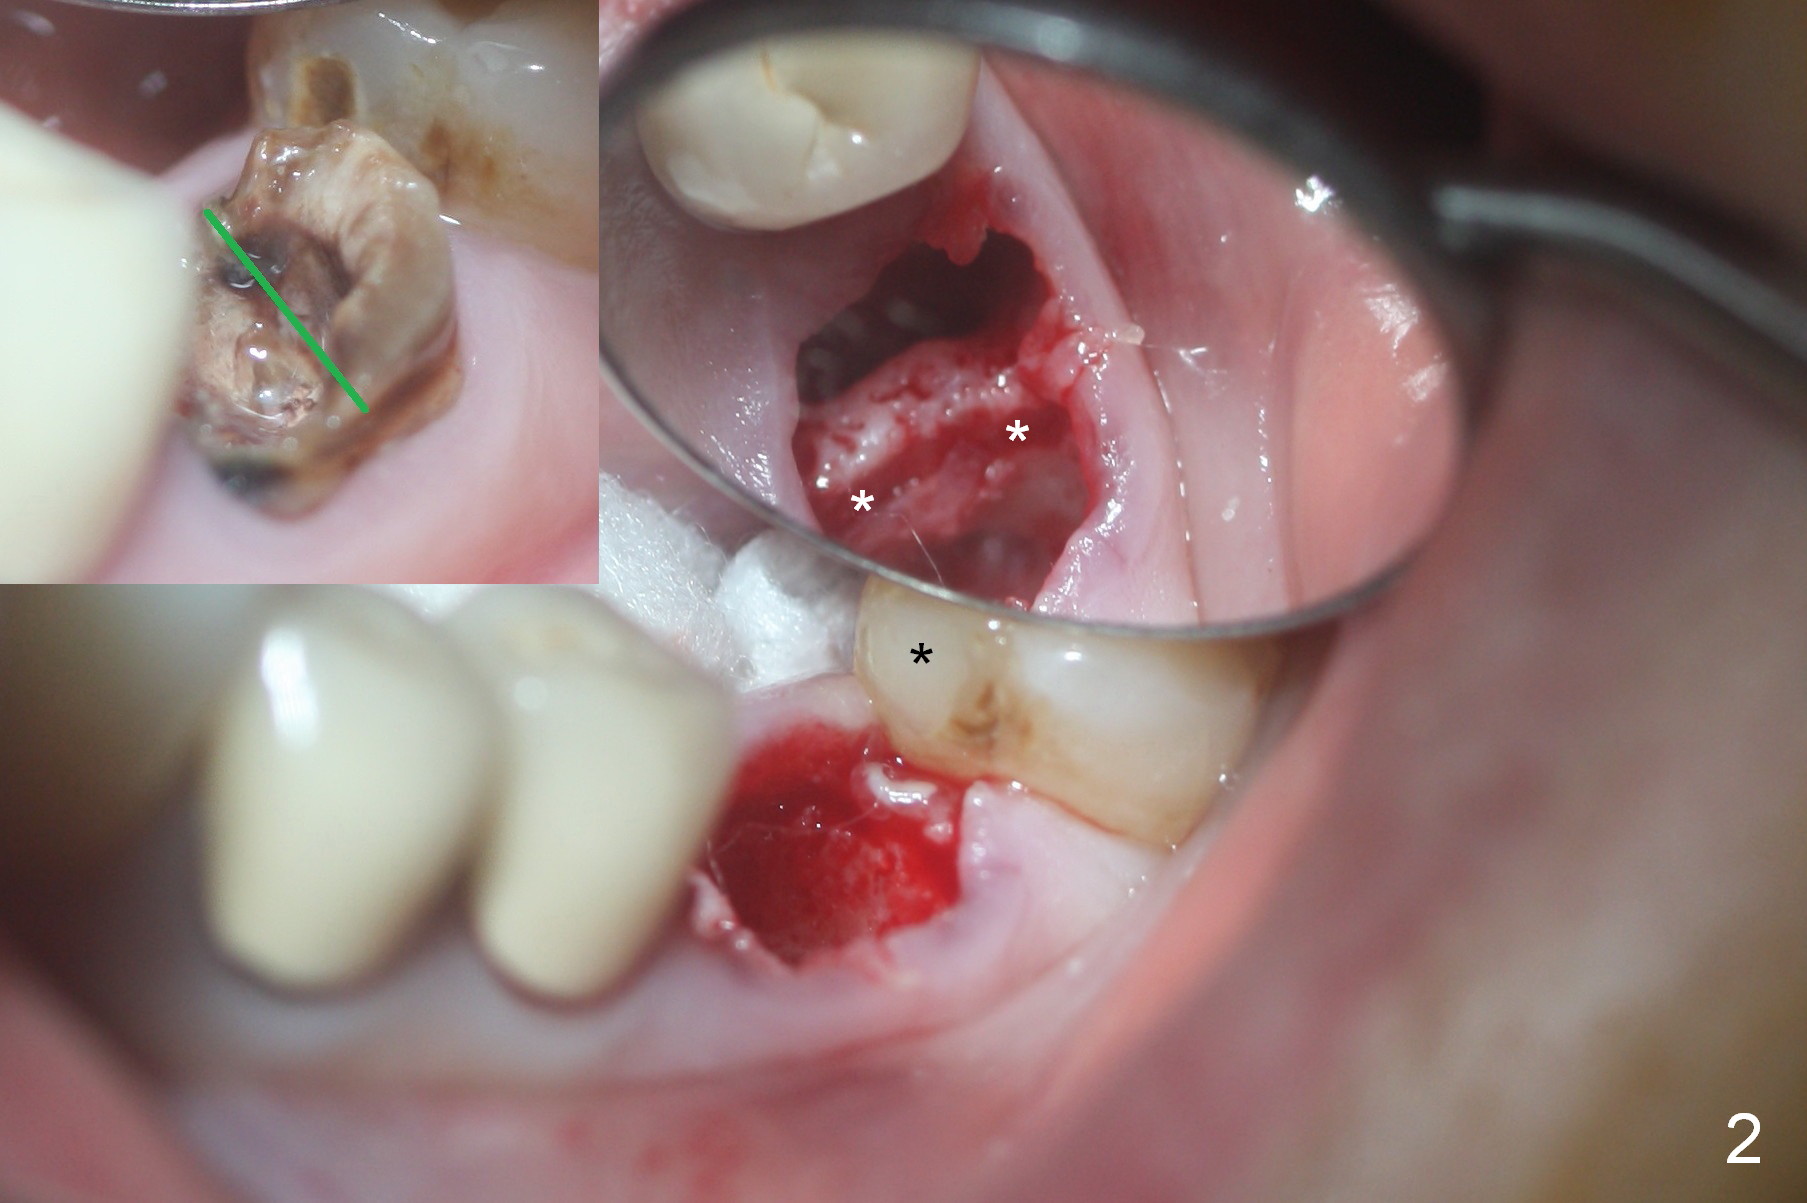
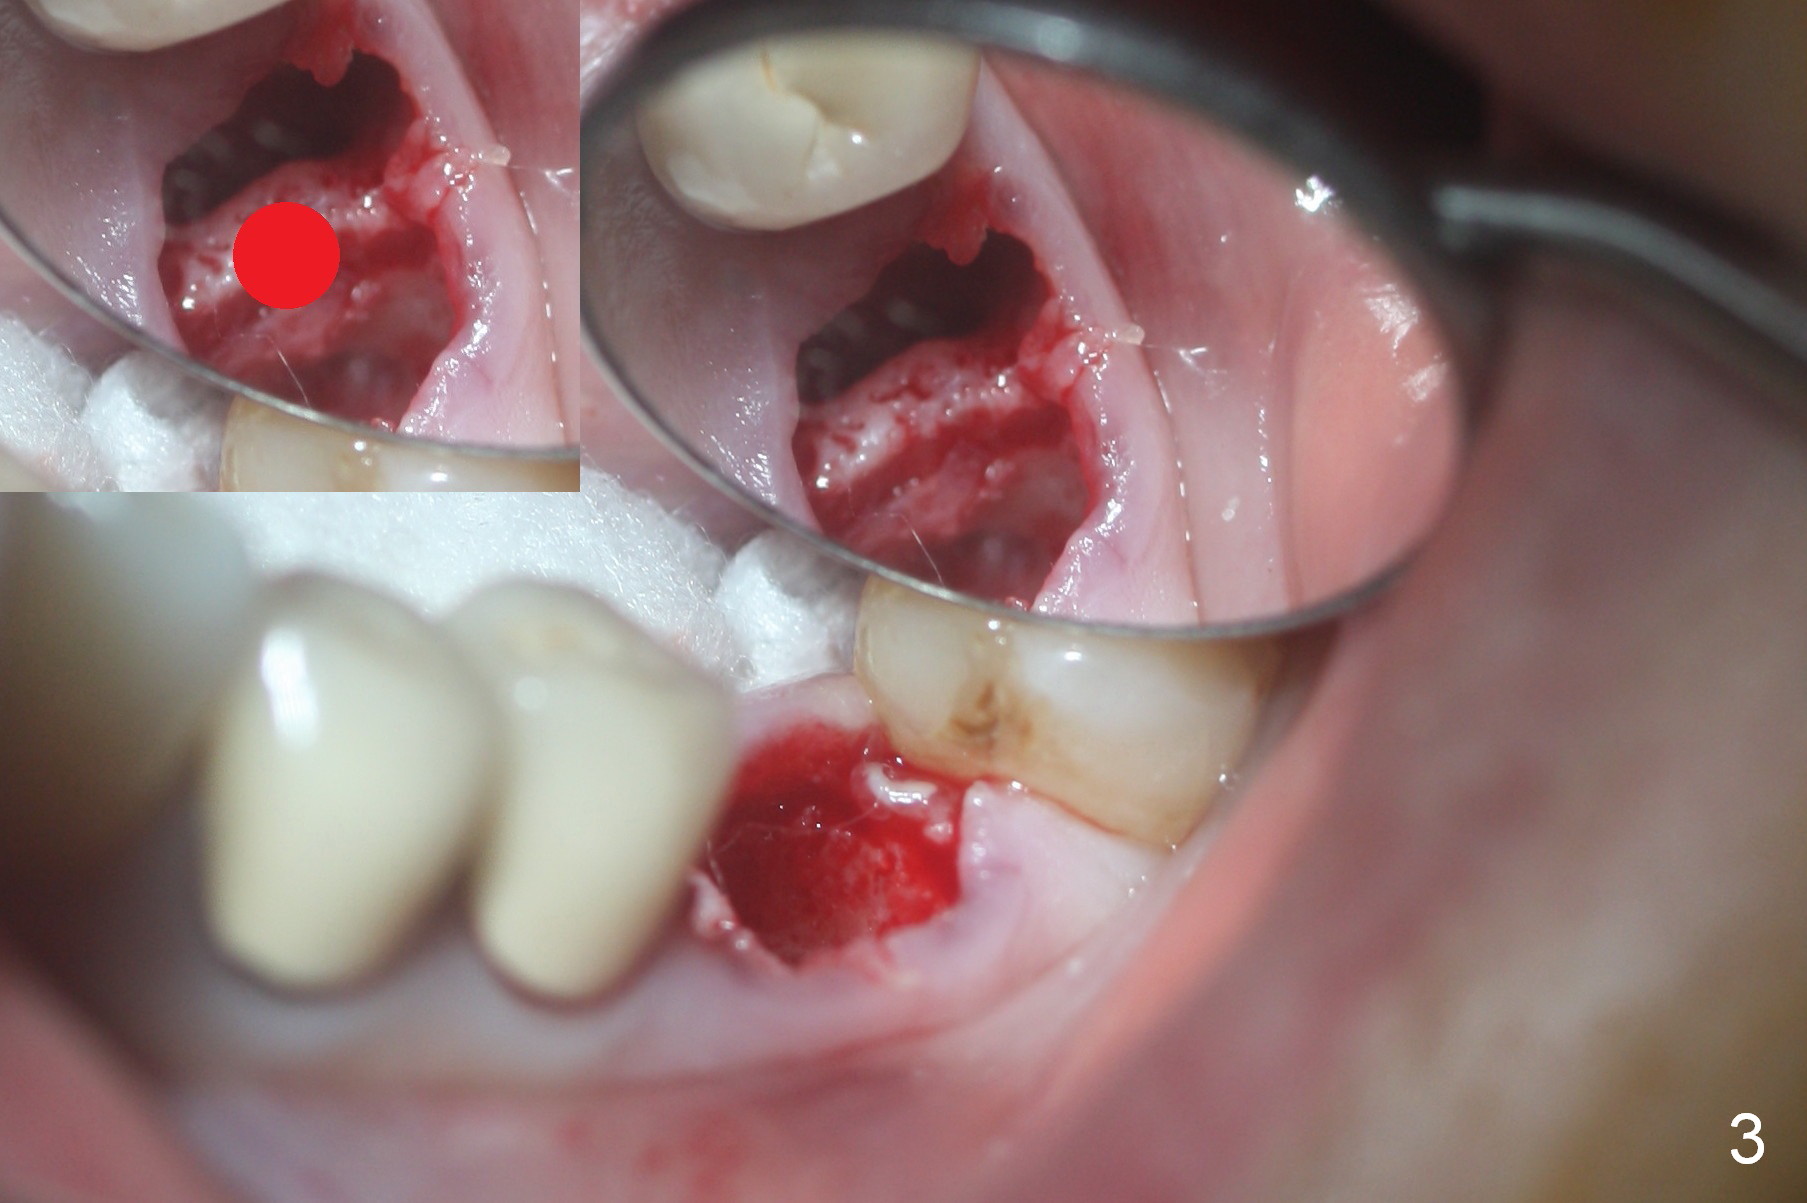
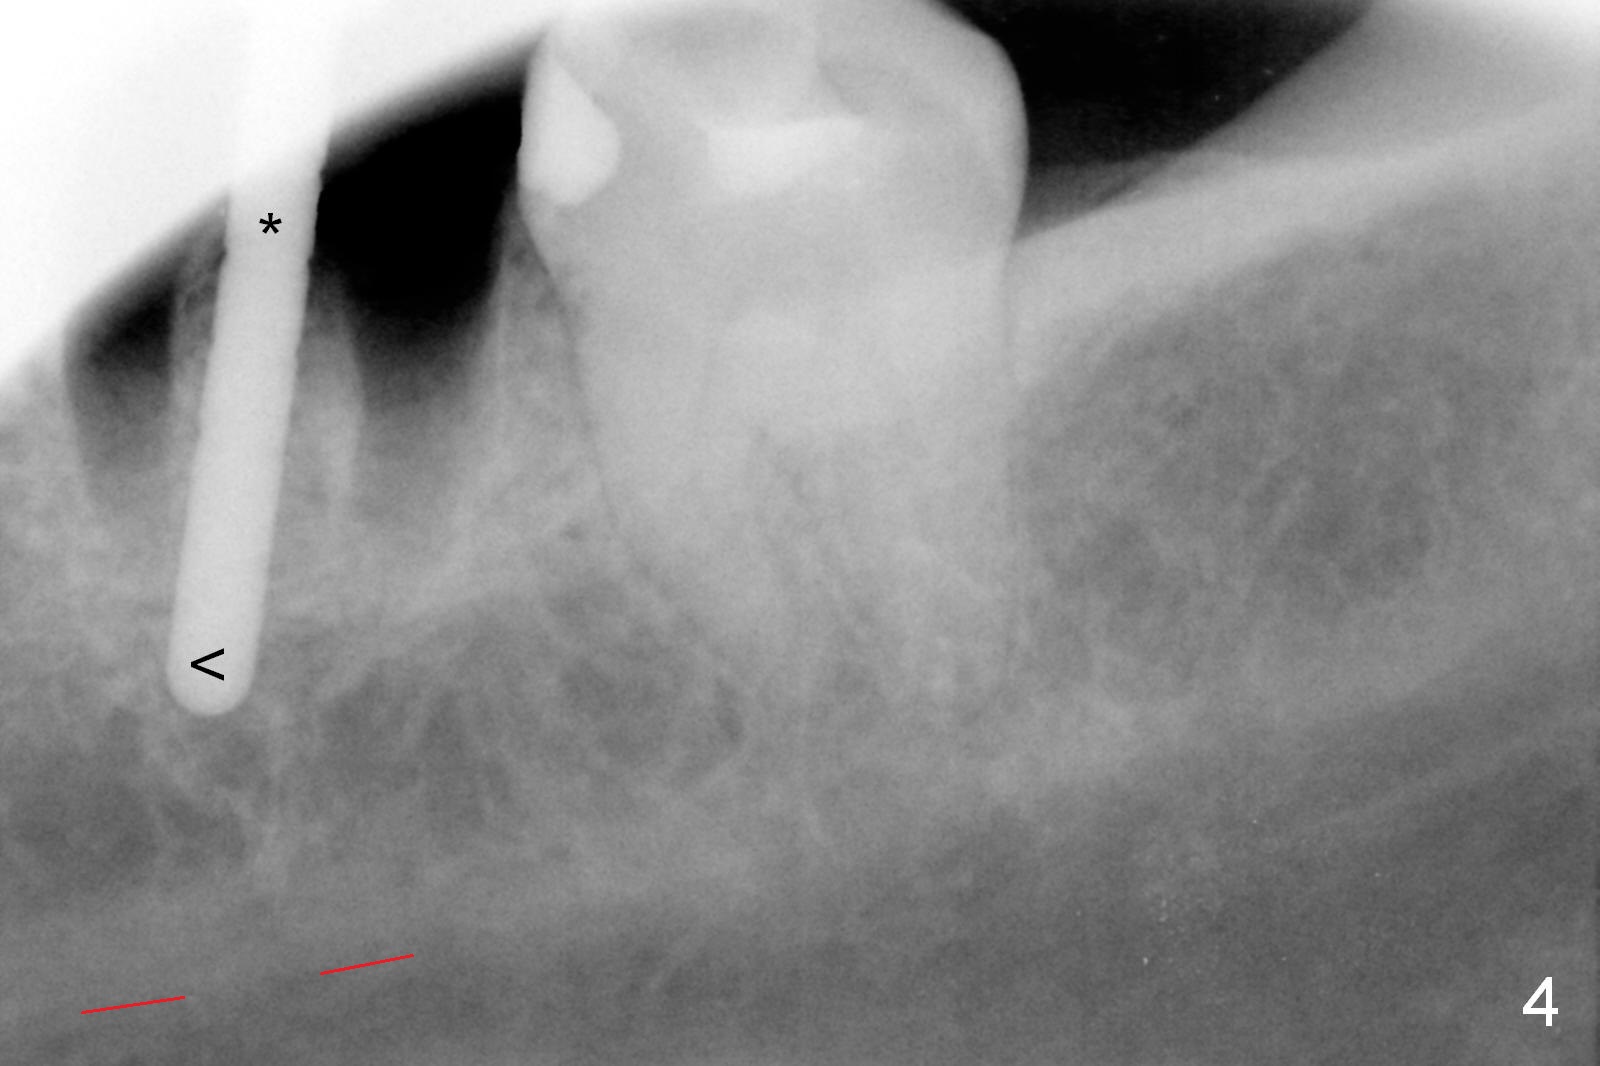
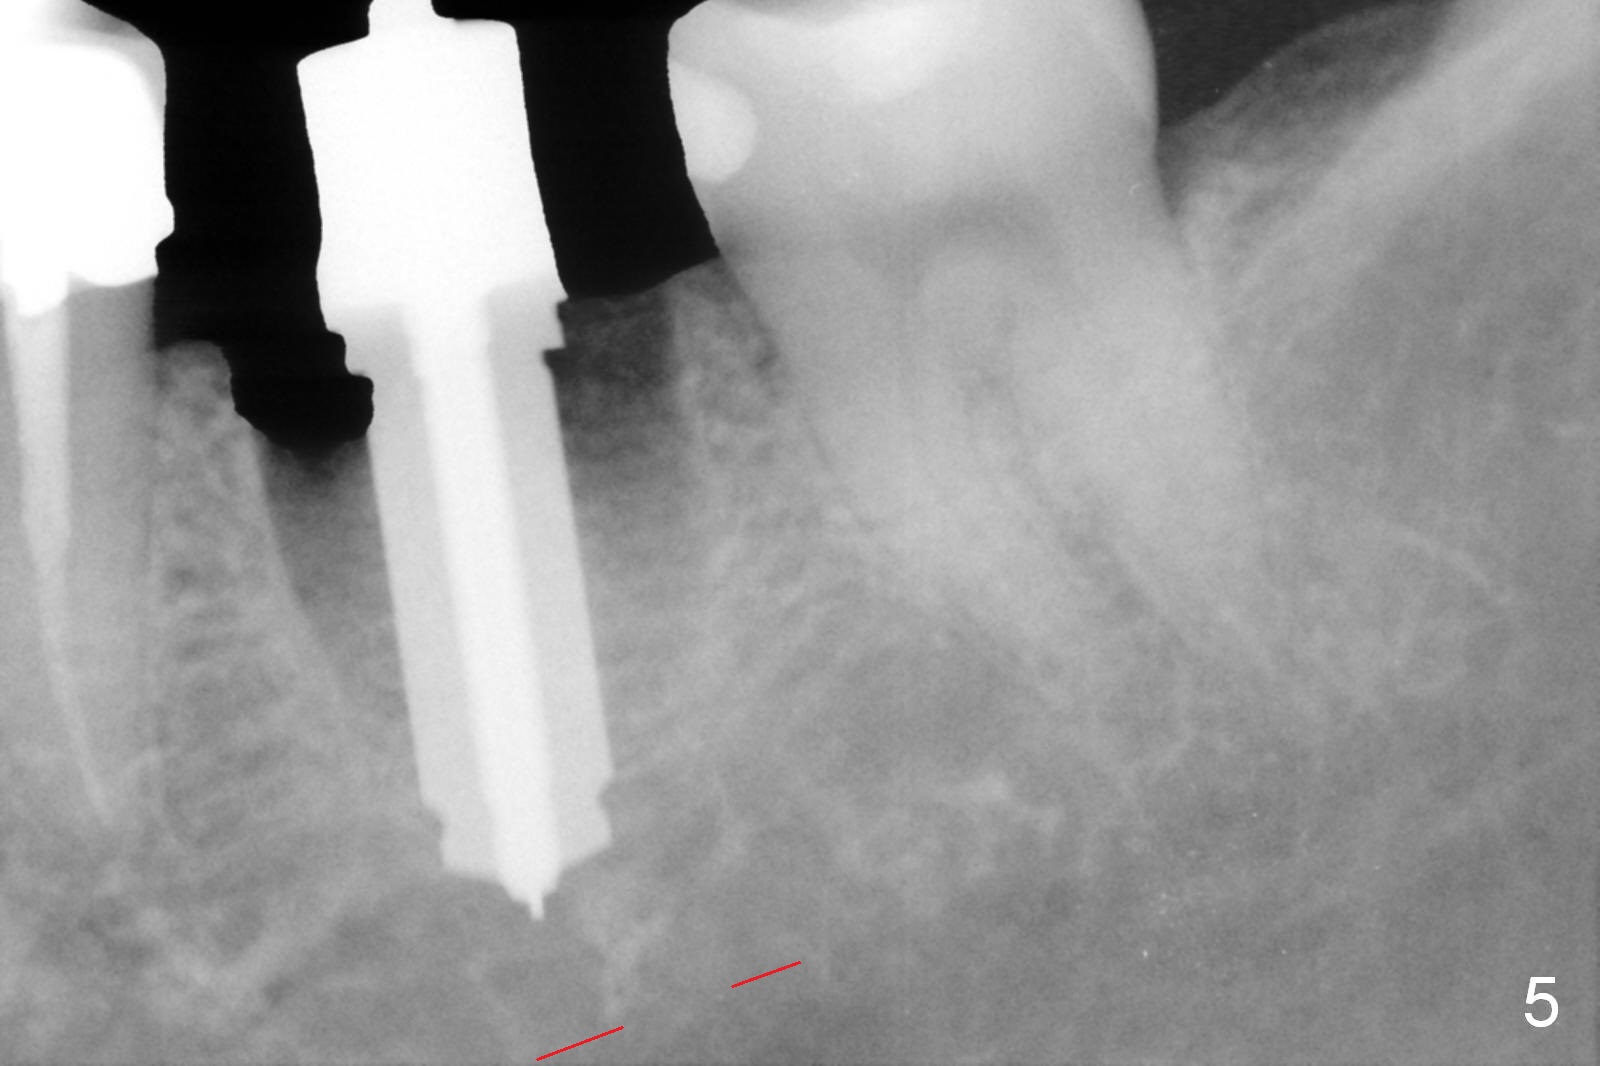
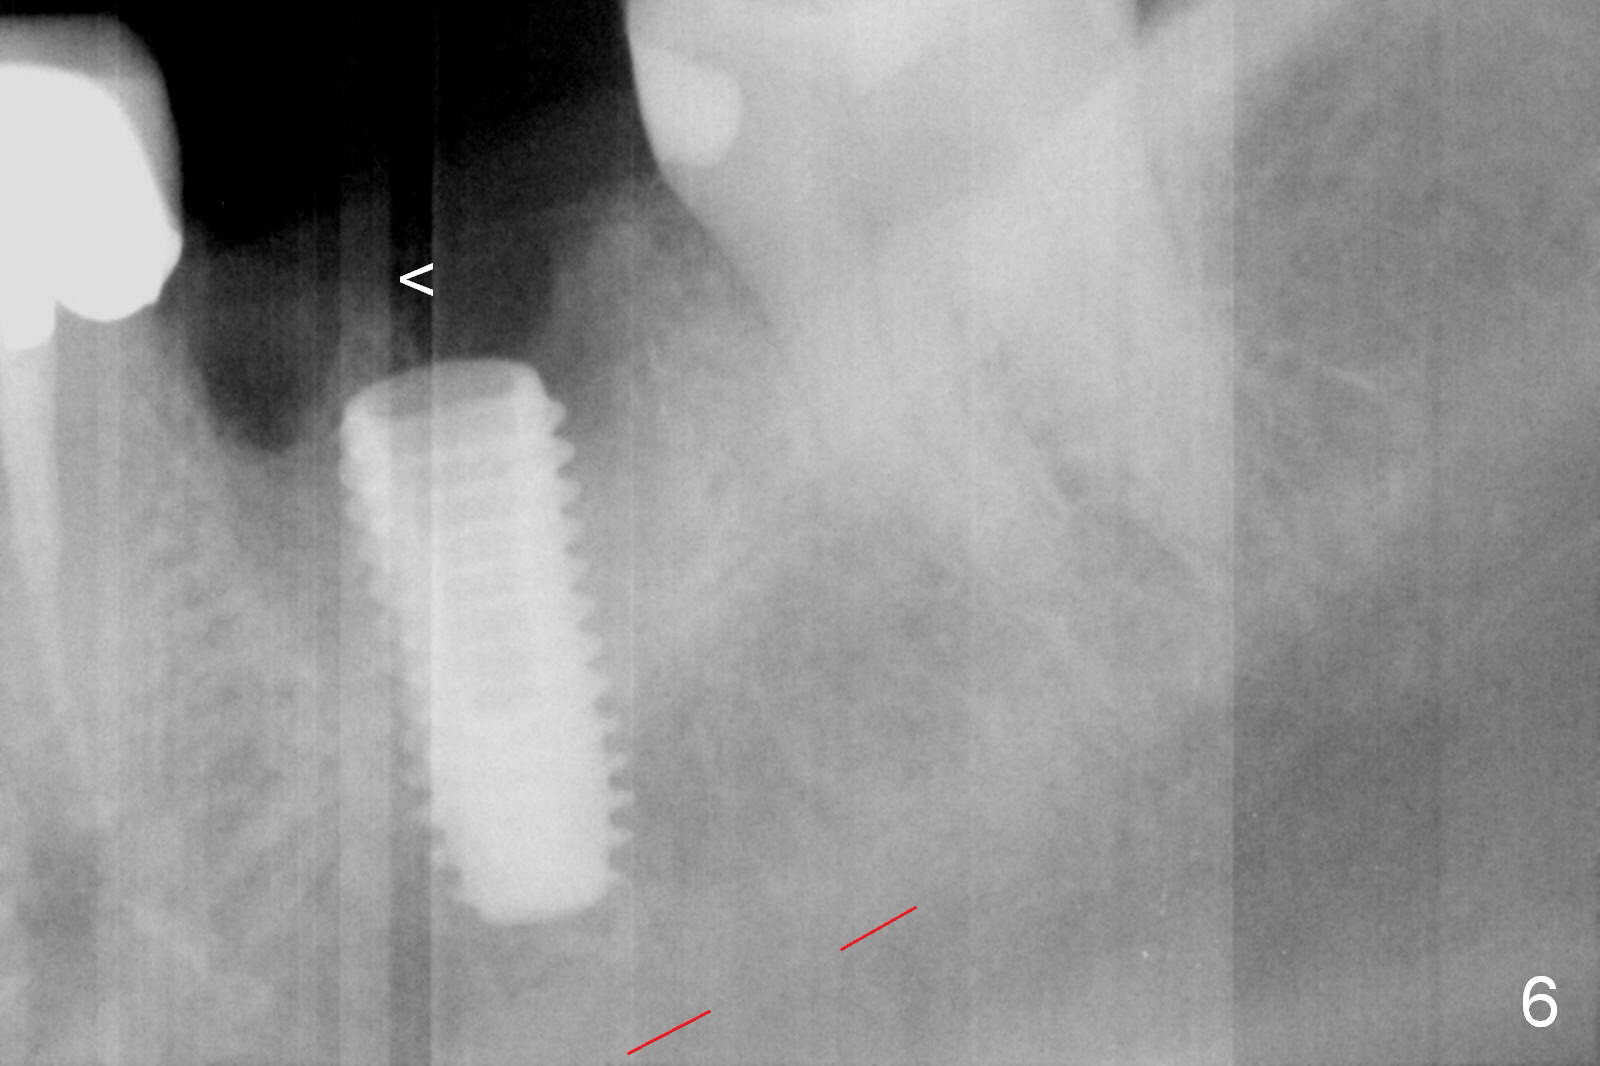
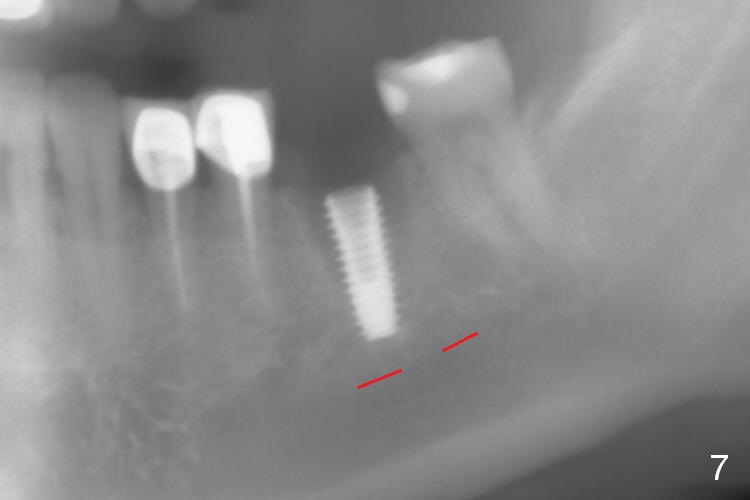
To remove the residual roots (Fig.1), sectioning is carried out using a surgical fissure bur (Fig.2 inset: green line). The latter damages the distal portion of the septum (Fig.2 white *). Then the middle of the septum is flattened using the same bur (Fgi.3 inset: red circle). This allows accurate entry of the osteotomy (Fig.4 *), although the lower portion of the osteotomy deviates mesially (<). The latter is corrected before increase in the depth and diameter (Fig.5: 5x11.5 mm drill). A 5x11.5 mm implant is placed approximately 2 mm below buccal portion of the septum (Fig.6 <), whereas the mesial and distal walls of the septum have been perforated during the later stage of osteotomy and the lingual crest is apical to the implant plateau. Panoramic X-ray is taken to re-confirm the position of the implant relative to the superior border of the Inferior Alveolar Canal (Fig.7 red dashed line). The 3-walled defect is repaired with packing allograft mixed with autogenous bone and Osteogen (Fig.8 *) before and after placement of a 6.5x4(3) mm abutment (A). The remaining soft tissue gap is closed with collagen plug before and after fabrication of an immediate provisional.
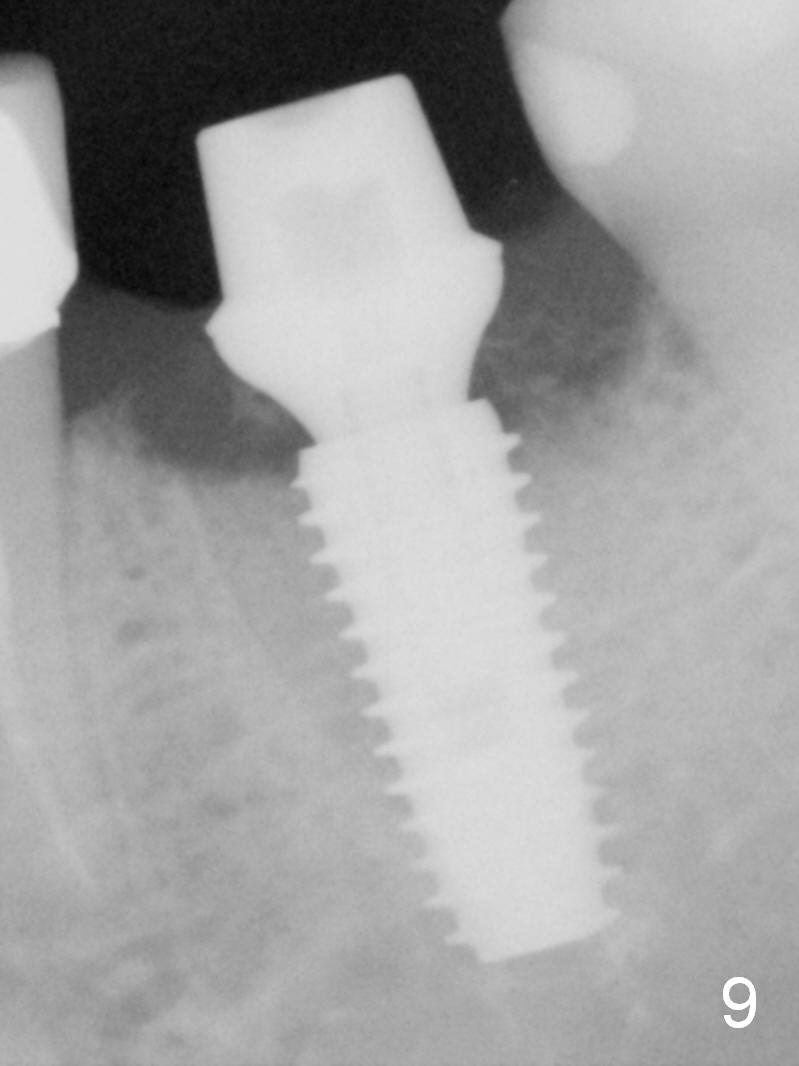
Organization of the bone next to the implant is different 2.5 months postop (Fig.9).
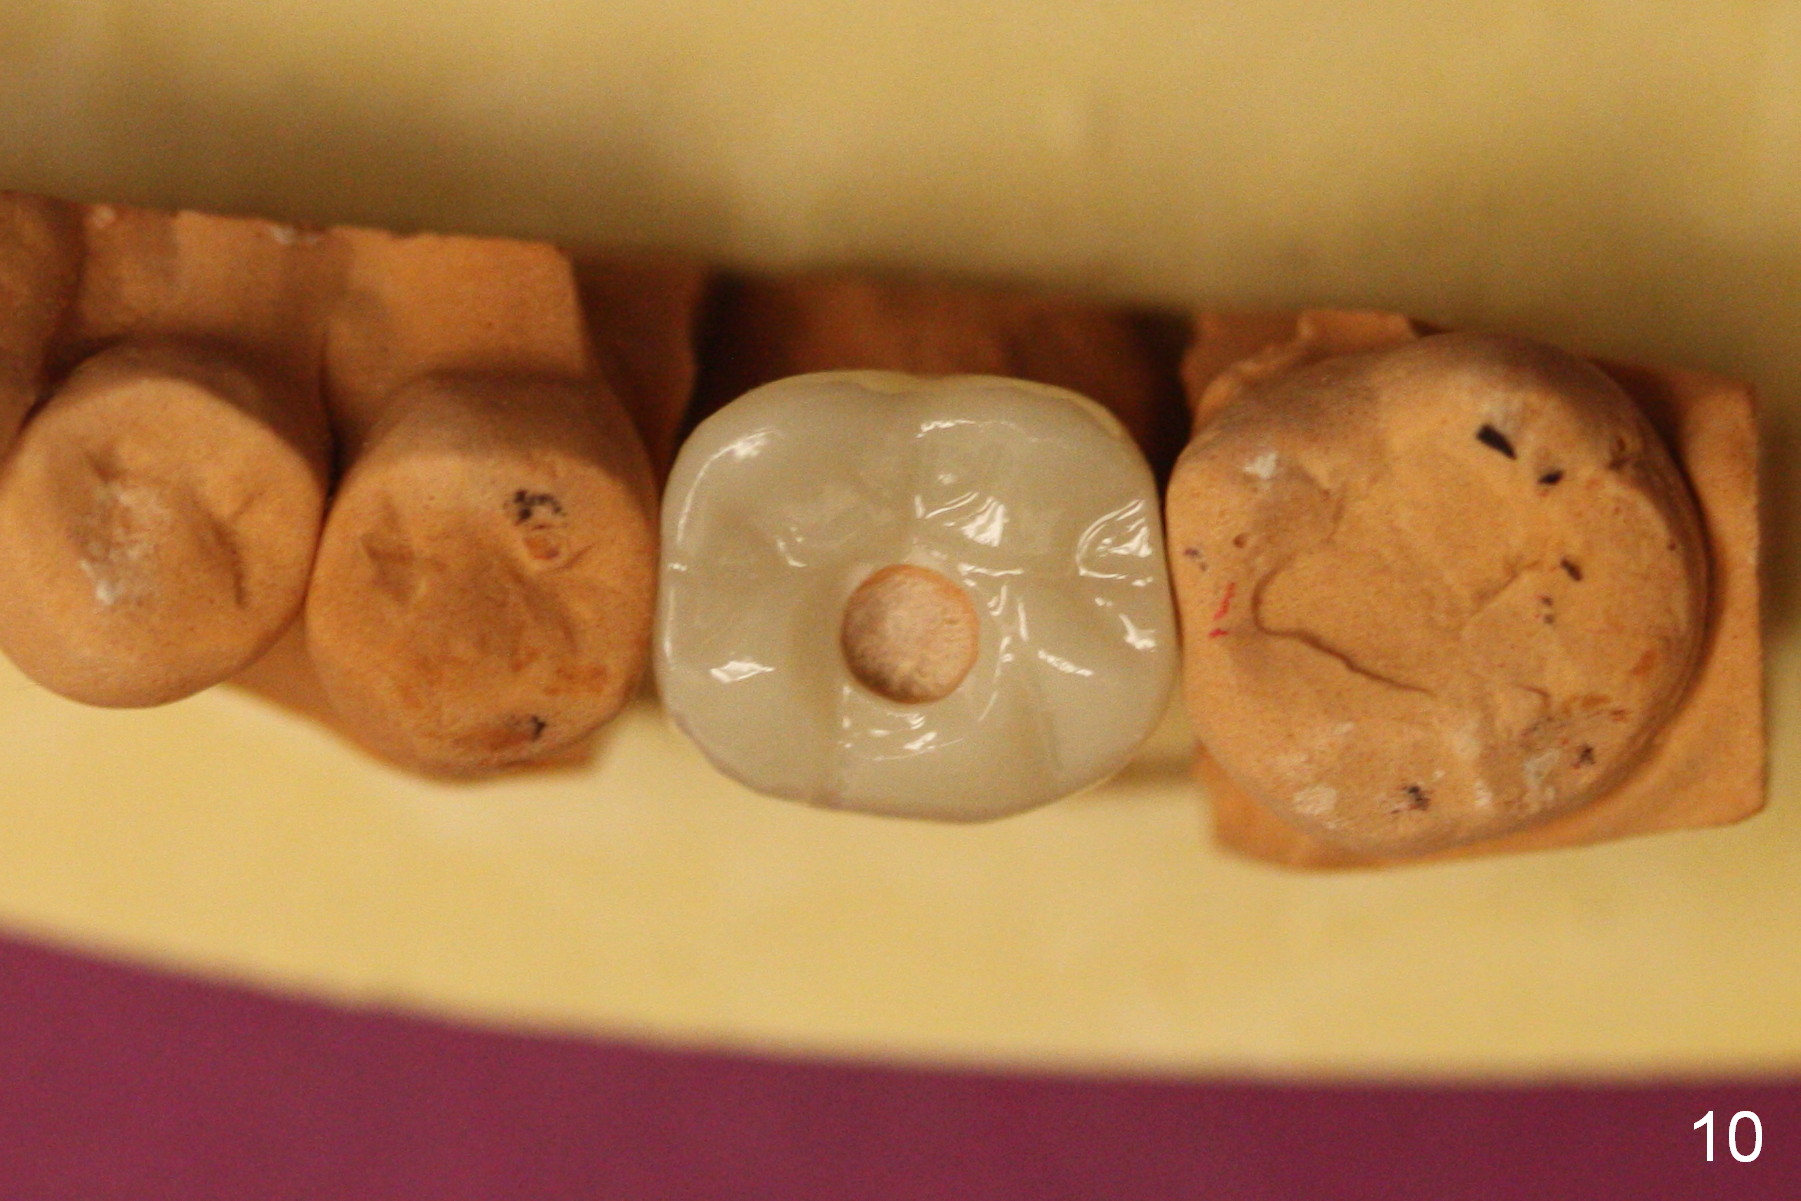
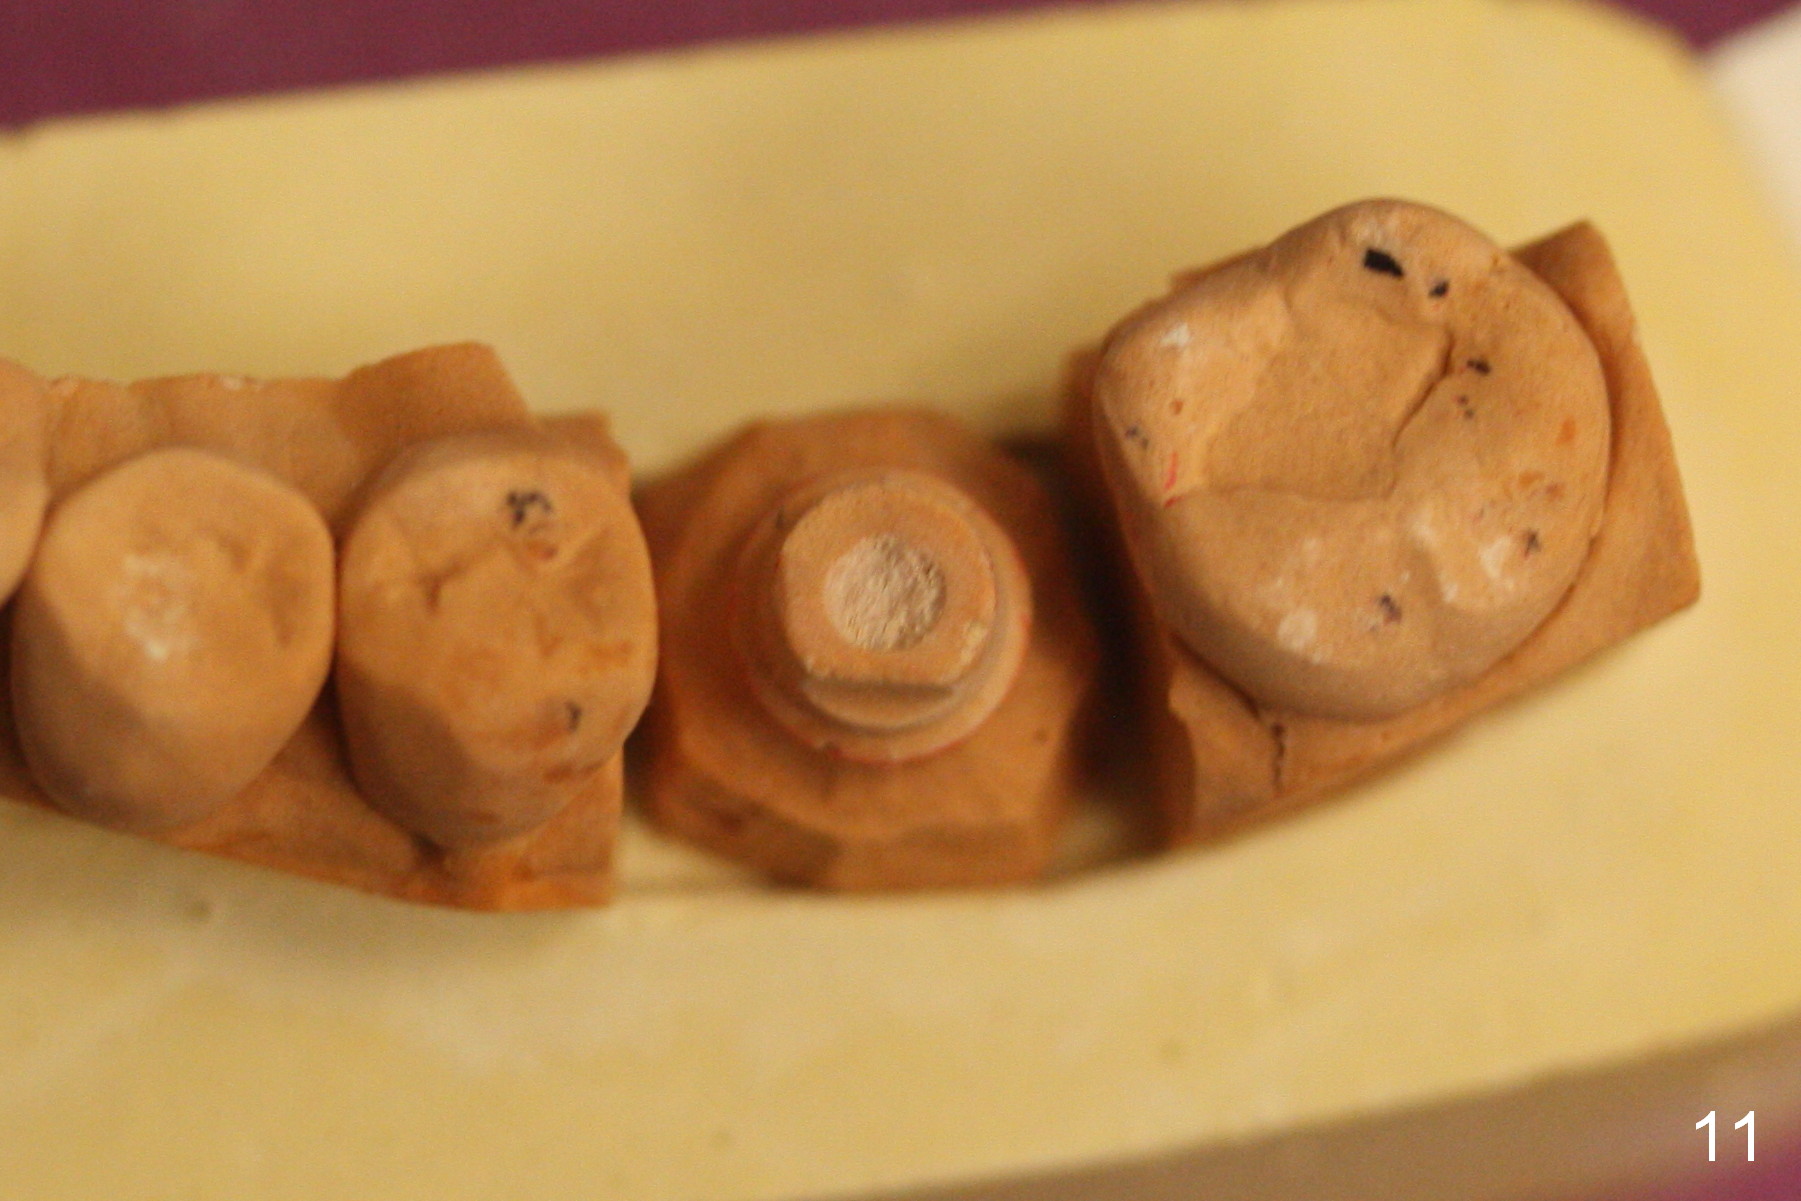
We are going to use a special method to reduce retention of cement. Ask lab to fabricate an access hole in the crown (Fig.10) over the abutment (Fig.11).
Return to Lower Molar Immediate Implant
Xin Wei, DDS, PhD, MS 1st edition 05/09/2016, last revision 08/29/2016