|
|
|
|
|
|
Improve Implant Placement
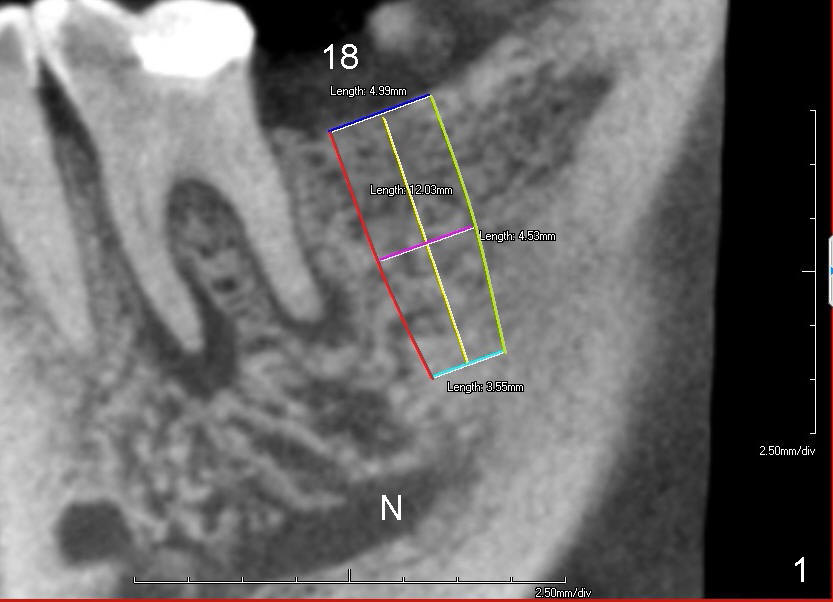
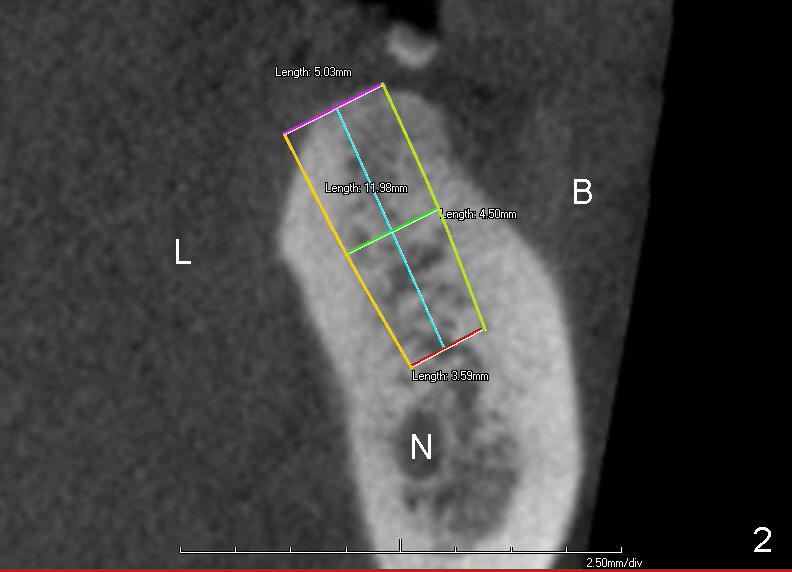
Traditionally, implant placement concentrates upon not touching the neighboring root or the nerve (Fig.1 (CT sagittal section), 2 (coronal) N) and inside the buccal and lingual plates (Fig.2 B, L). The design does not consider opposing dentition.
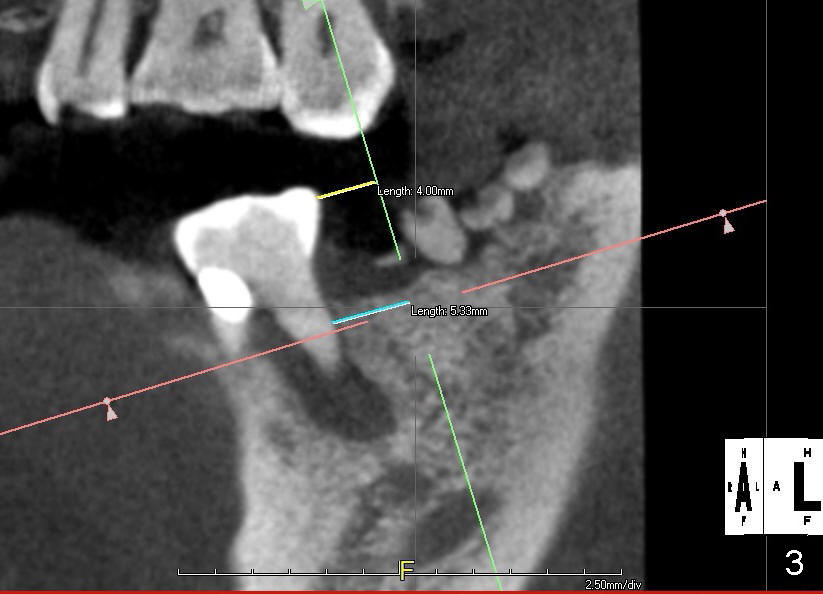
A restoratively oriented design pays attention to occlusion. The center of the 2 mm pilot drill will be 4 mm from the neighboring tooth (Fig.3).
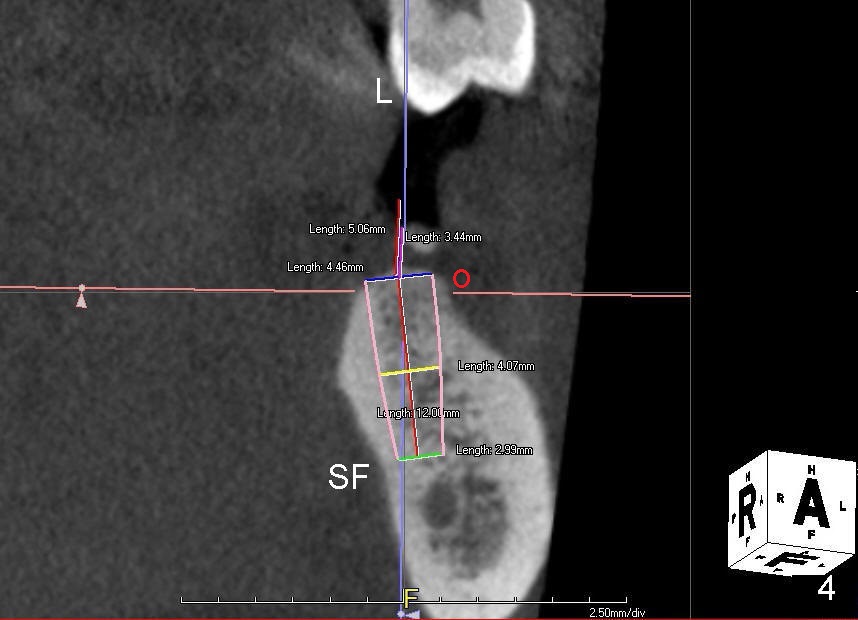
Probably due to long standing edentulism, the buccal plate is atrophic. In order for the future crown (mainly its buccal cusp) to occlude with the lingual cusp (Fig.4 L, functional cusp) of the upper 2nd molar, the coronal end of the bone-level implant should be more buccal than the traditional one (Fig.2), whereas the apical end more lingual. But not too much! The lingual plate should be protected. Place a finger in the submandibular fossa (SF) while making osteotomy.
Root canal therapy has been done for the tooth #19. Before surgery, take a PA using the existing layout to confirm that the apical radiolucency has been reduced or disappeared. After finishing 2 mm pilot drilling at the depth 8 mm, insert a paralleling pin and check the trajectory against the upper opposing tooth. Make necessary adjustment with Linderman bur. Then take PA to check mesiodistal trajectory and proximity to the nerve. Deepen osteotomy to 12 mm (deeper than 11 mm mark). Use reamers for further osteotomy. The autogenous bone will be saved and placed most likely in the buccal aspect when the buccal threads are exposed (Fig.4: red circle). Use collagen dressing (apron-shaped with a hole in the middle, buccal portion wider). Use a 5.2 (or 6.2 mm) healing abutment to hold the dressing in place. From Fig.4, can you guess what length and cuff should be chosen? How is the result?
Return to Professionals
Xin Wei, DDS, PhD, MS 1st edition 07/31/2014, last revision 03/05/2016