|
|
|
|
|
|
|
|
|
|
|
|
Immediate Provisional Fabrication
To achieve the best esthetic result, a temporary restoration is to be fabricated immediately after implant and abutment placement.
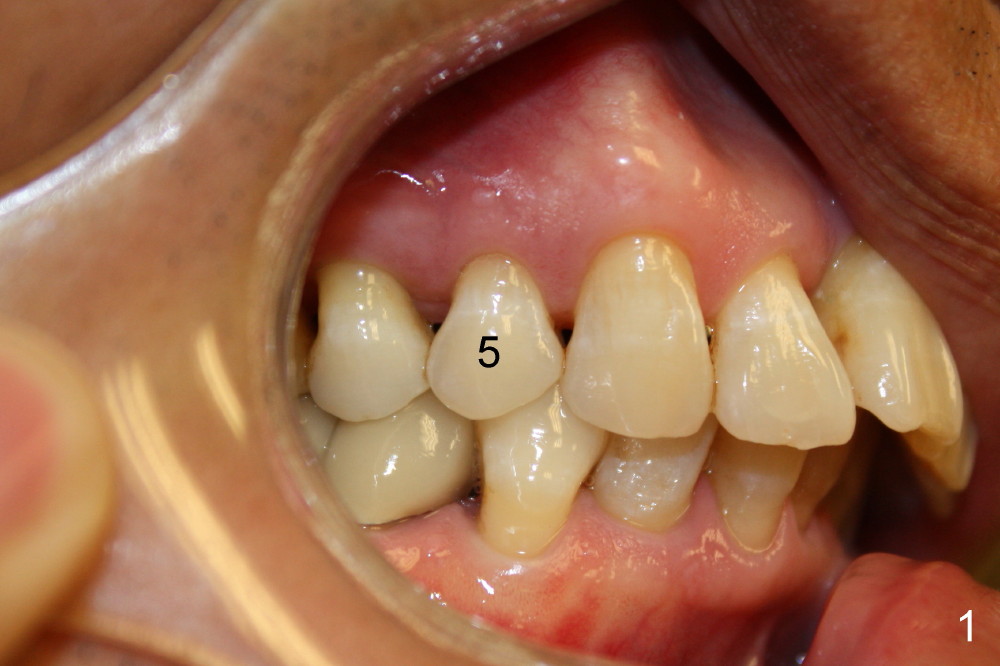
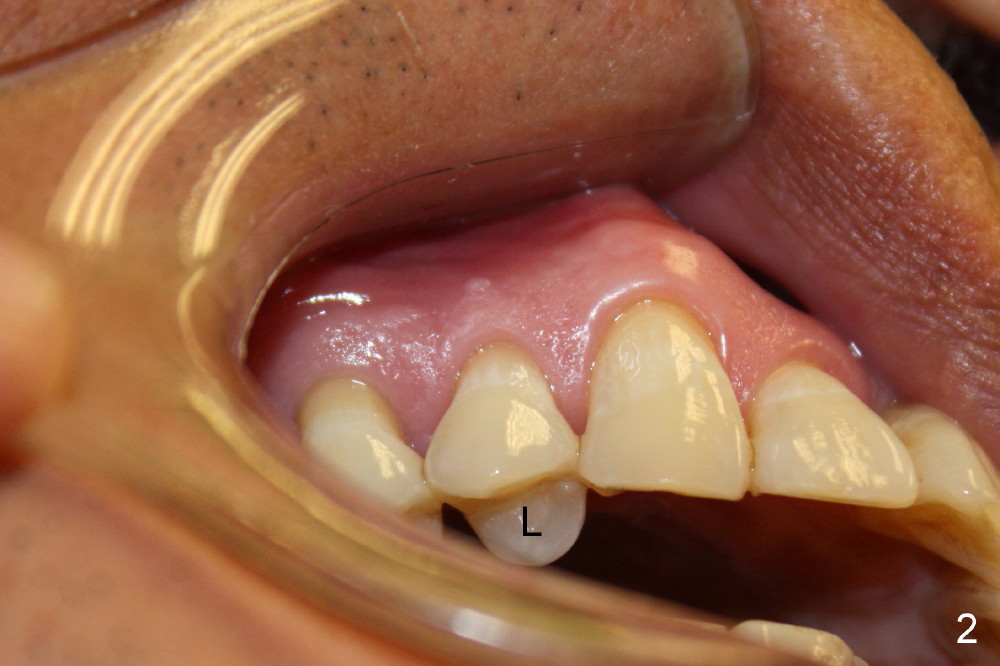
Mr. Luo's upper right first premolar is to be extracted (Fig.1: #5), because the lingual cusp (Fig.2: L) is cracking from the tooth.
The immediate provisional requires that the implant has primary stability (>40 Ncm, torque wrench).
Install appropriate sized abutment, cement, insert #2 cord and prep.
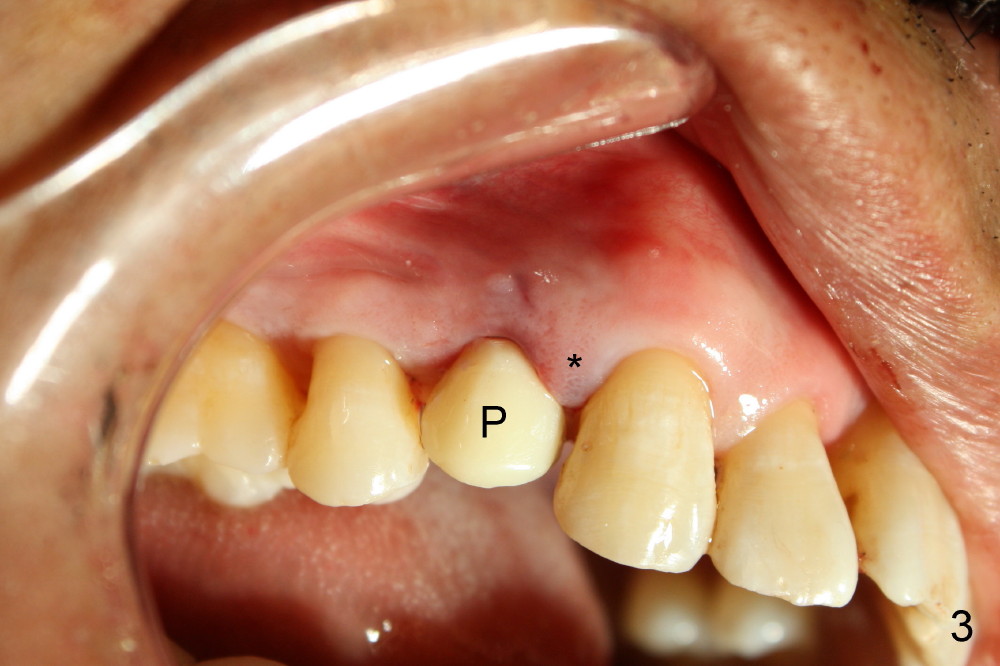
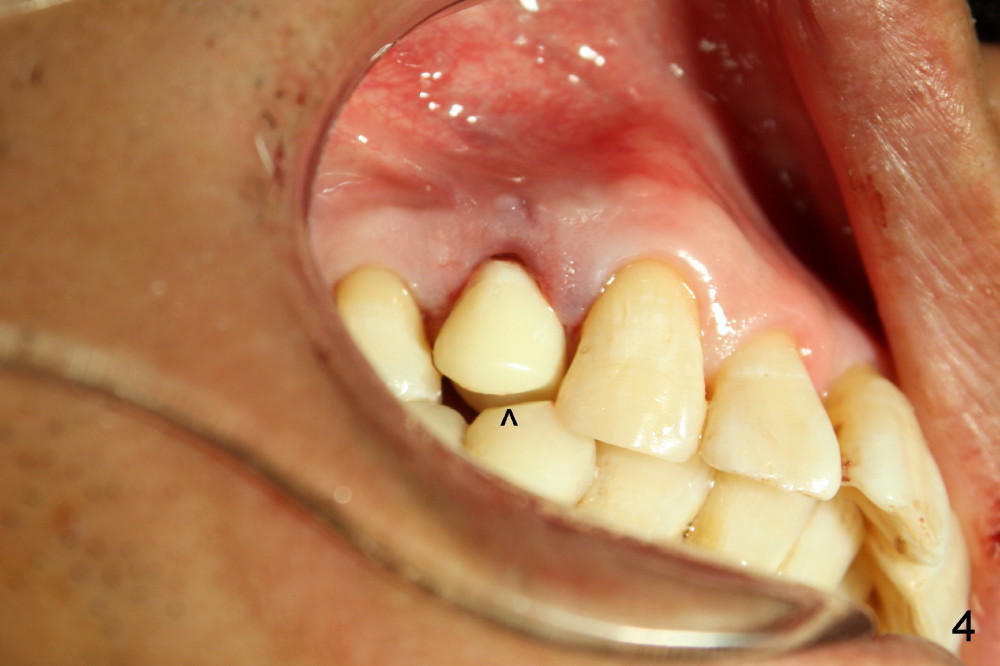
Use crown form as much as possible for cosmetics. Trim the margin of the crown form aggressively. Make sure that there is plenty clearance between just inserted abutment and the opposing arch. Reline the crown form with acrylic of matching shade, trim the margin and polish. Add acrylic to loose contact area if necessary (Fig.3,4).
When the provisional is seated (Fig.3: P), the interdental papilla (*) should be kept in its normal position. Use an articulating paper to check that there is no contact when the patient bites down and grinds. Direct vision reveals that there is clearance between the temporary and the opposing tooth (Fig.4 arrowhead).
Remove the cord, finish temp bond cementation and remove excess cement thoroughly.
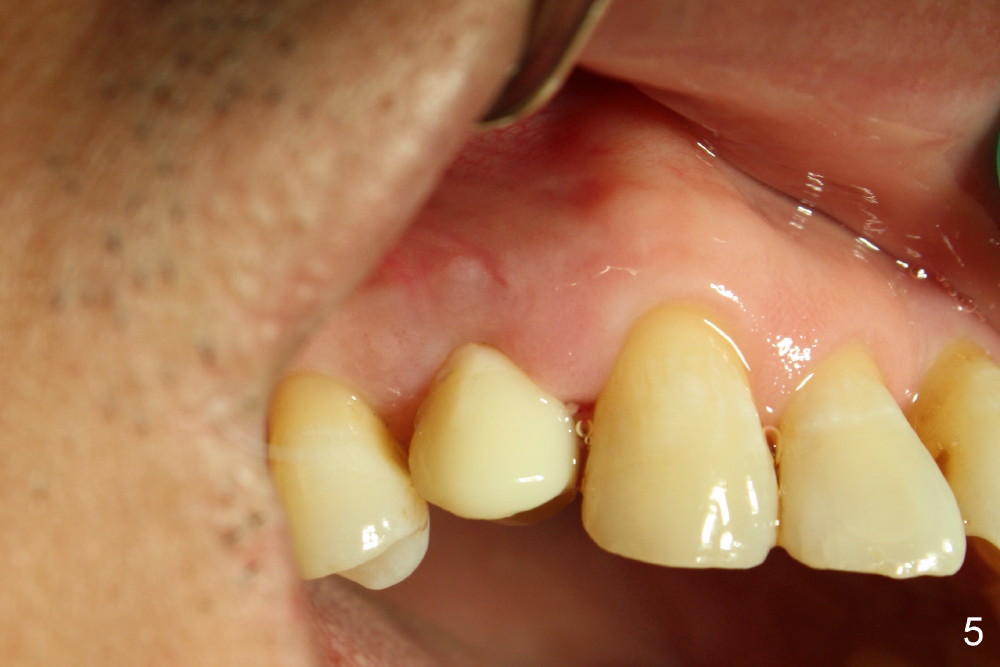
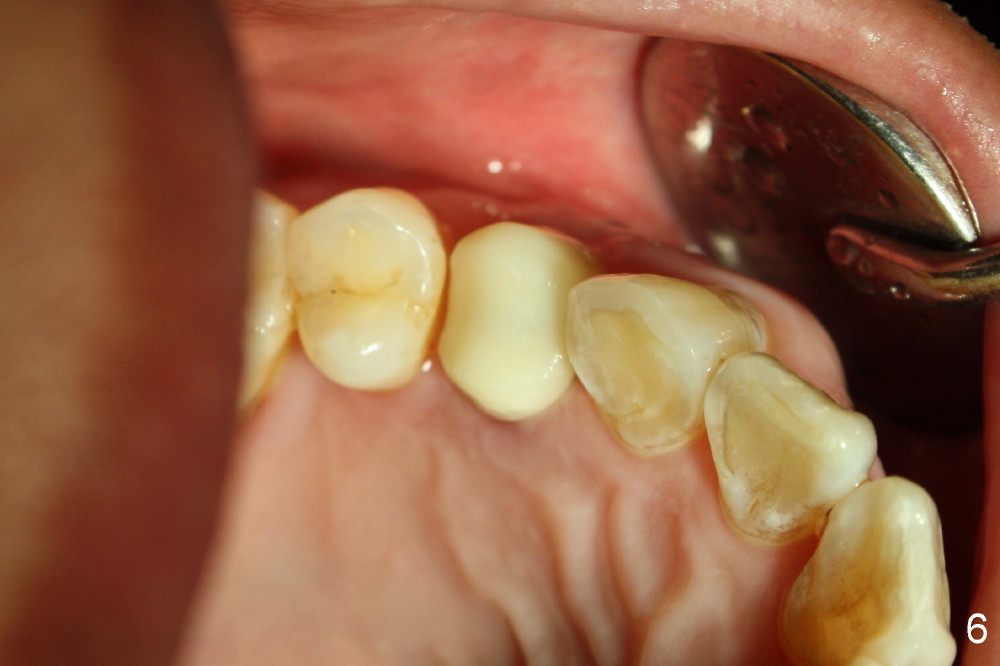
Five days later, the gingiva around the provisional returns to normal color (Fig.5,6, as compared to Fig.3,4: gingiva purplish due to difficult extraction).
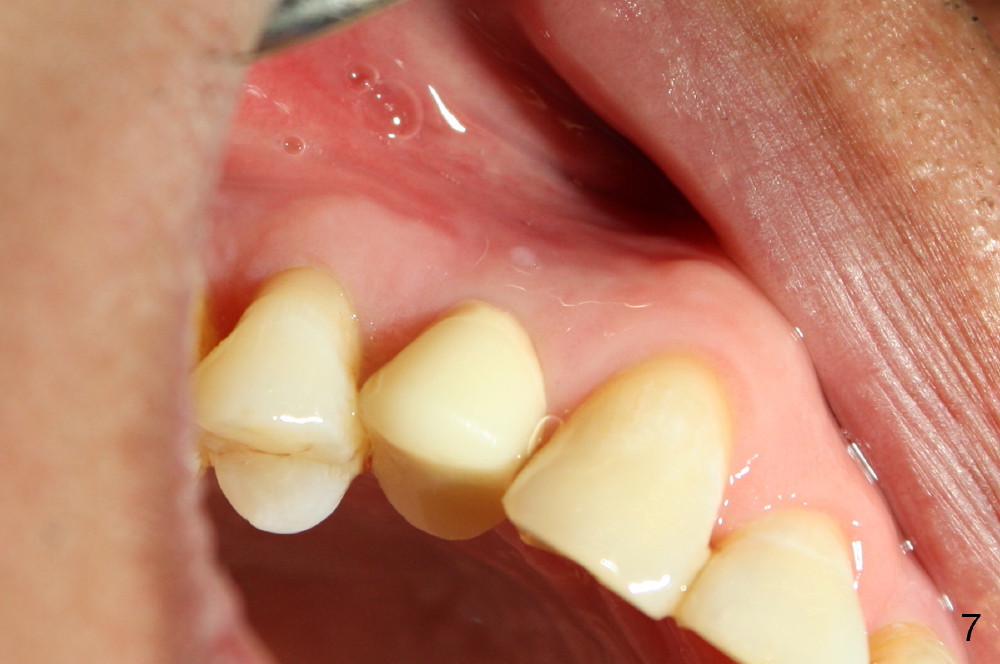
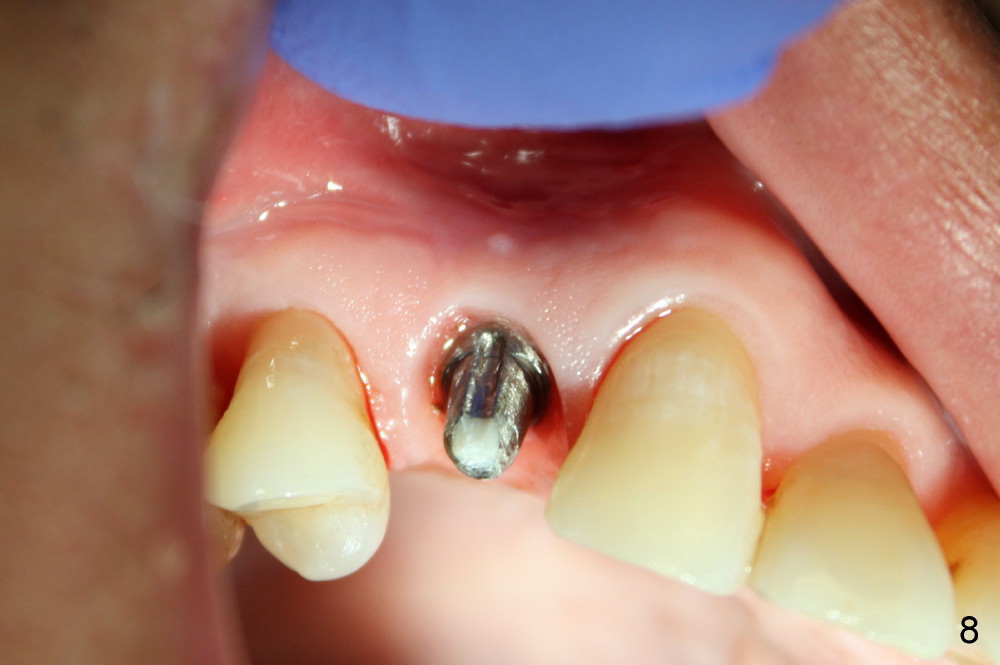
The patient returns 6 months postop for impression of a permanent restoration. The gingiva with knife-edged papillae adapts to the provisional (Fig.7). The gingiva looks healthy when the provisional is removed (Fig.8). The buccal bone resorption seems to be minimal, as compared to Fig.1,2.
Xin Wei, DDS, PhD, MS 1st edition 09/01/2013, last revision 02/23/2014