


|
|
|
|
|
|
|
|
|
|
|
|
|
|
|
|
|
|
|
|
|
|
|||
Flexibility of Immediate Implant Placement
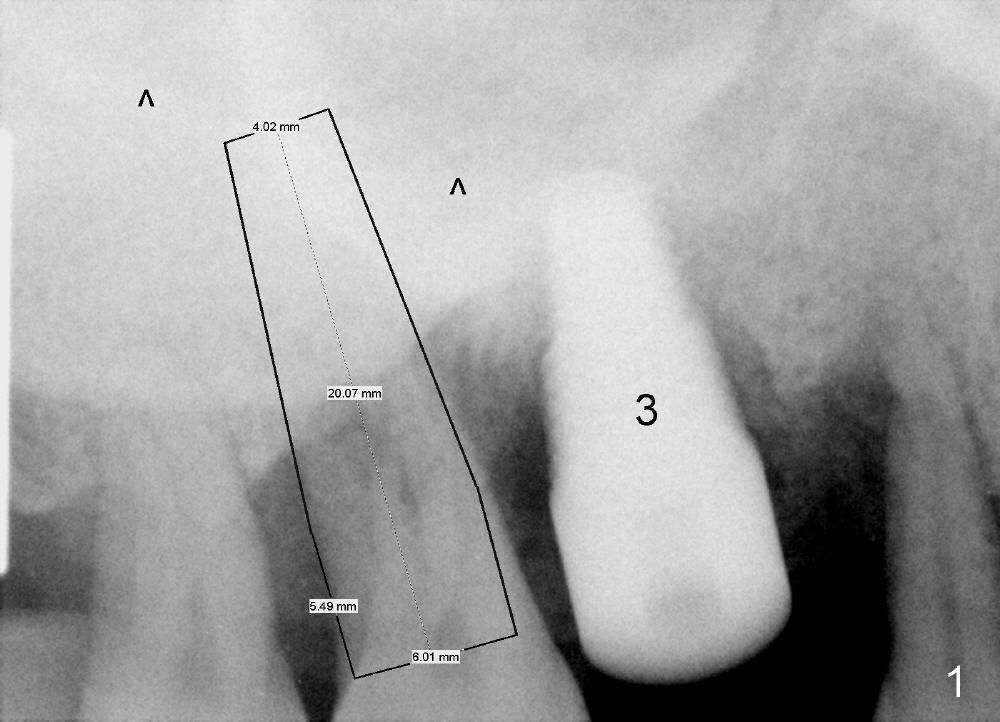
A 44-year-old man has advanced generalized chronic periodontitis. Full mouth reconstruction (FMR) with implants is unavoidable. For financial reason, FMR is being carried out by stages (1). As soon as the implant crown (Fig.2 C) at the site of the upper right 1st molar (#3) is cemented, a periodontal abscess develops with the neighboring molar.
An immediate implant is planned (Fig.1 black outline). A 6x20 mm implant appears to be appropriate for the site; it is planned to be engaged into the sinus floor (^) for primary stability.
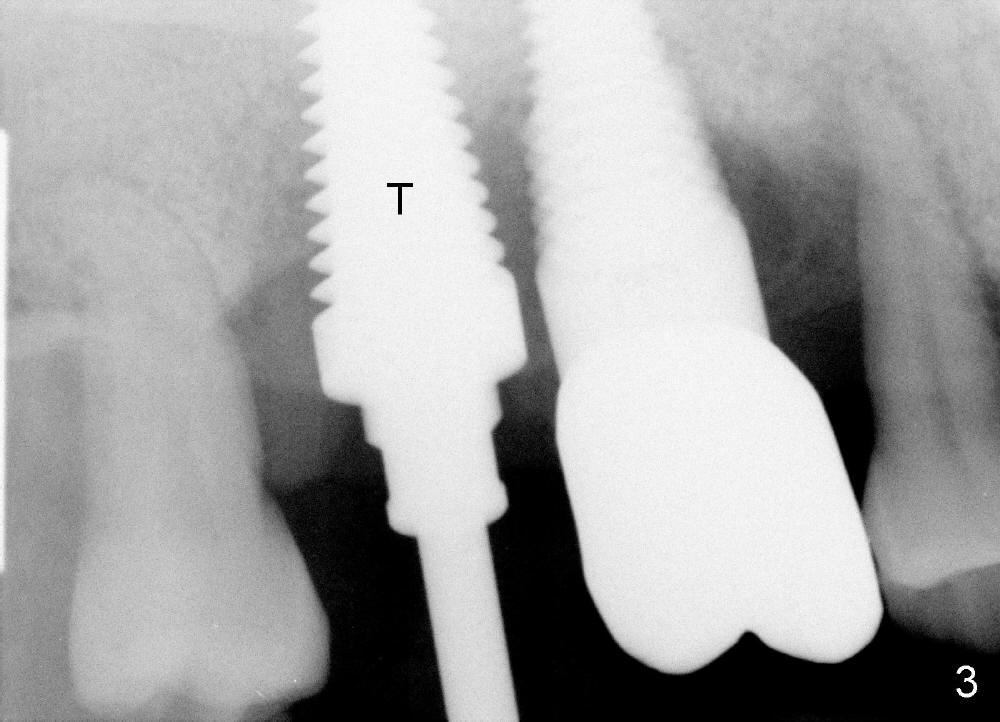
Following extraction, the bottom of the socket is examined to be flat. There is almost no alveolar bone. The bone that will support the implant is basal bone. The osteotomy is formed by rounded tapered osteotomes: 2-4 mm at the depth of 20 mm, followed by insertion of a 4.5x20 mm tap (Fig.2: T). The sinus floor is lifted (^). The tap is firmly bound to the basal bone.
The osteotomy is sequentially enlarged by 5x20, 6x20 and 7x17 mm taps with increasing stability. By the time the last tap is inserted (Fig.3: T), it is parallel to the neighboring implant (I) with some separation.
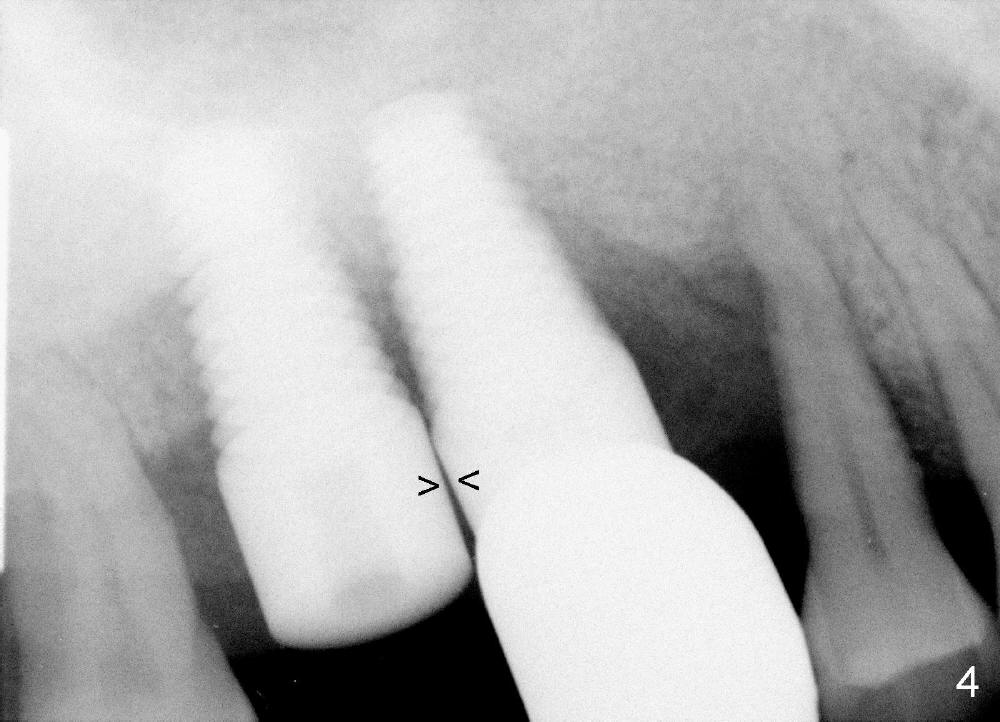
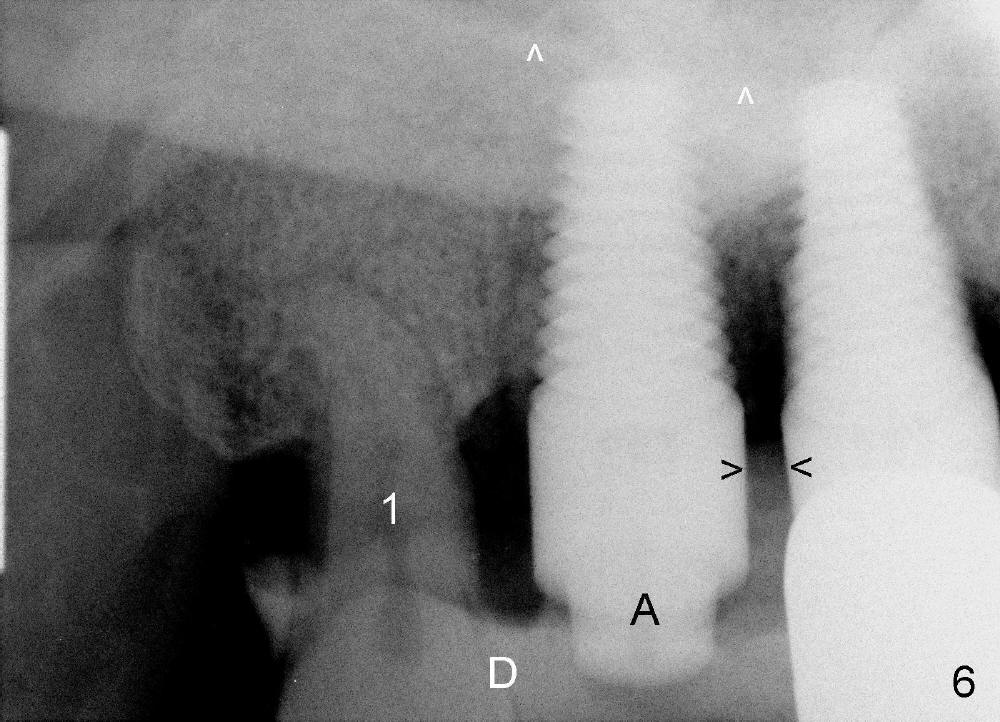
When a 7x17 mm implant is placed, there is almost no separation from the neighboring implant (Fig.4 between arrowheads). The new implant is then partially removed from the osteotomy, redirected and placed back to the site with the same insertion torque (>60 Ncm). The trajectory is more favorable (Fig.6) than before (Fig.4). The immediate implant allows us to change in trajectory, which should be not so easy with implant in a healed site.
With placement of a large diameter implant, the amount of bone graft is reduced, favoring bone regeneration, particularly with the case of a large preop bony defect.
For this case, a collagen membrane is used to cover a synthetic bone graft in the buccal and lingual aspect of the socket. No suture is used to stabilize the membrane. Placing sutures in the posterior maxillary region is extremely difficult. Instead a short abutment (Fig.5,6: A) is placed to hold perio dressing in place. In fact extraction of the 3rd molar (Fig.6: #1) is postponed. The 3rd molar can also help keep the perio dressing (Fig.6: D) in place.
Dr Wei, As you recall, I said I prefer to place the implant into an immediate extraction socket when ever possible. Realigning the implant to allow for more interseptal bone was the proper treatment (should have at least 1.5 mm of bone). I would have added apical bone after up- fracturing the sinus floor to allow a 20mm implant to be placed, but believe the 17mm implant will be sufficient. Keep an eye on the crestal bone as healing takes place, if threads become exposed it may be necessary to add graft. I have been traveling and did not have access to email for awhile. Dr Borgner
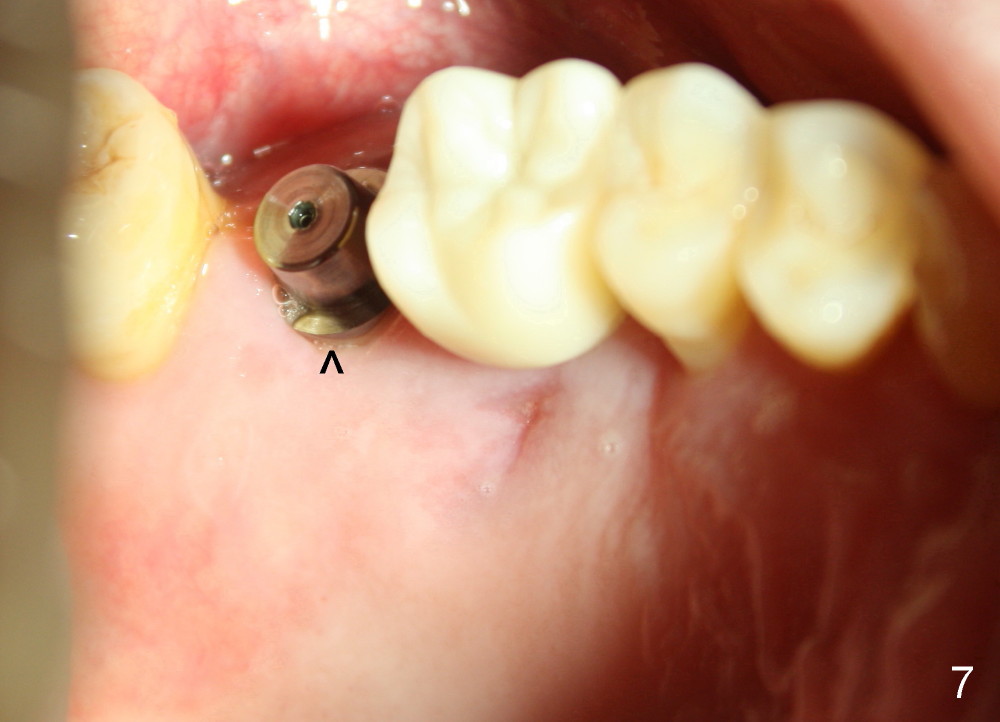
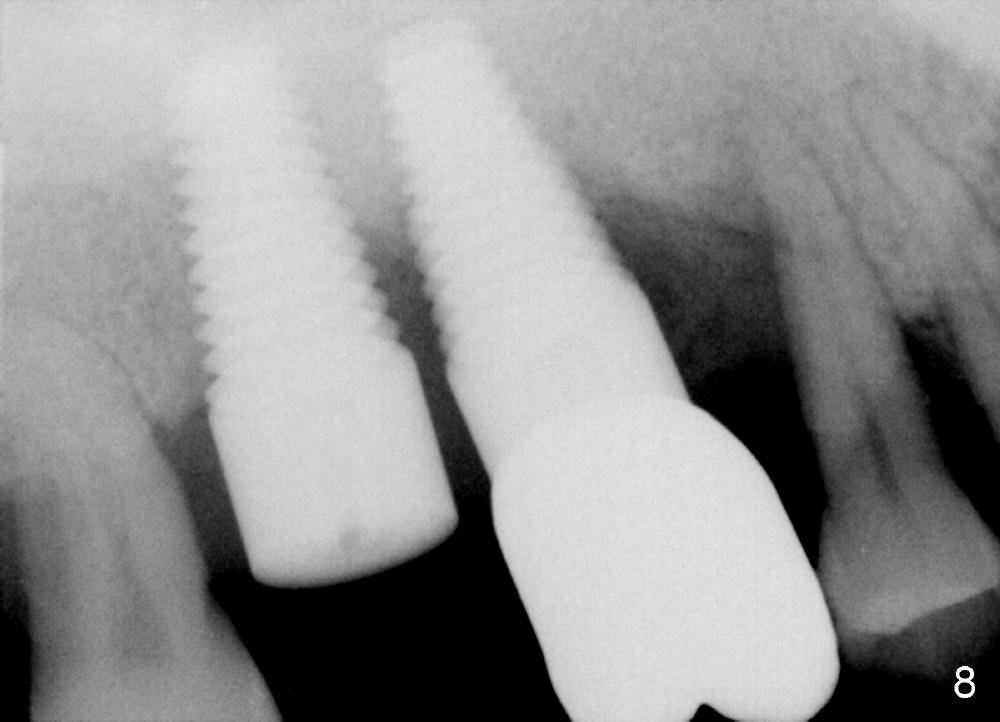
The patient returns for 1 week postop follow up. While the palatal abscess has resolved, the palatal gingiva has adapted to the implant without thread exposure (^ in Fig.7, as compared to Fig.5). Crest bone level appears to remain the same 3 months postop (Fig.8, as compared to Fig.6). There is no abnormality associated with the soft tissue (including thread exposure). A healing cuff is placed and a final restoration will be finished in a month.
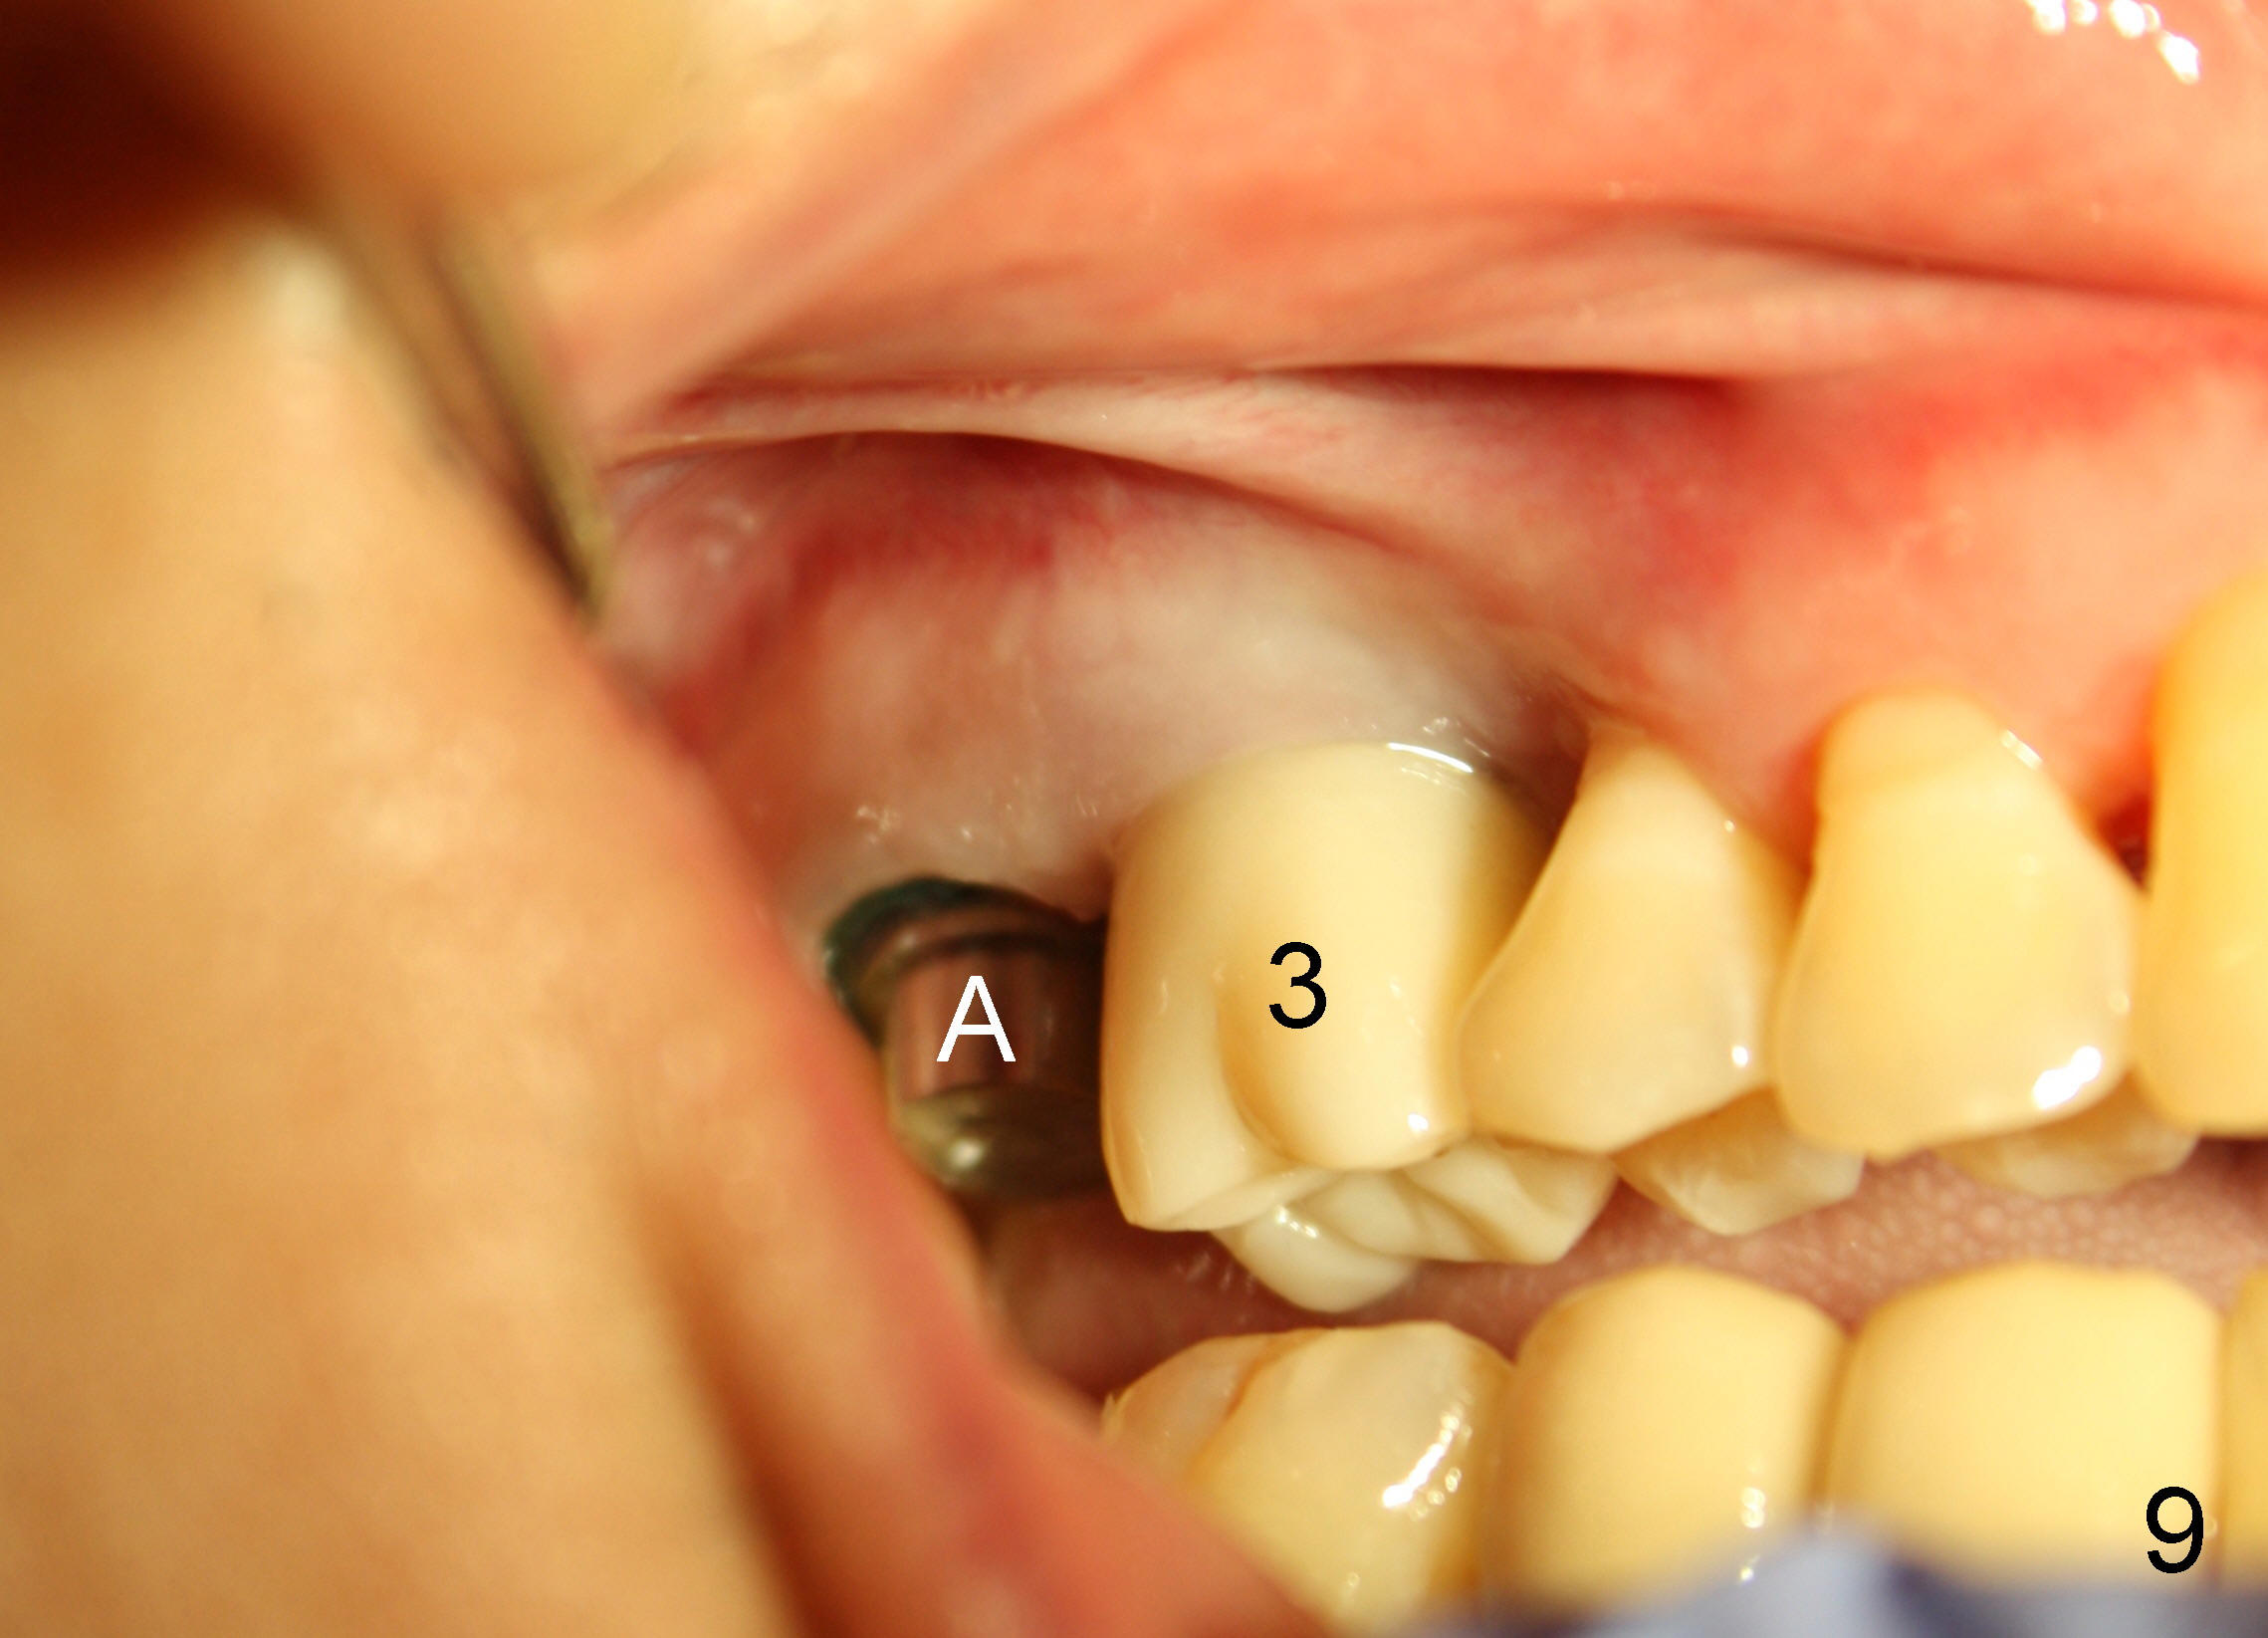
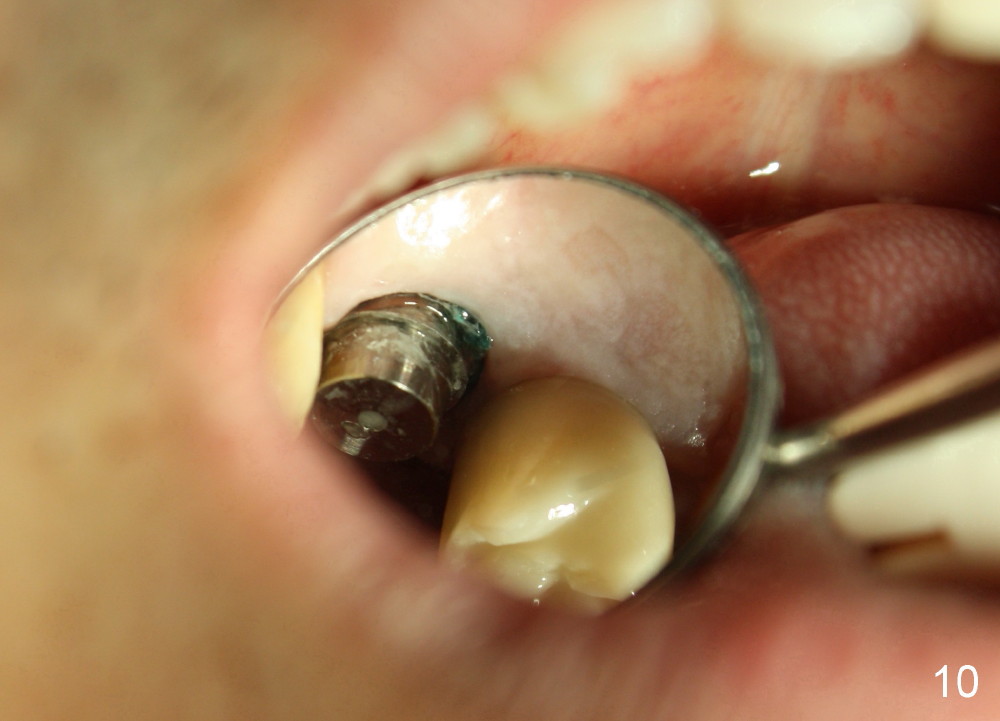
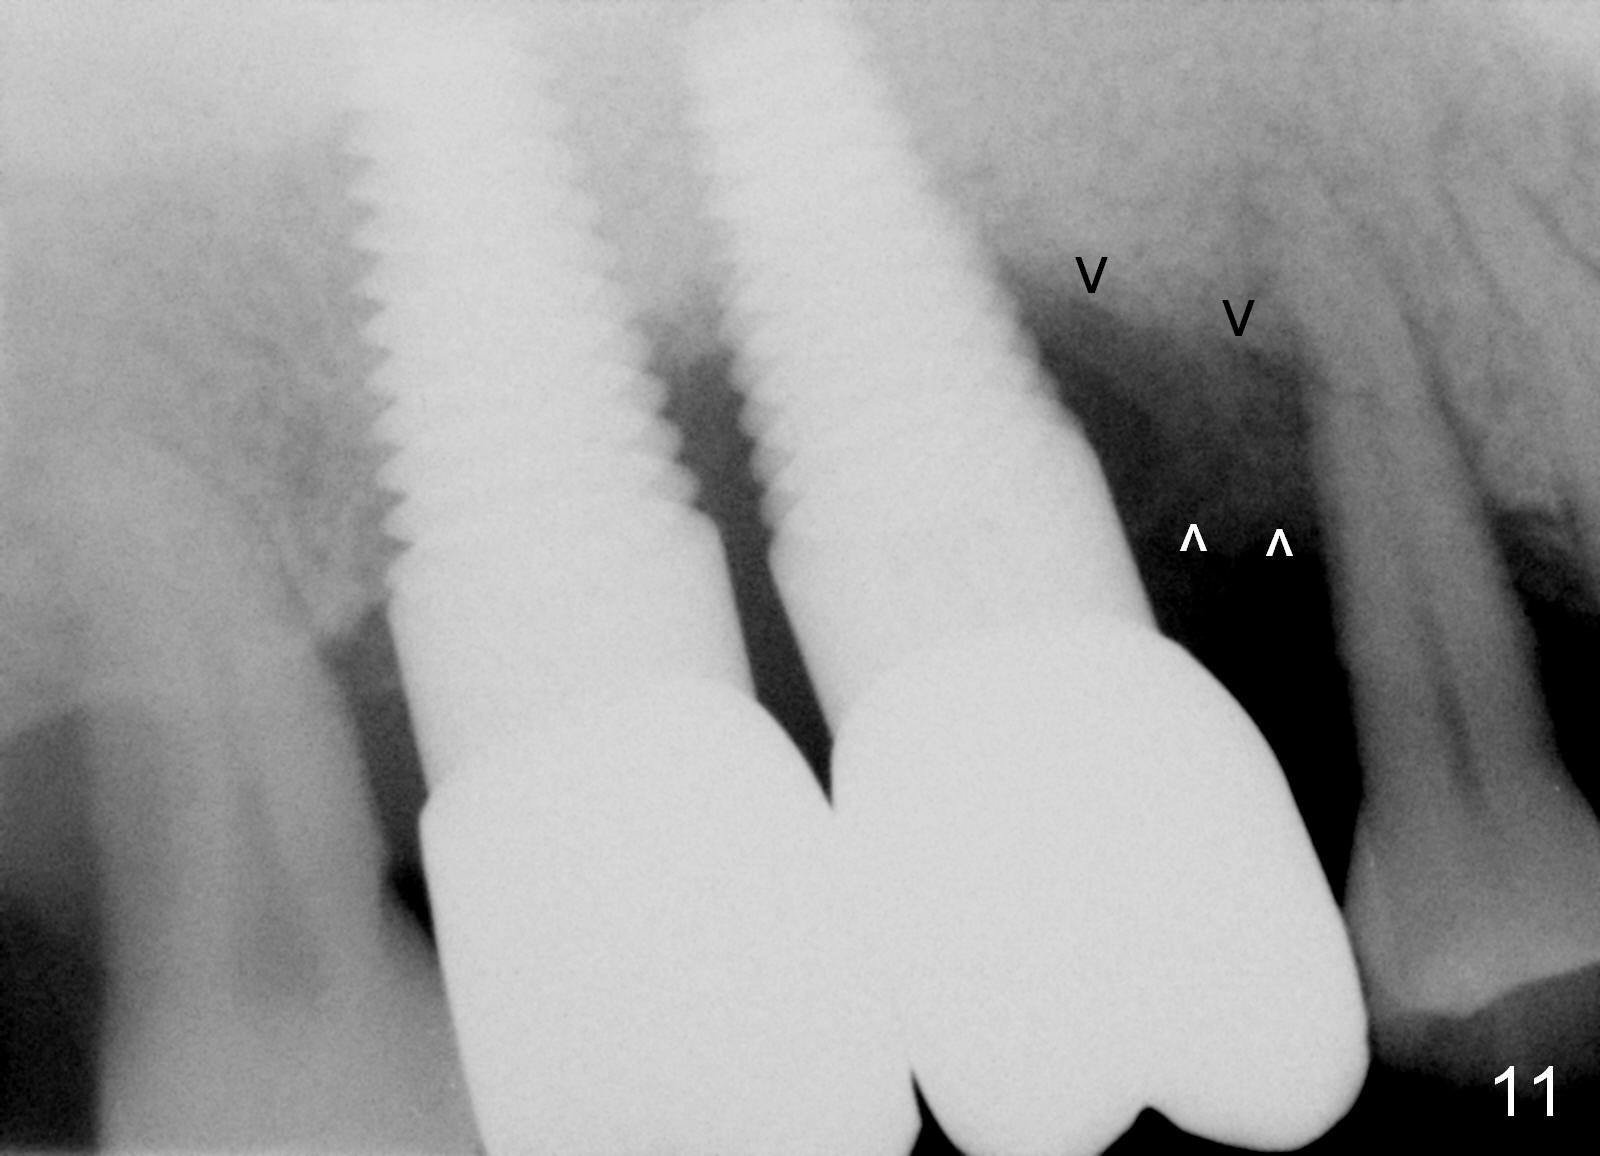
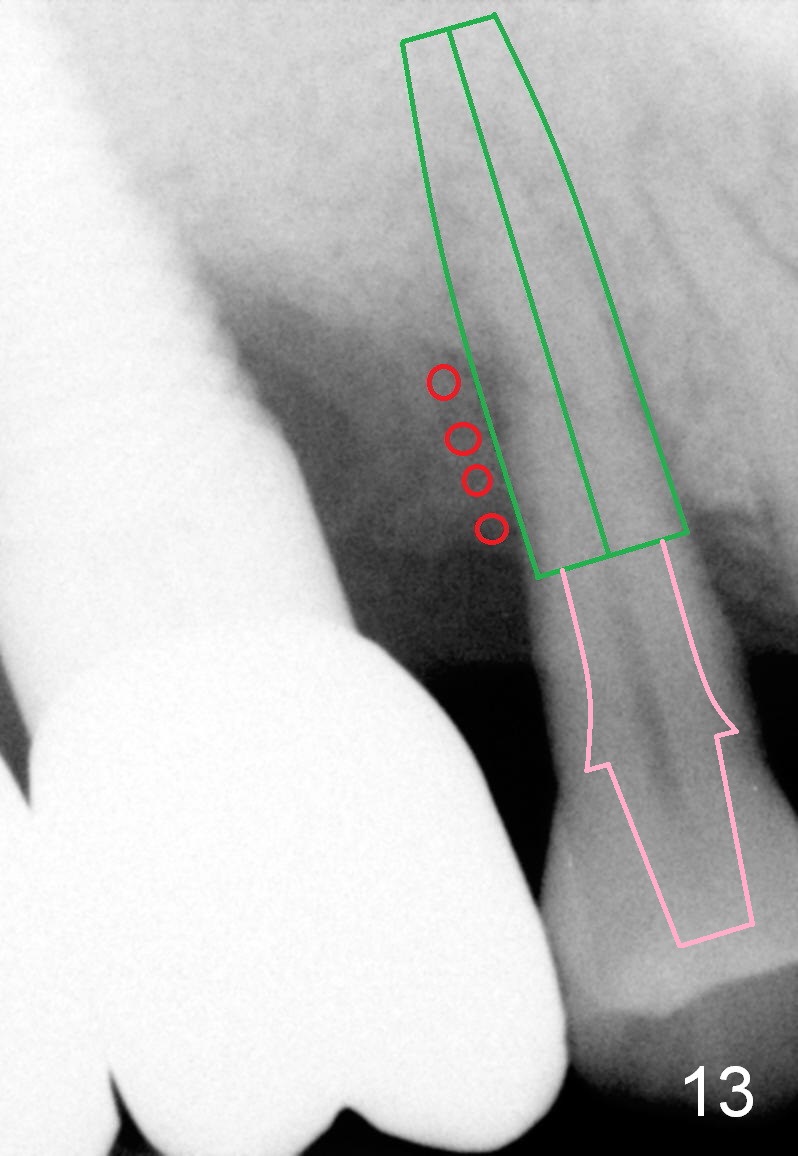
The patient returns as planned. An abutment (Fig.9 A) is placed and gingival retraction cords inserted for prep and impression. The crown at the site of #3 has been in function for the last 5 months. The gingiva is healthy buccally (Fig.9) and palatally (Fig.10 mirror view). Fig.11 is taken 7 and 13 months post cementation of the crowns at the sites of #2 and 3, respectively. The gingiva around these 2 implants remains healthy. Where bone resorption is severe, it appears better to use a bone-level implant (Fig.12,13 drawing) to make sure that the implant is completely buried in the bone. In the area the implant is exposed, add bone graft (red circles). Use a long abutment with a long cuff for restoration (Fig.13 pink area). On the other hand, the length of the smooth part of the tissue-level implant is fixed. Sometimes for the restoration, the implant may be placed too shallow, leading to thread exposure.
Return to Professionals, Upper Molar Immediate Implant
3 Loss
Xin Wei, DDS, PhD, MS 1st edition 04/29/2014, last revision 02/09/2021