.jpg)
%20abutment.jpg)
|
|
|
|
|
|
|
|
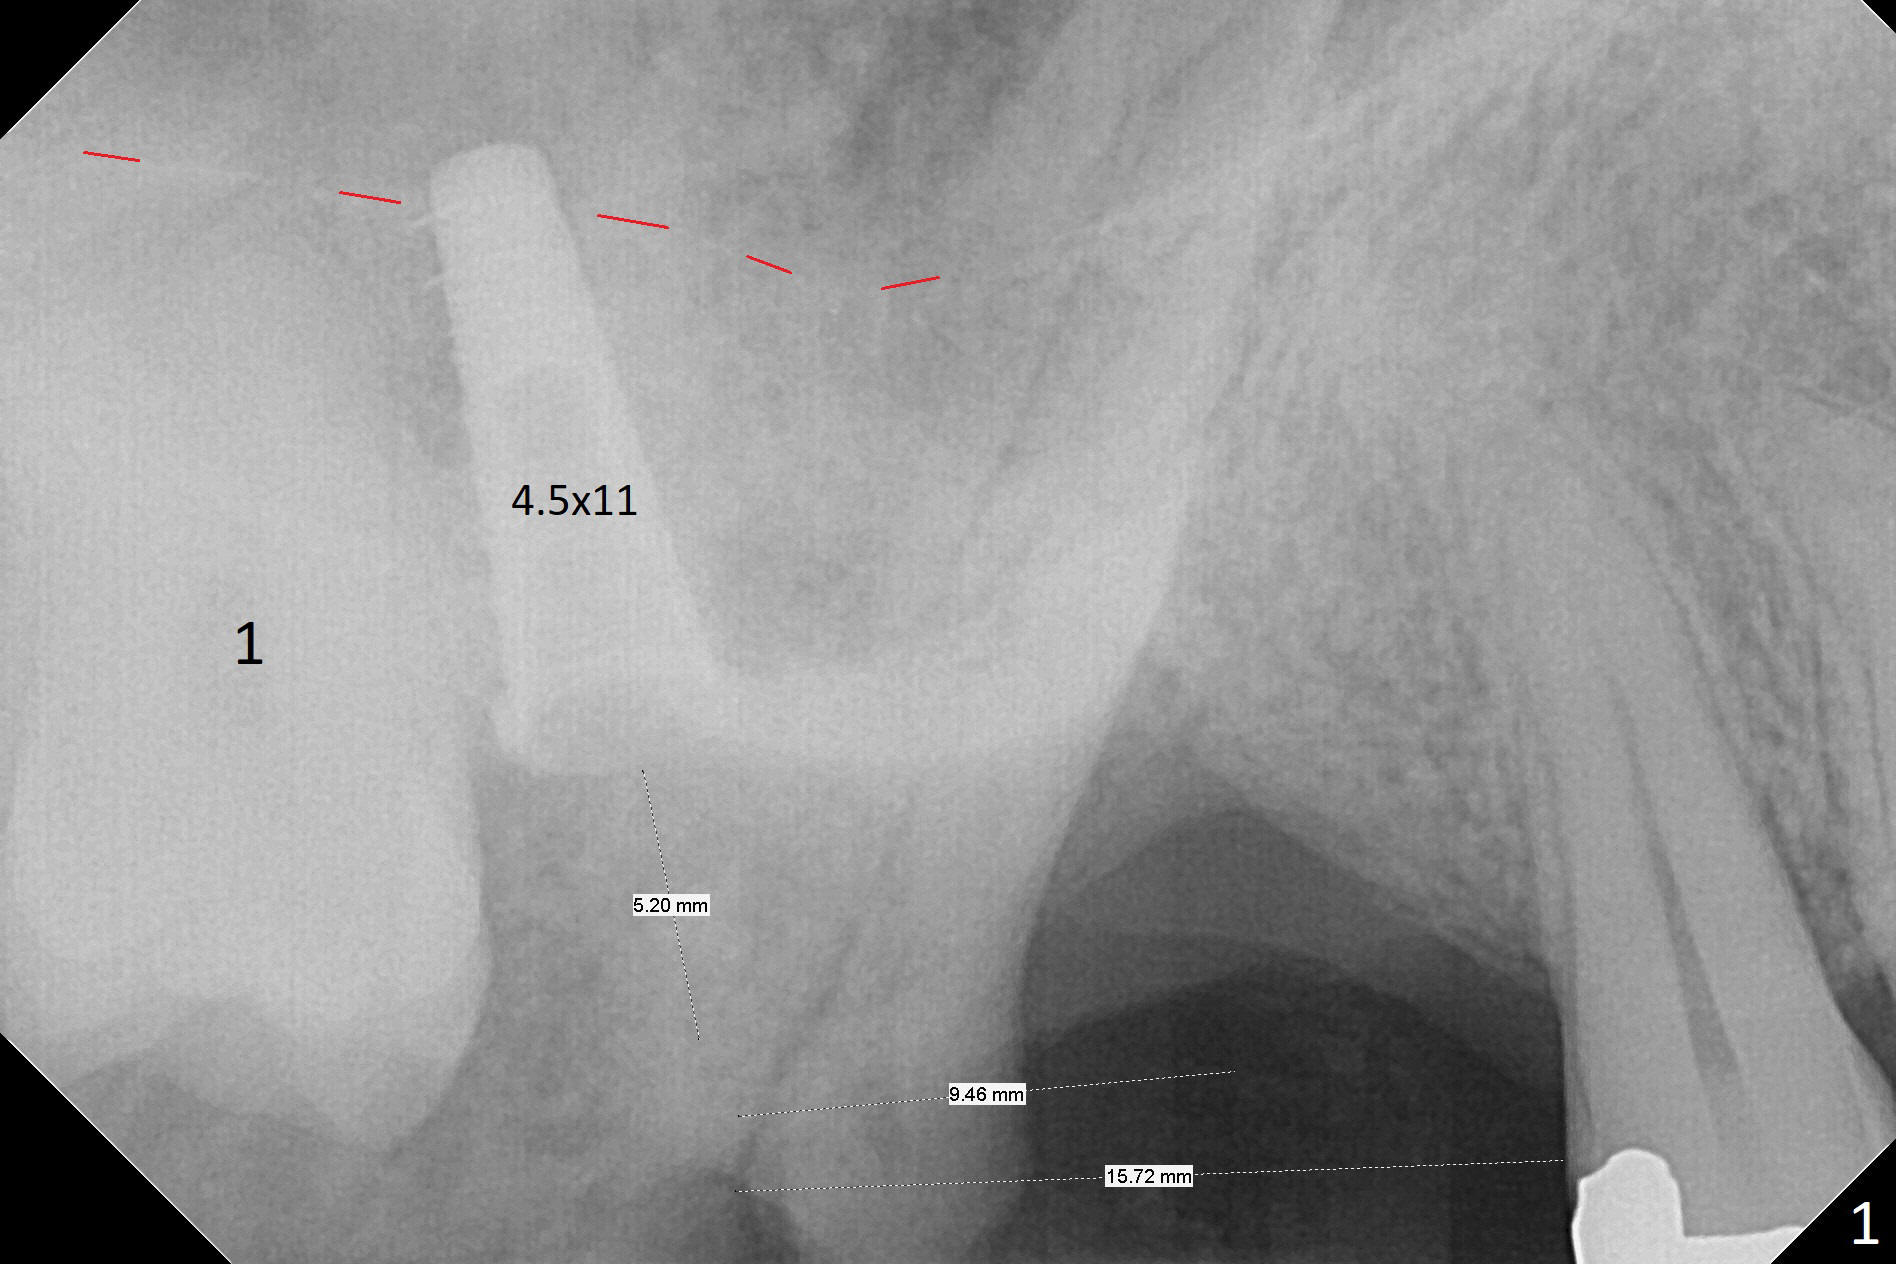
Osteotomy Depth: Soft Tissue Landmark
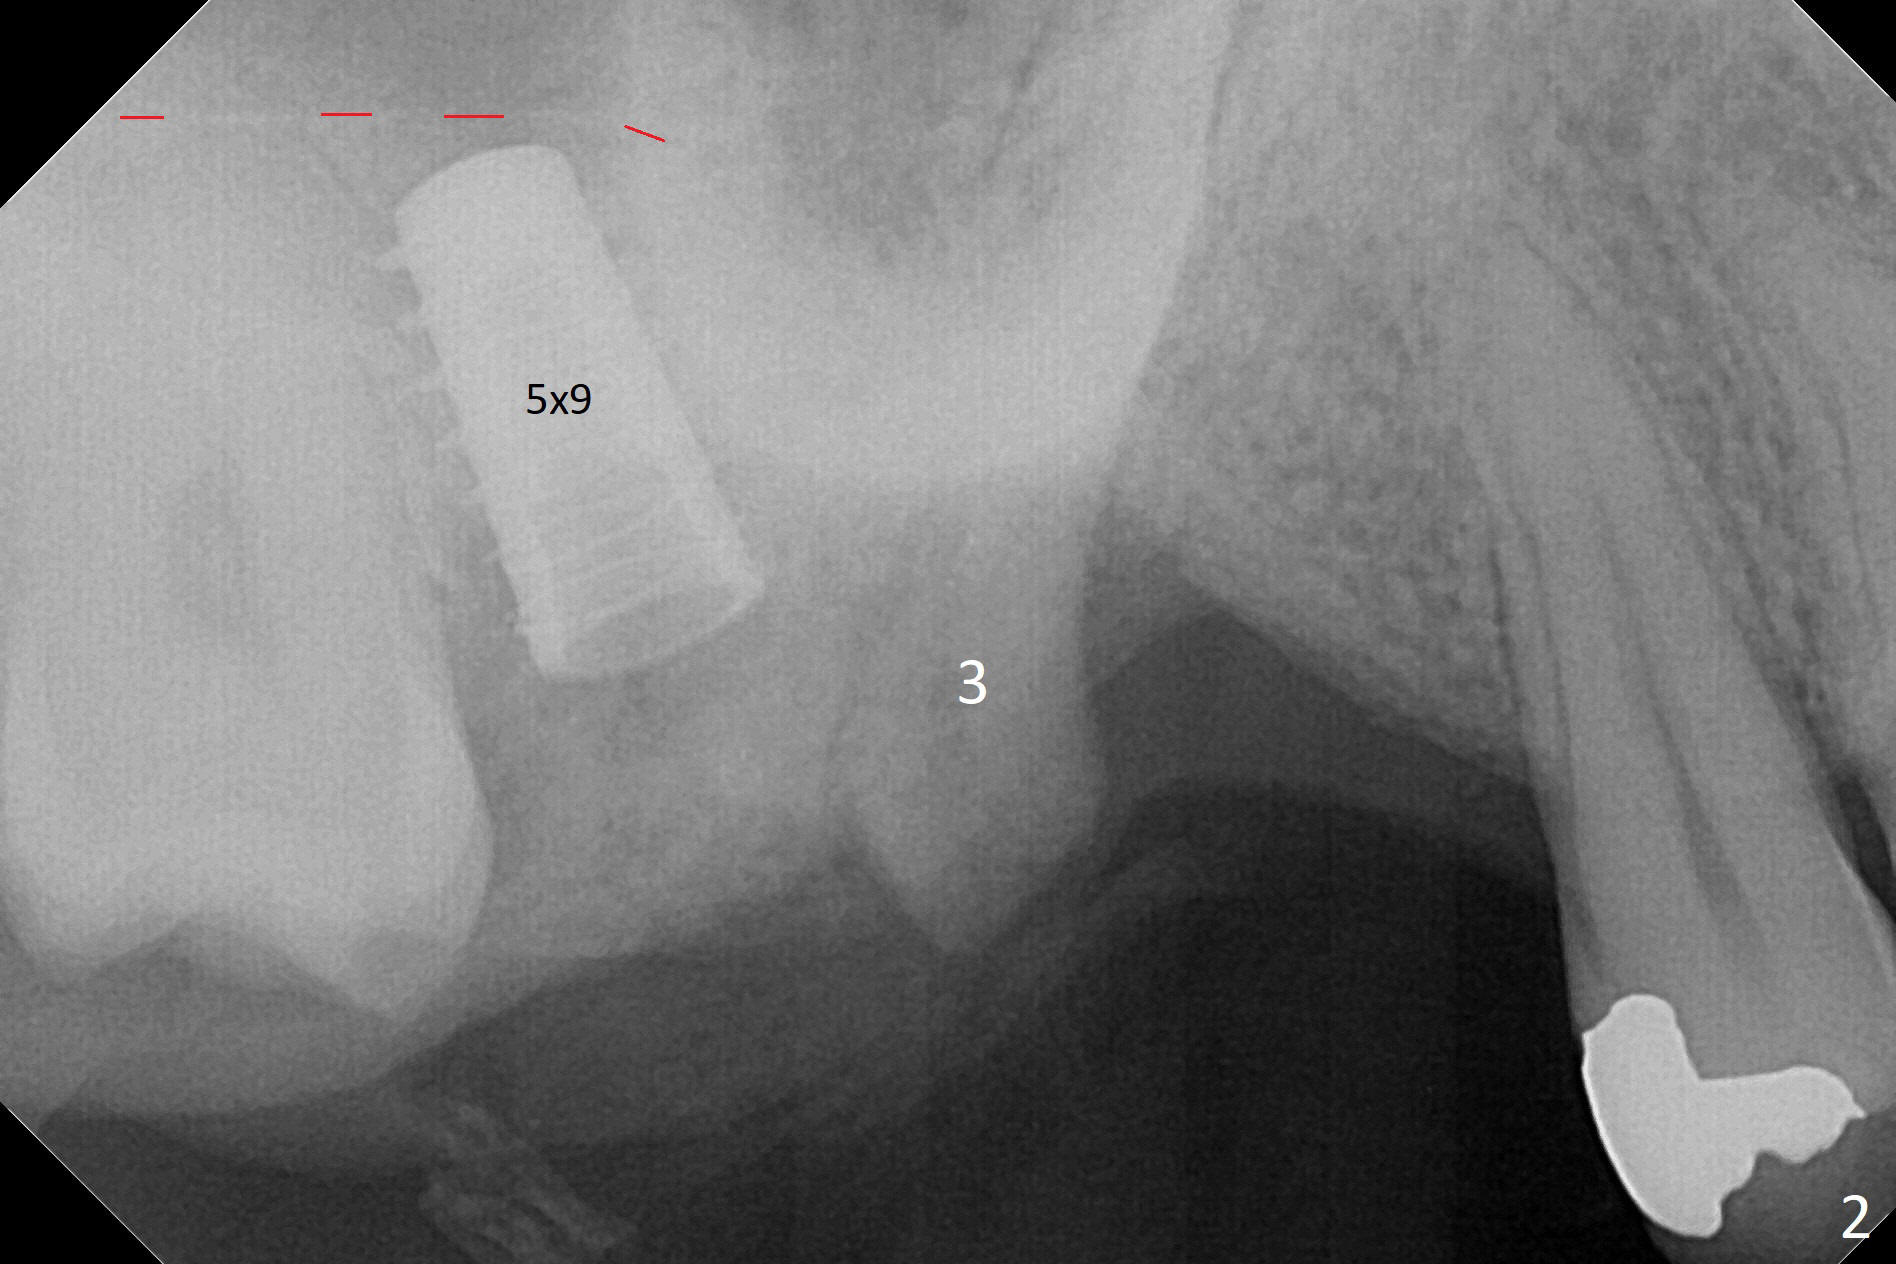
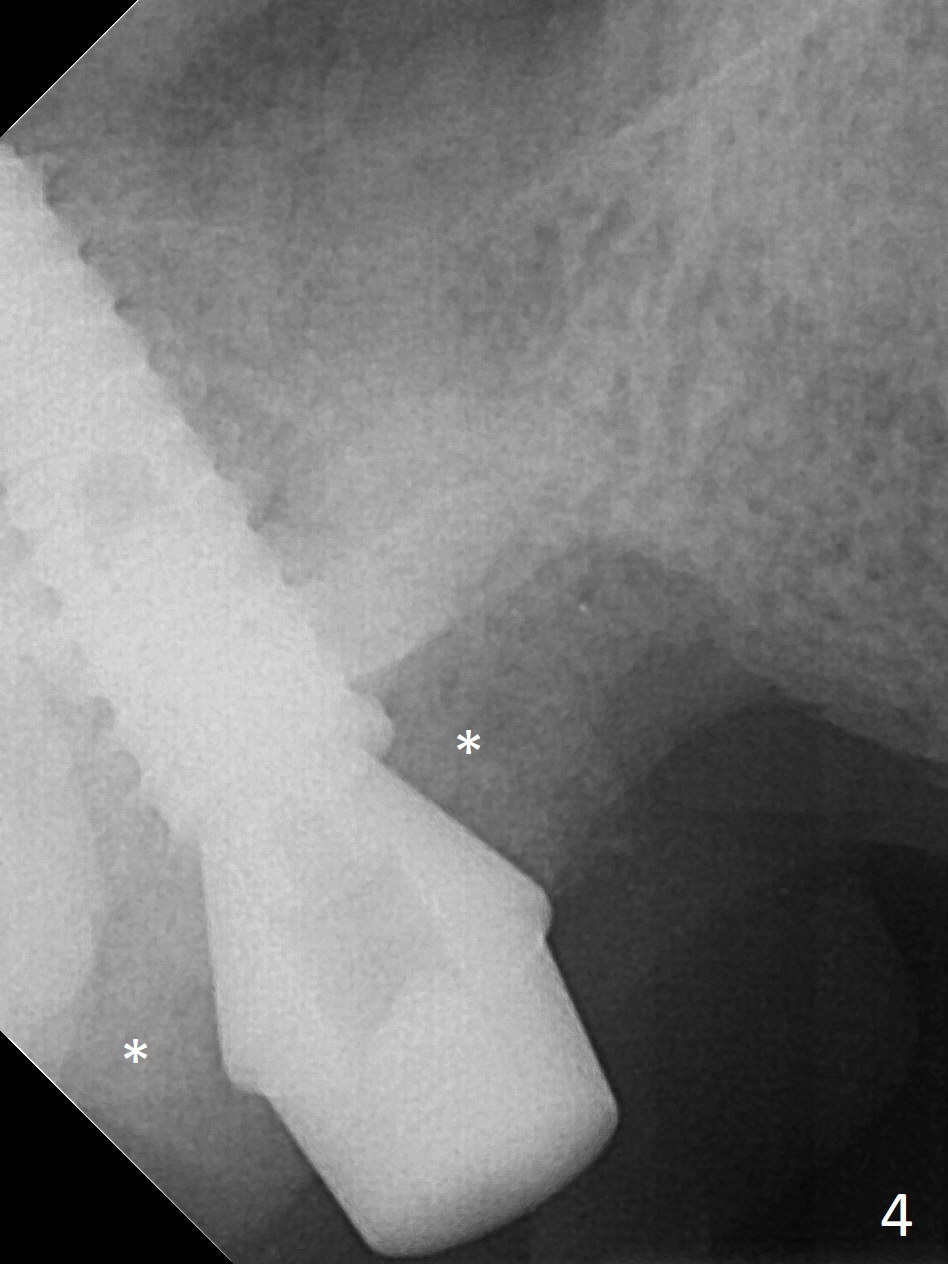
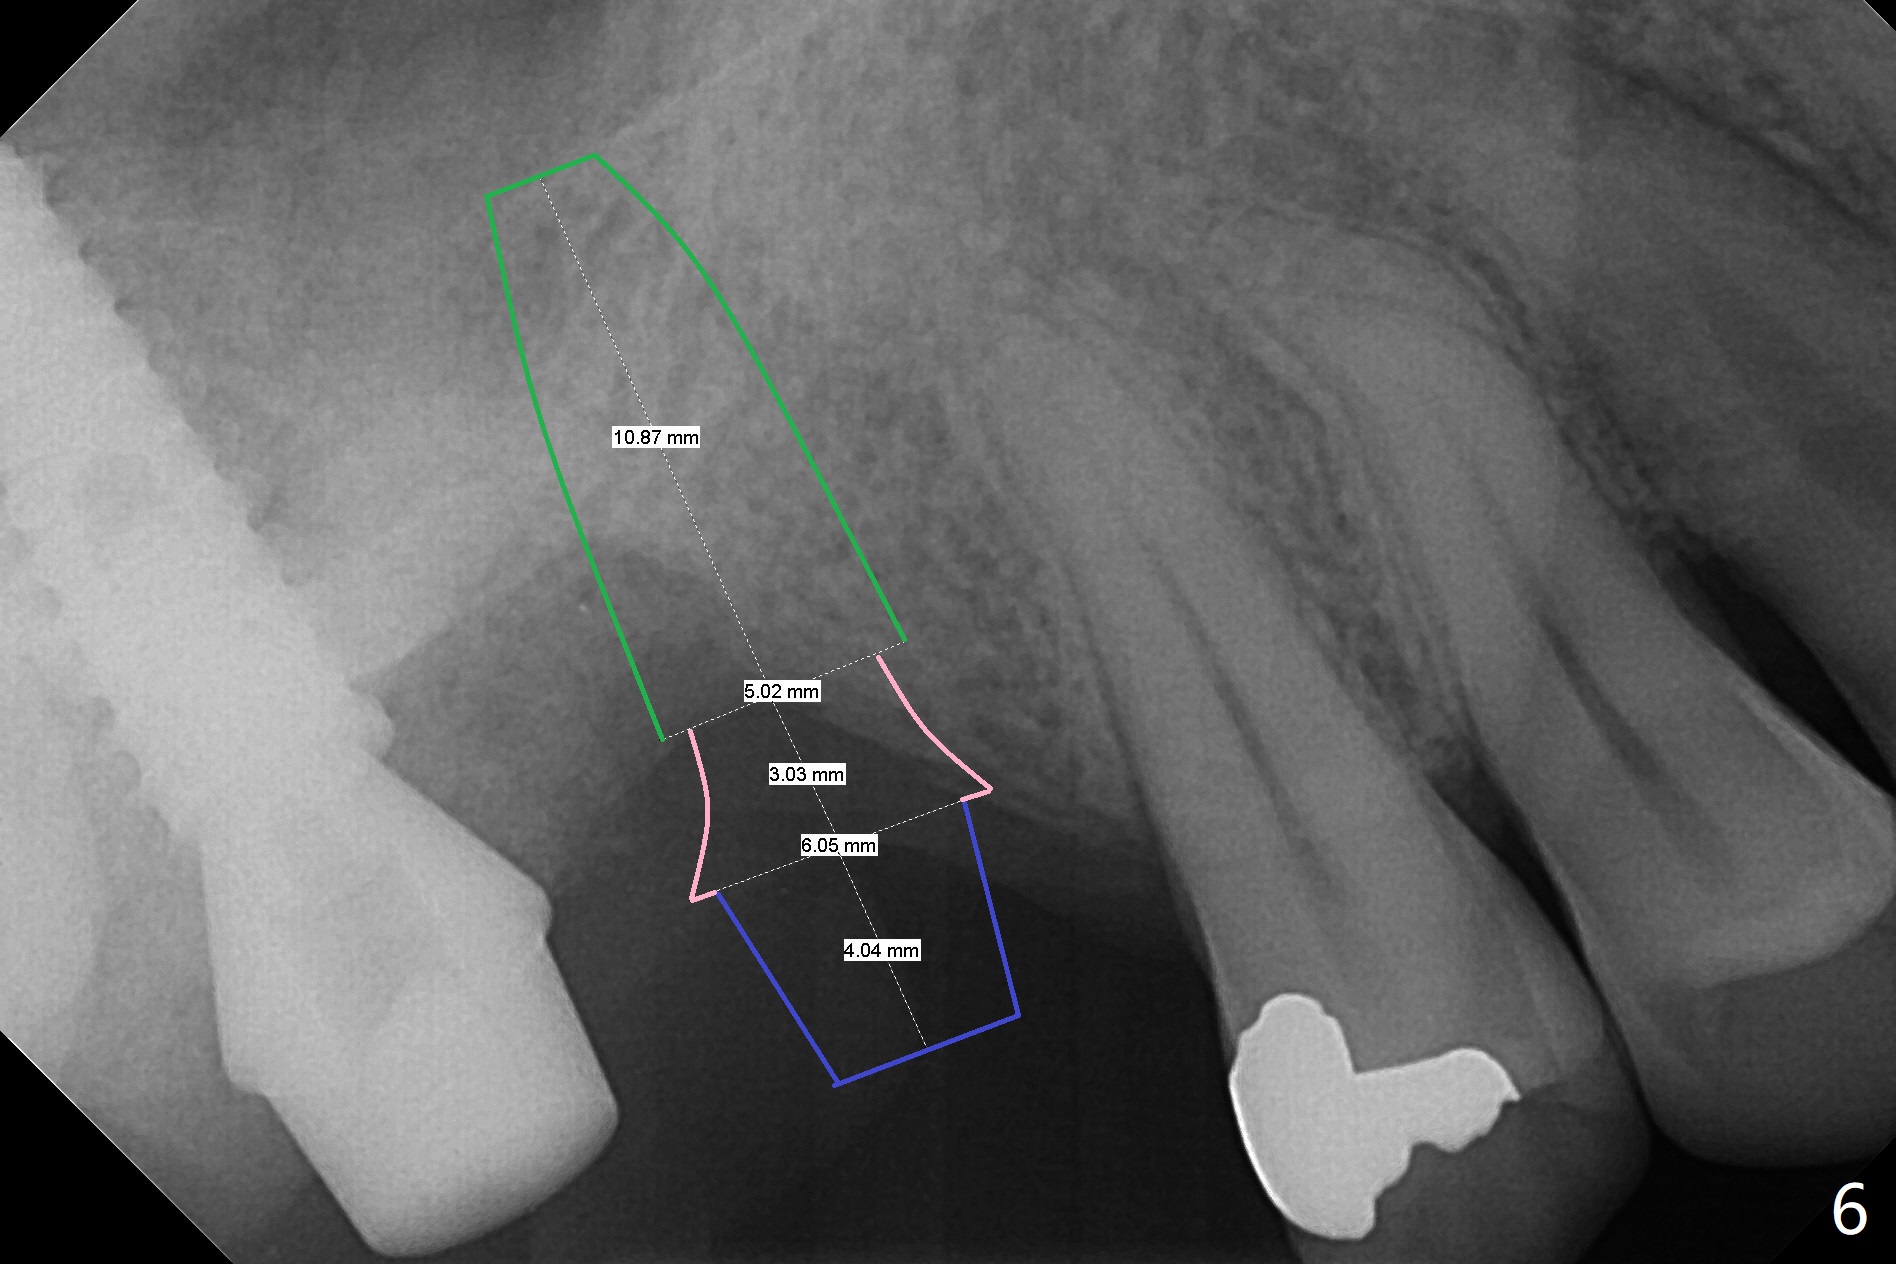
It is difficult to use hard tissue landmark (drill stopper) to make osteotomy in the fresh extraction socket because of socket irregularity and hemorrhage. Once osteotomy is initiated, depth is more reliably controlled with soft tissue landmark (such as gingival margin). This happens in today's case. Without CT information, the osteotomy is established in the buccal slope of the septum of the tooth #2 (after extraction) by using alternatively Magic Sinus Lifter and 4.8 mm Magic Drill (MD). Finally the sinus floor (Fig.1 red dashed line) is lifted after the MD reaches ~16 mm counting from the gingival margin, consistent with preop panoramic X-ray and intraop PA measurement. The 4.5x11 mm dummy implant is close to the impacted 3rd molar (1). Following use of Lindamann bur to move the osteotomy mesially, a 5x9 mm dummy implant is placed away from the 3rd molar (Fig.2 (3: residual root of the 1st molar)). The latter is intentionally not removed in order to maintain osteotomy integrity. A 5x13 mm IBS implant is placed with >50 Ncm; a 6.5x4(4) mm abutment is hand tightened (Fig.3). The remaining large socket is filled with Vera Graft (Fig.4 *). Two months postop, the abutment changes to 6.5x5.7(2) mm without provisional (Fig.5). Nearly 3 months postop, the patient will return for #3 residual root extraction and implant placement with incision (Fig.6). Osteotomy will be initiated in a slope. Prepare surgical round bur for flattening. After placement of a healing abutment, periodontal dressing is to be applied. Take photos to show gingival adaptation to the new abutment without implant exposure at #2.
Return to Upper Molar Immediate Implant, Prevent Molar Periimplantitis (Protocols, Table) CMC Training 2 3 4 Xin Wei, DDS, PhD, MS 1st edition 11/03/2017, last revision 08/14/2018