
,%207.5x4(3),%20more%20bone%20graft.jpg)
,%207.5x4(3),%20more%20bone%20graft.jpg)
|
|
|
|
|
|
|
|
|
|
|
|
|
|
|
|
|
|
|
|
|
|
|||
Place Bone Graft in Step
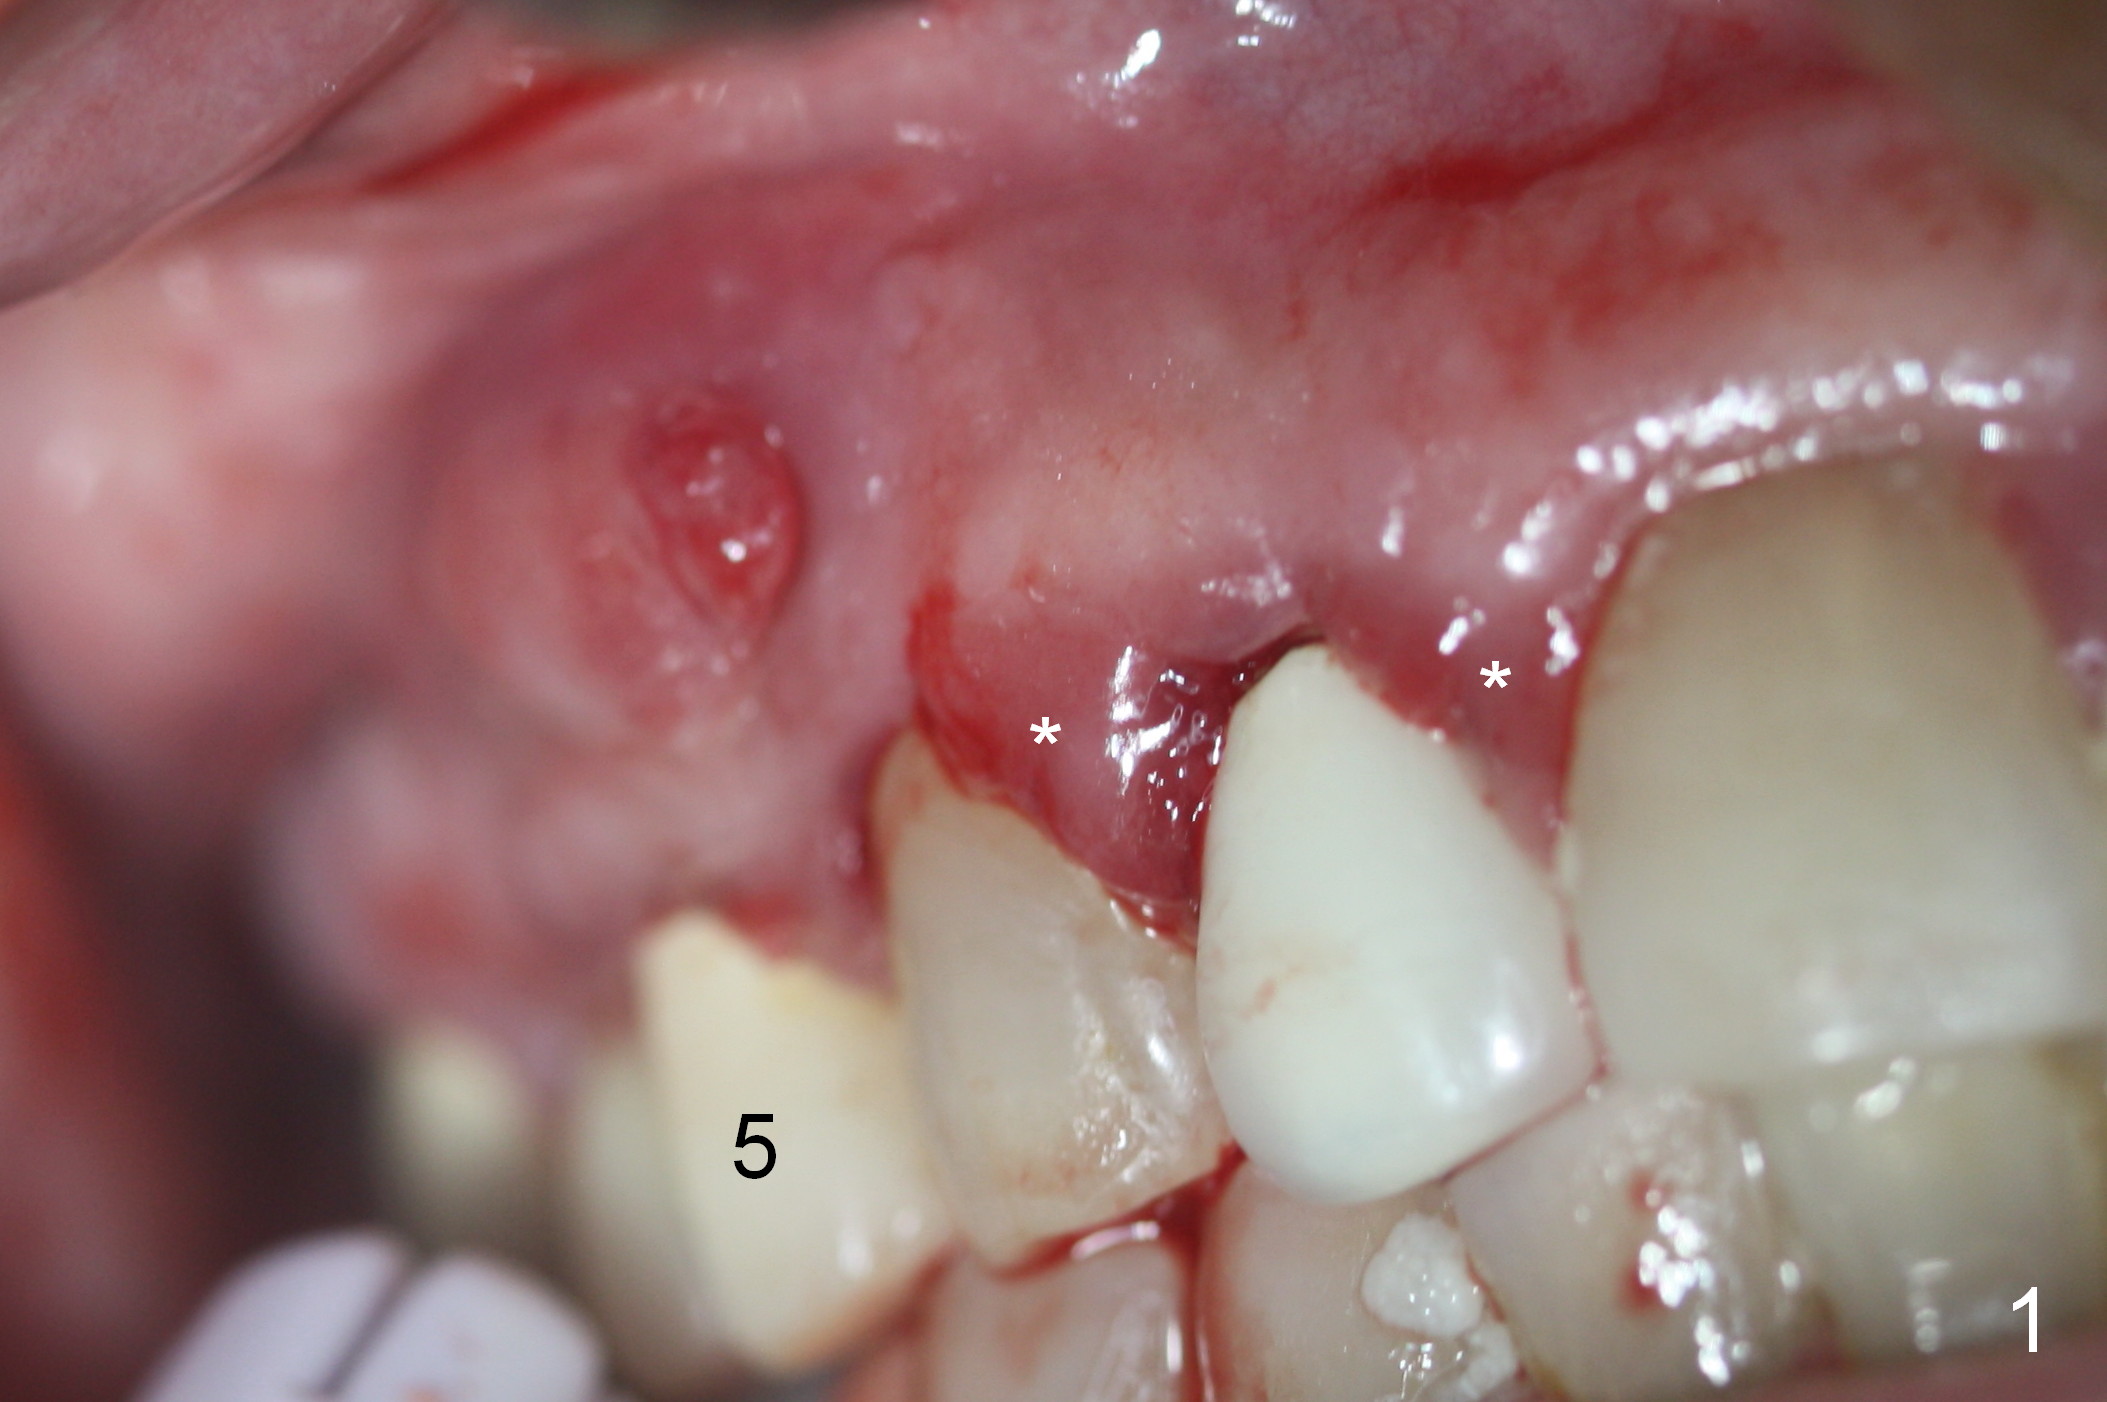
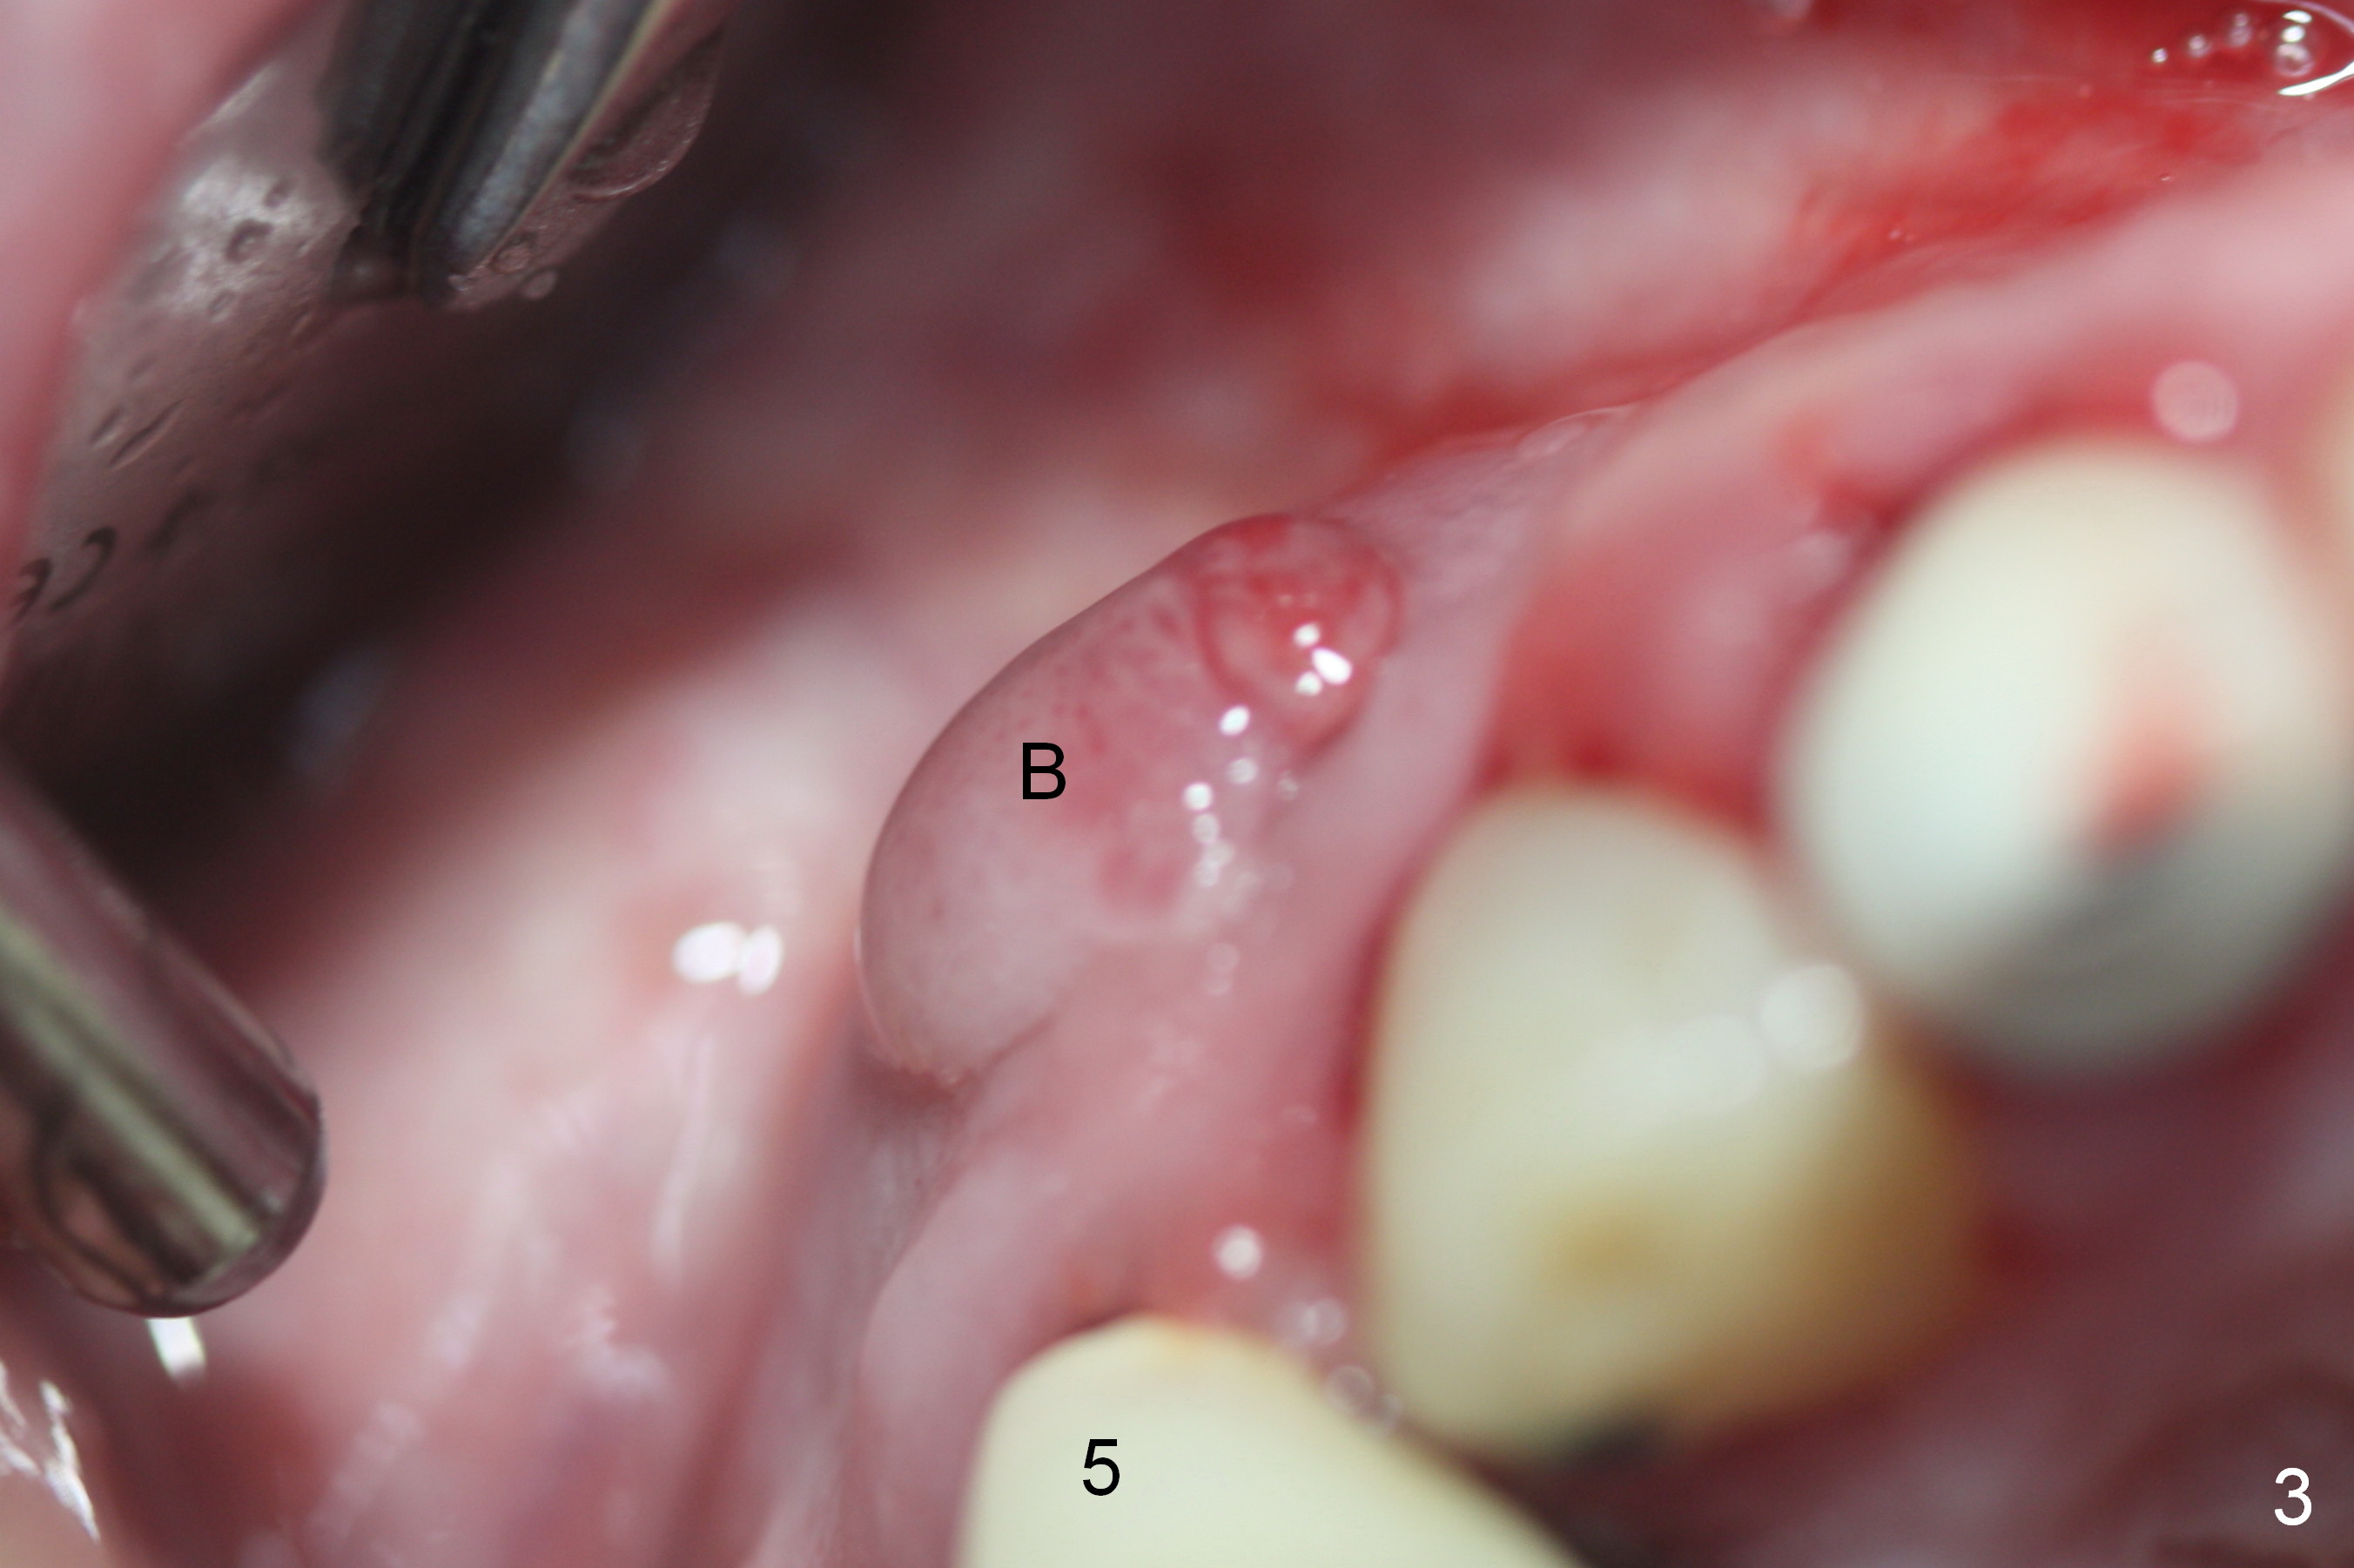
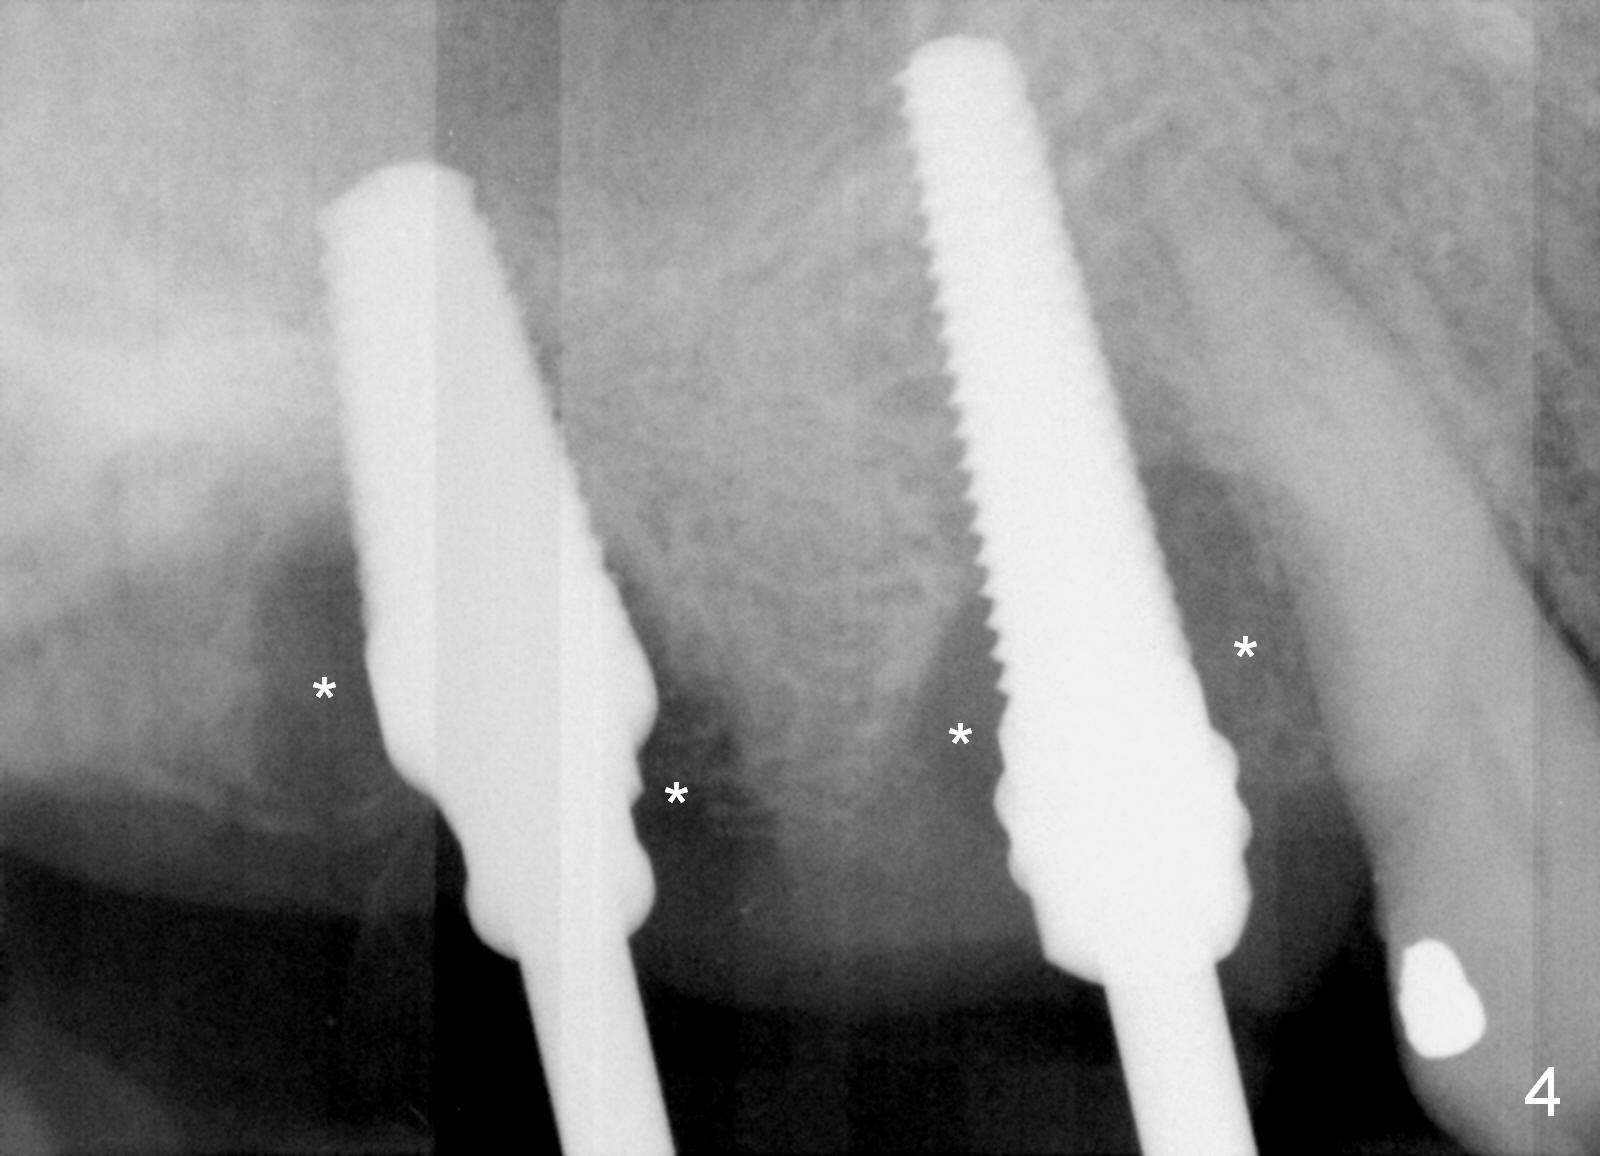
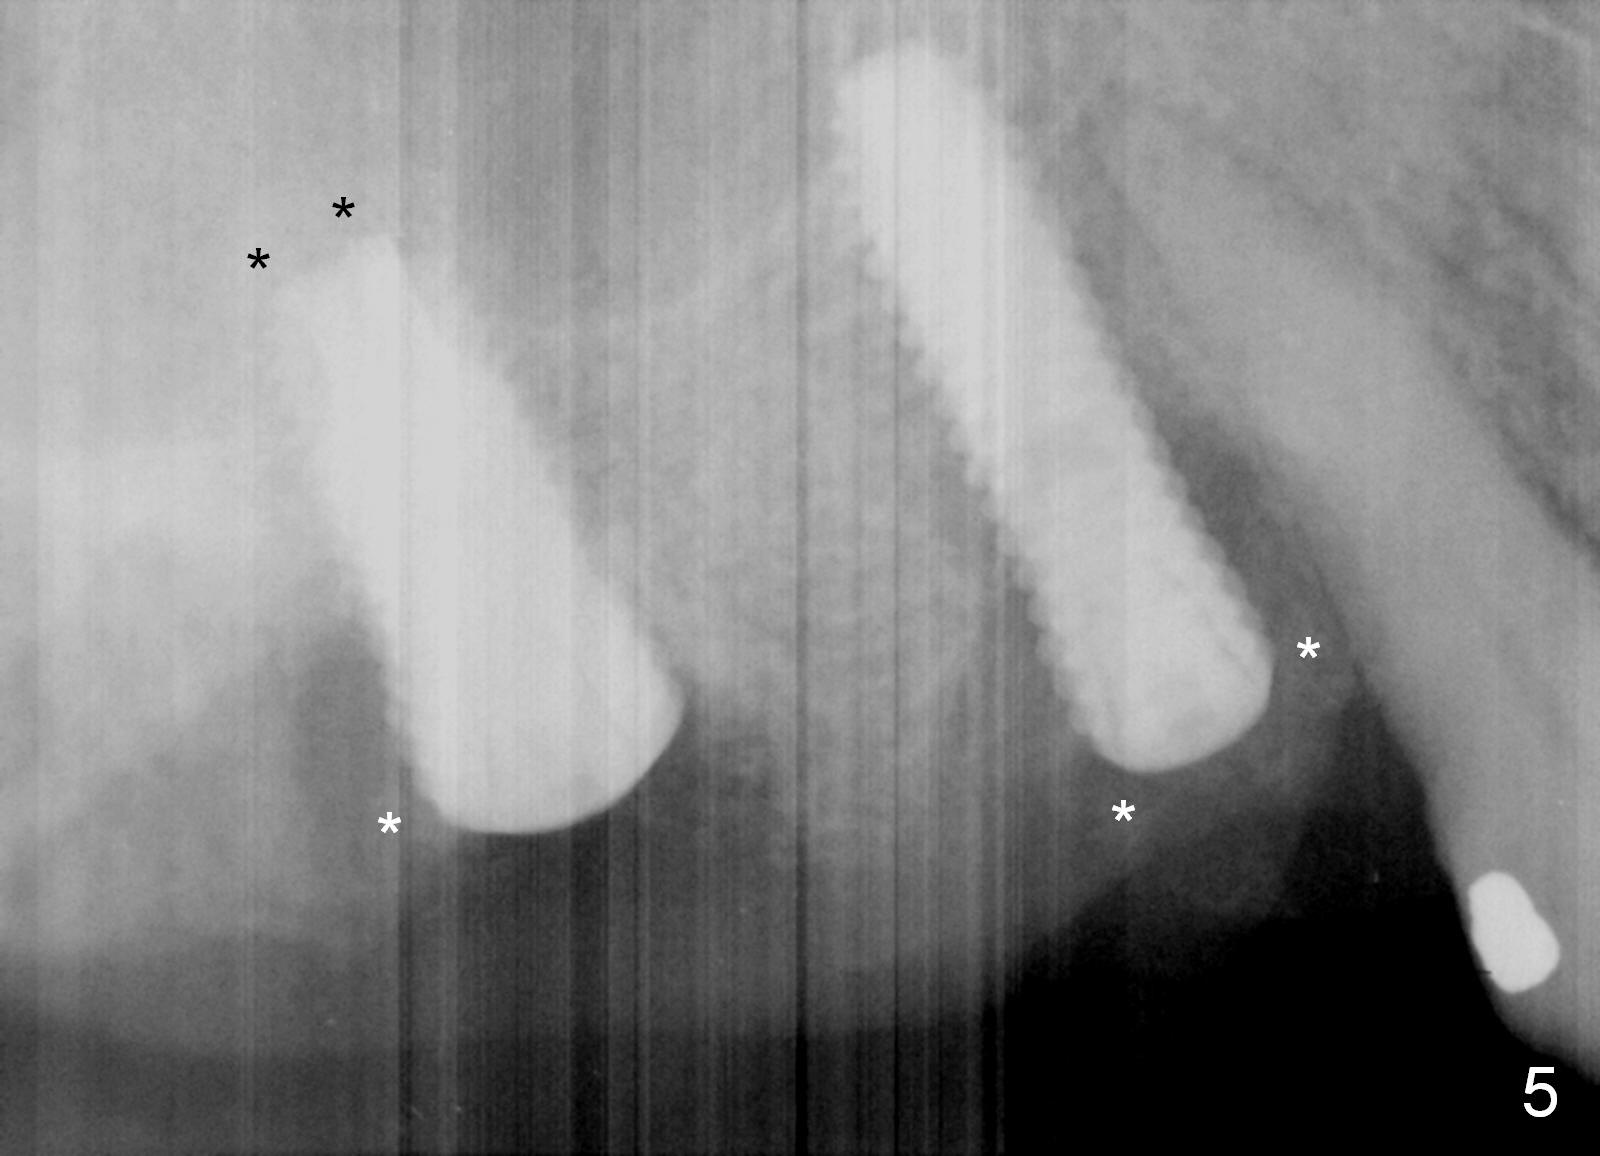
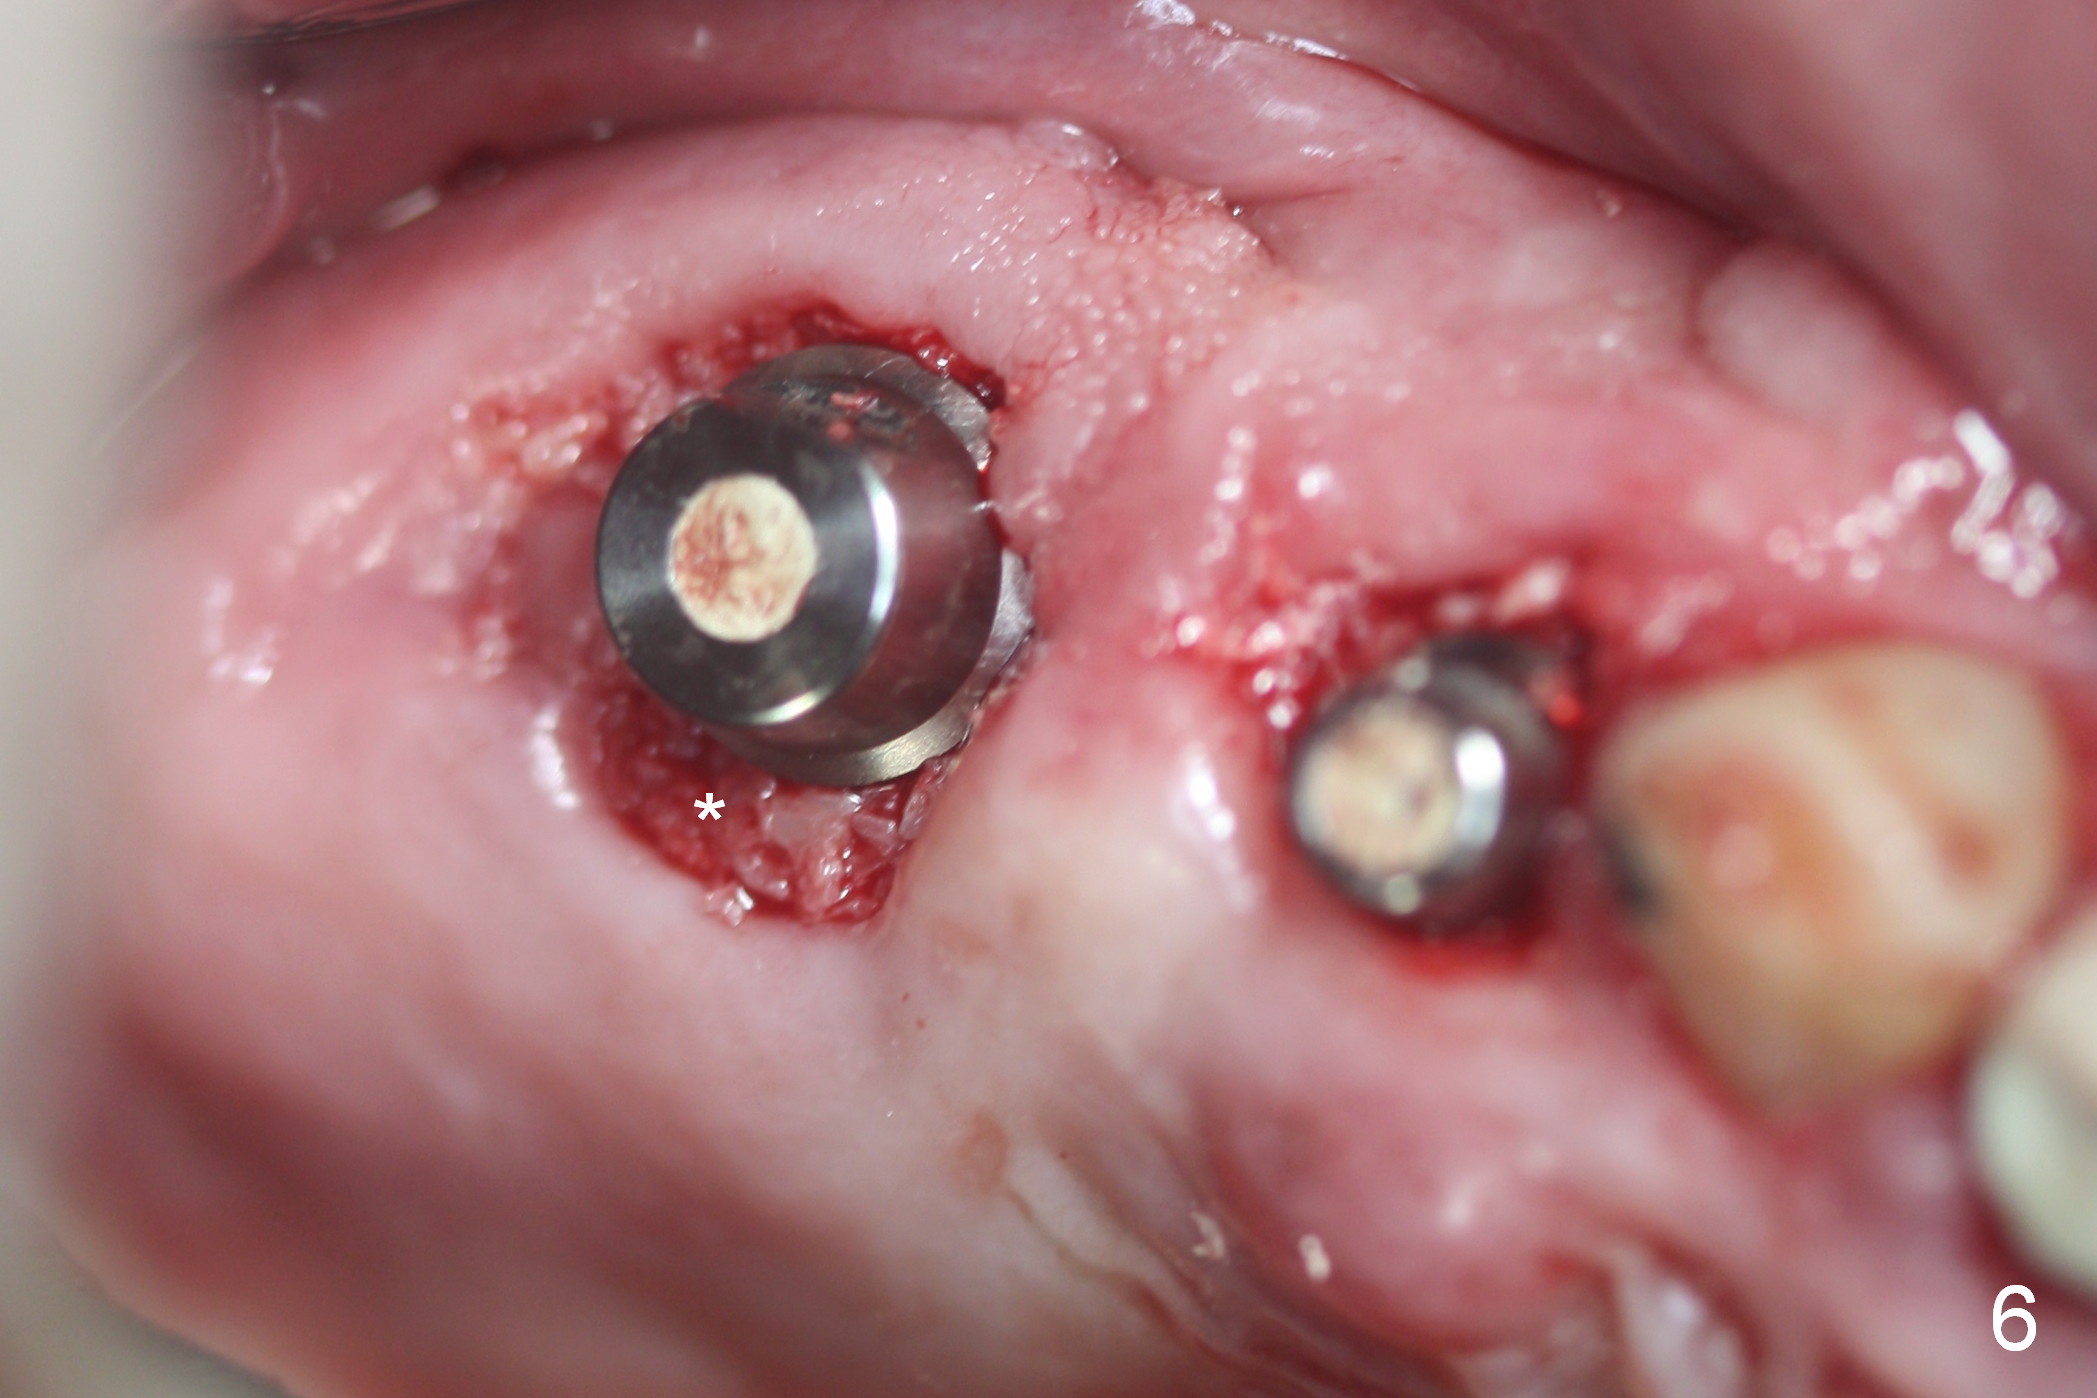
Preop photos show generalized gingival hyperplasia (hypertension med (Amlodipine, Calcium Channel Blocker), Fig.1 *), palatal (Fig.2<) and buccal (Fig.3 B) abscesses originated from the tooth #5. There is a smaller abscess buccal to the tooth #3 (not shown). After extraction, the buccal and palatal plates of the teeth #3 and 5 are found basically non-existent. When taps are placed, large socket defects are evident (Fig.4 *). In addition to sinus lift at #3 (Fig.5 black *), mineralized cancellous and cortical allograft (.5-1 and 1-2 mm) is placed around the implants with healing screws in place (white *). After the healing screws are removed and cemented abutments are placed, more allograft is packed (Fig.6-8 *). Closing the "dead" space in step may prevent immediately postop infection and peri-implantitis.
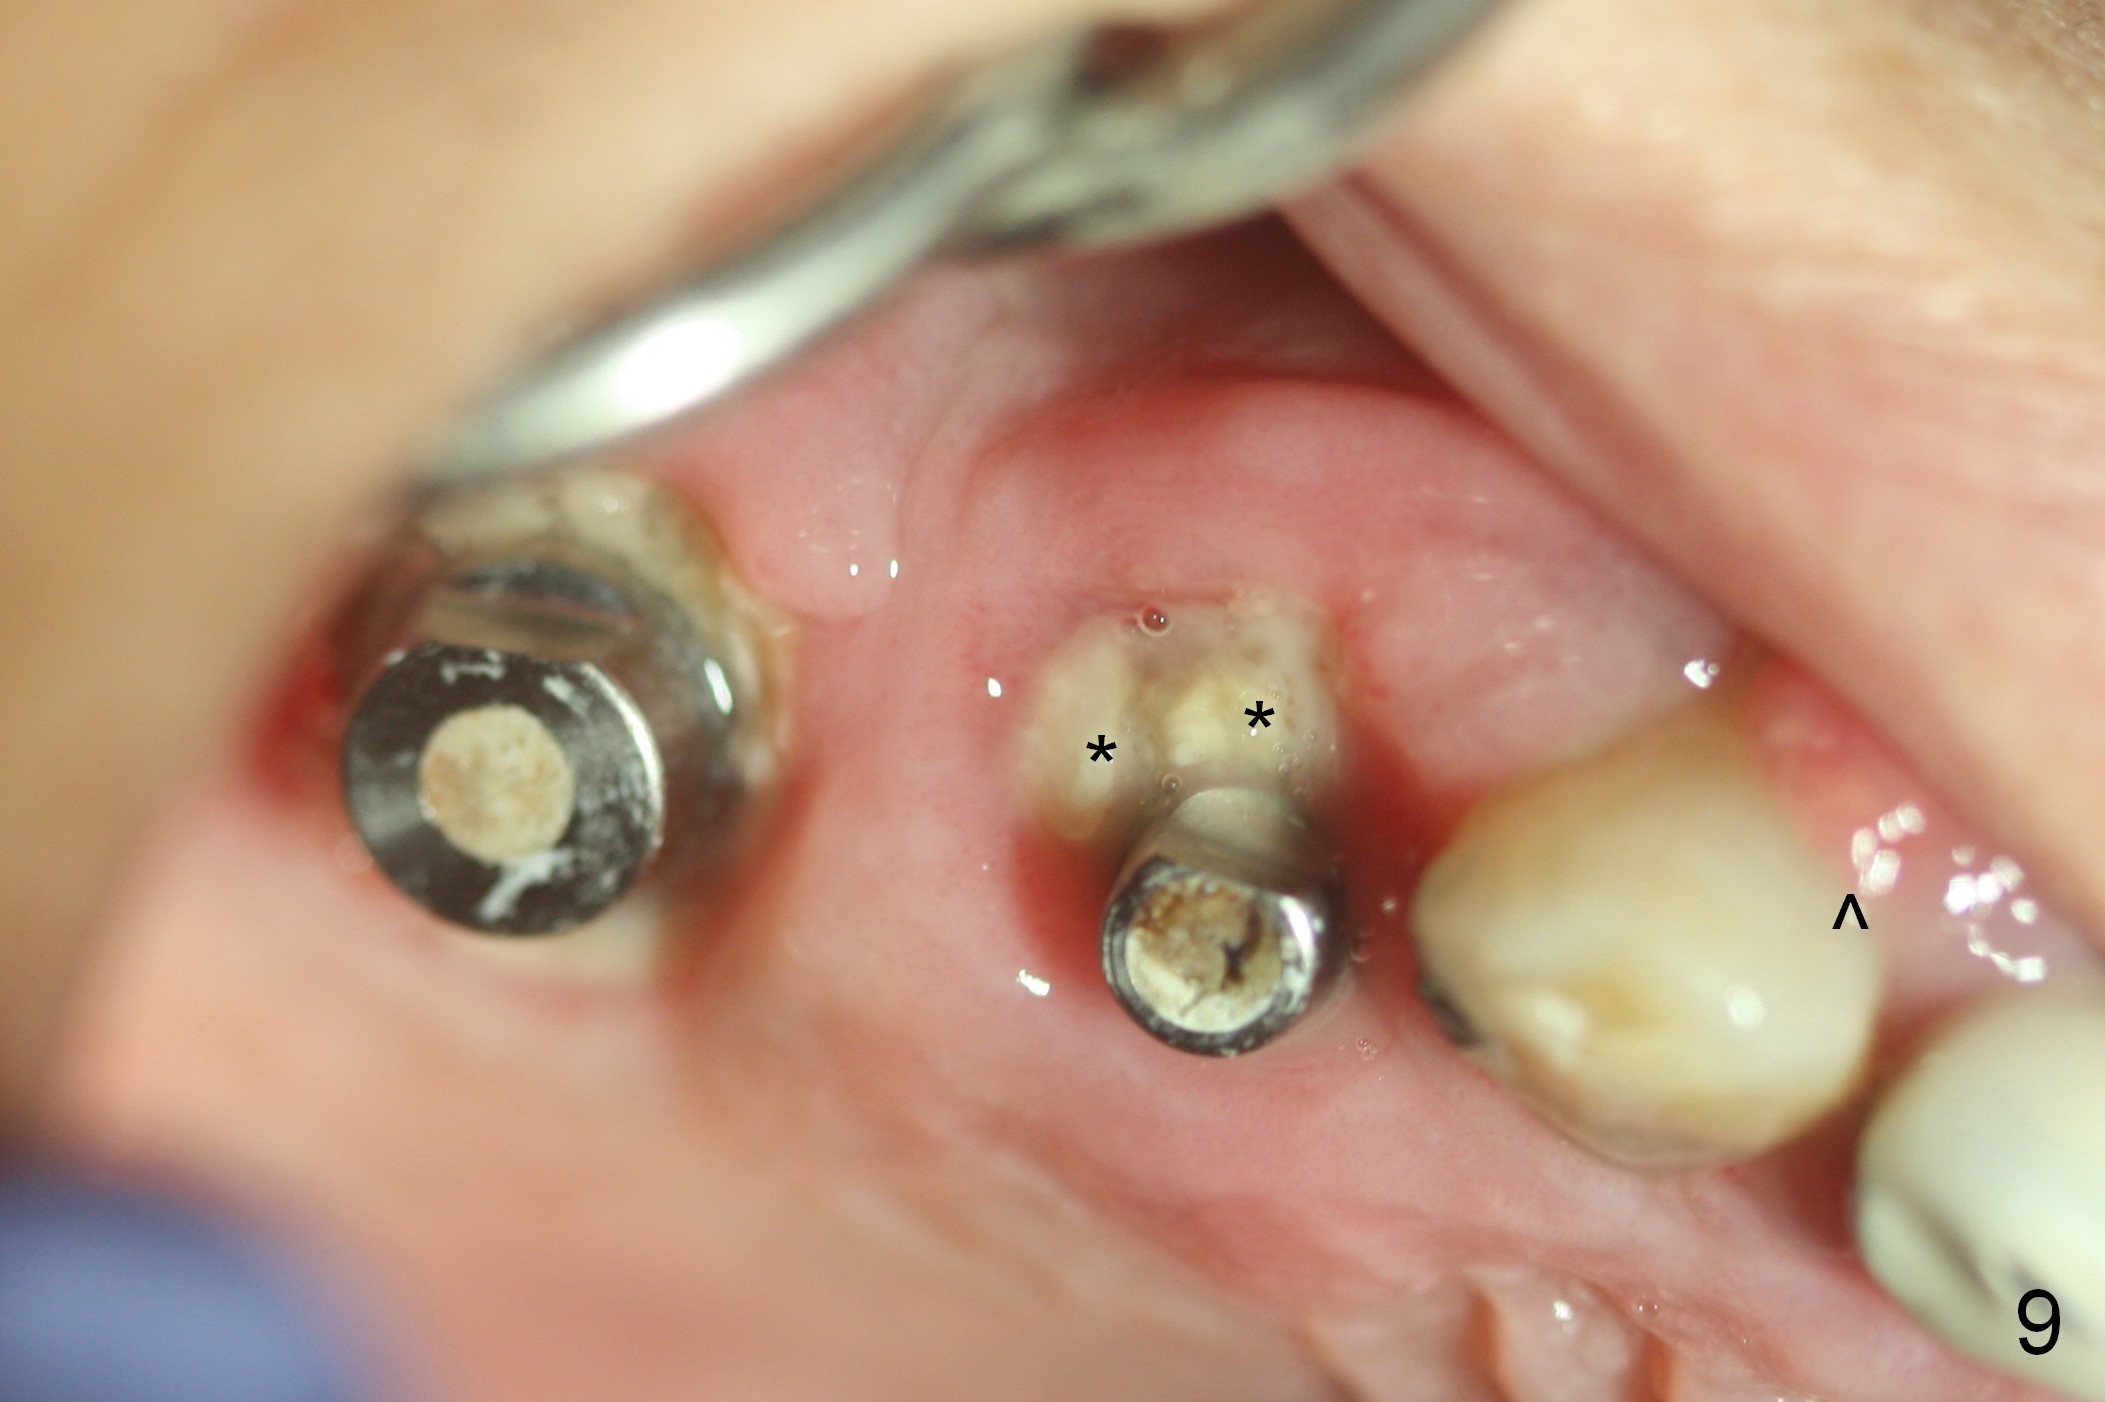
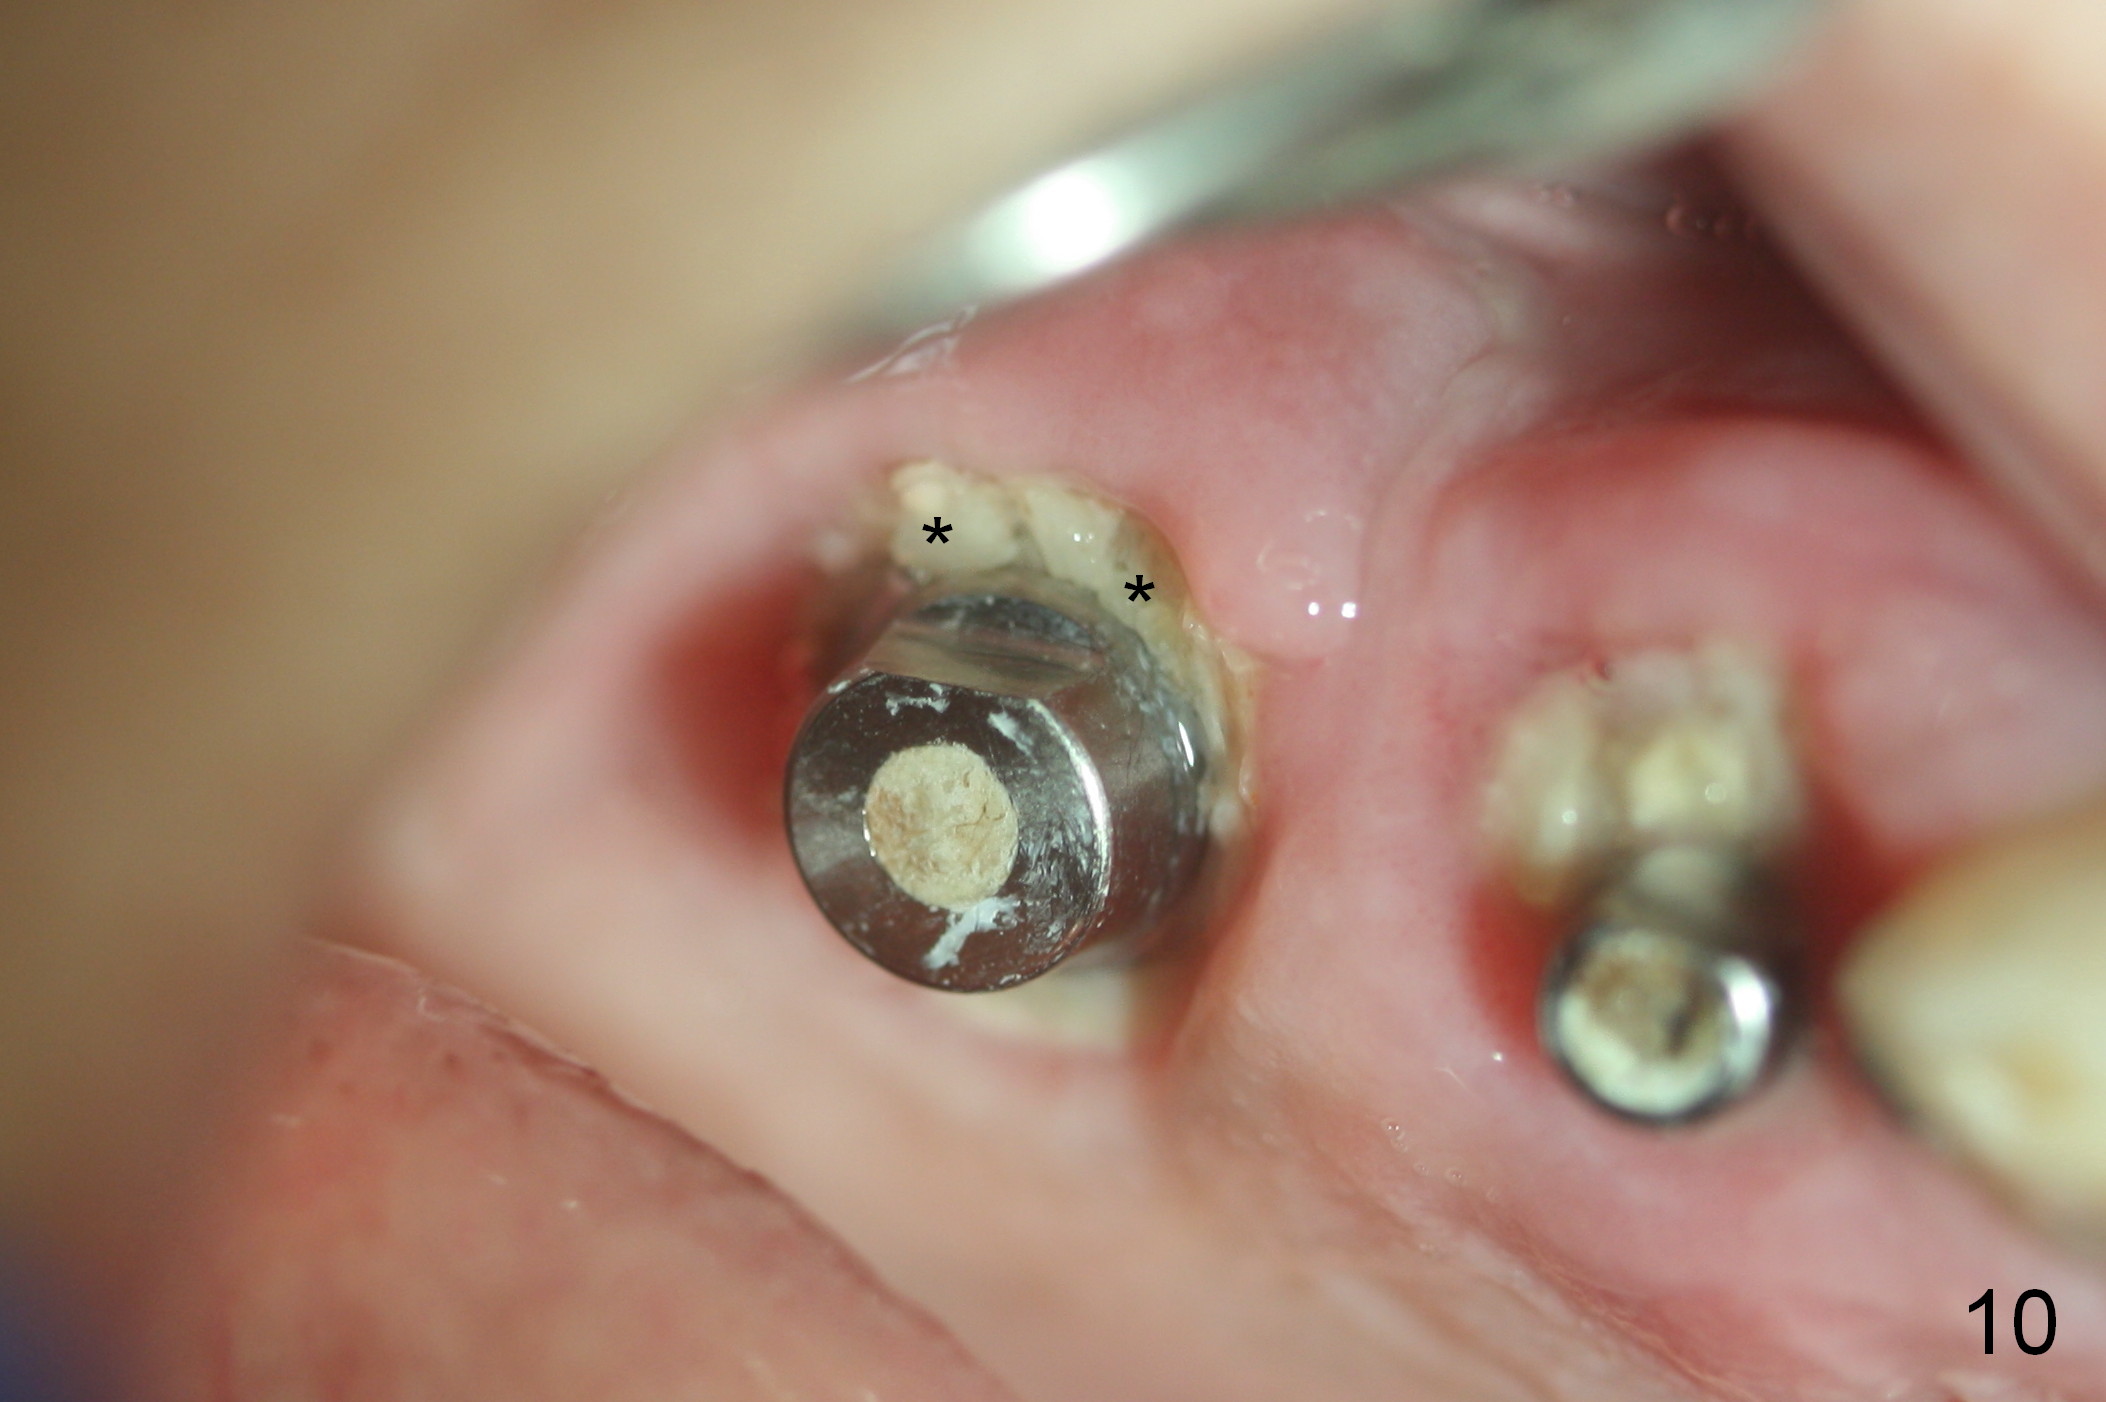
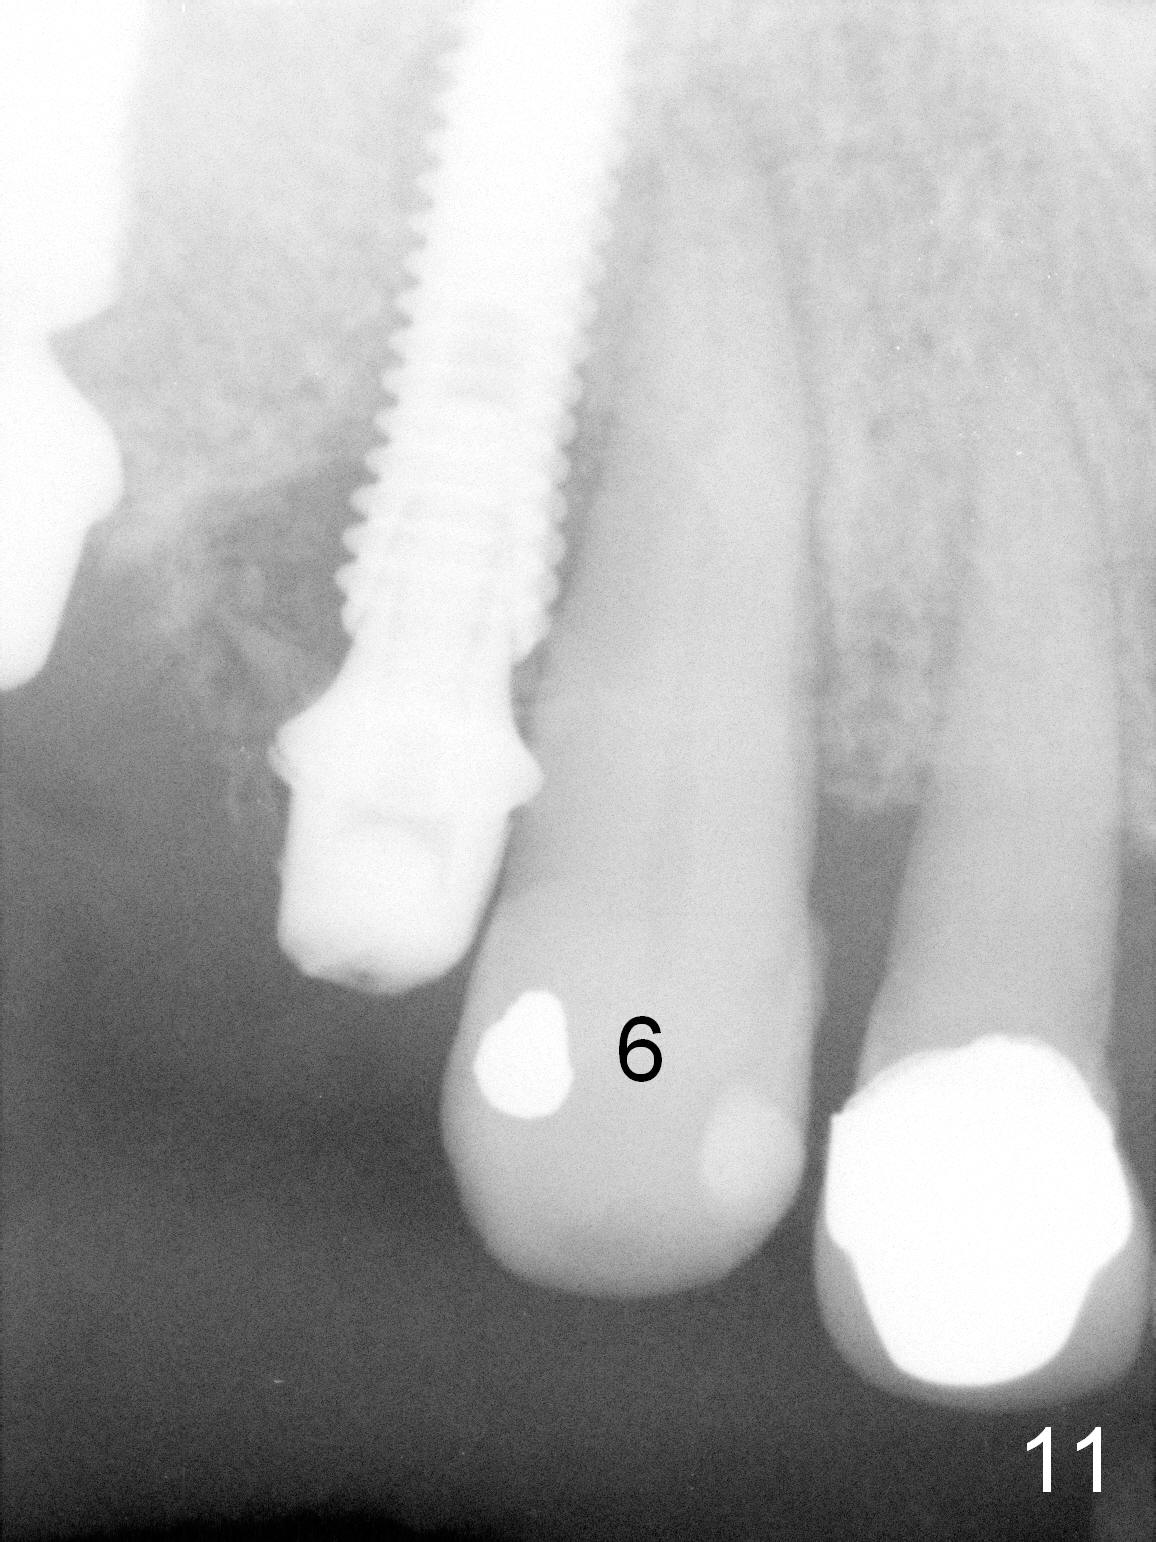
There is no infection around the implants 1 months postop (Fig.9,10). In fact infection mesial to #6 is more severe than preop (Fig.9 arrowhead, Fig.11). When the provisionals are removed for trimming, there is yellowish bone graft around the abutments, which is apparently not incorporated by the body (Fig.9,10 *). It is easily removed by spraying water. The margin of the abutment at #5 is subgingival; an abutment with a longer cuff should be changed next visit.
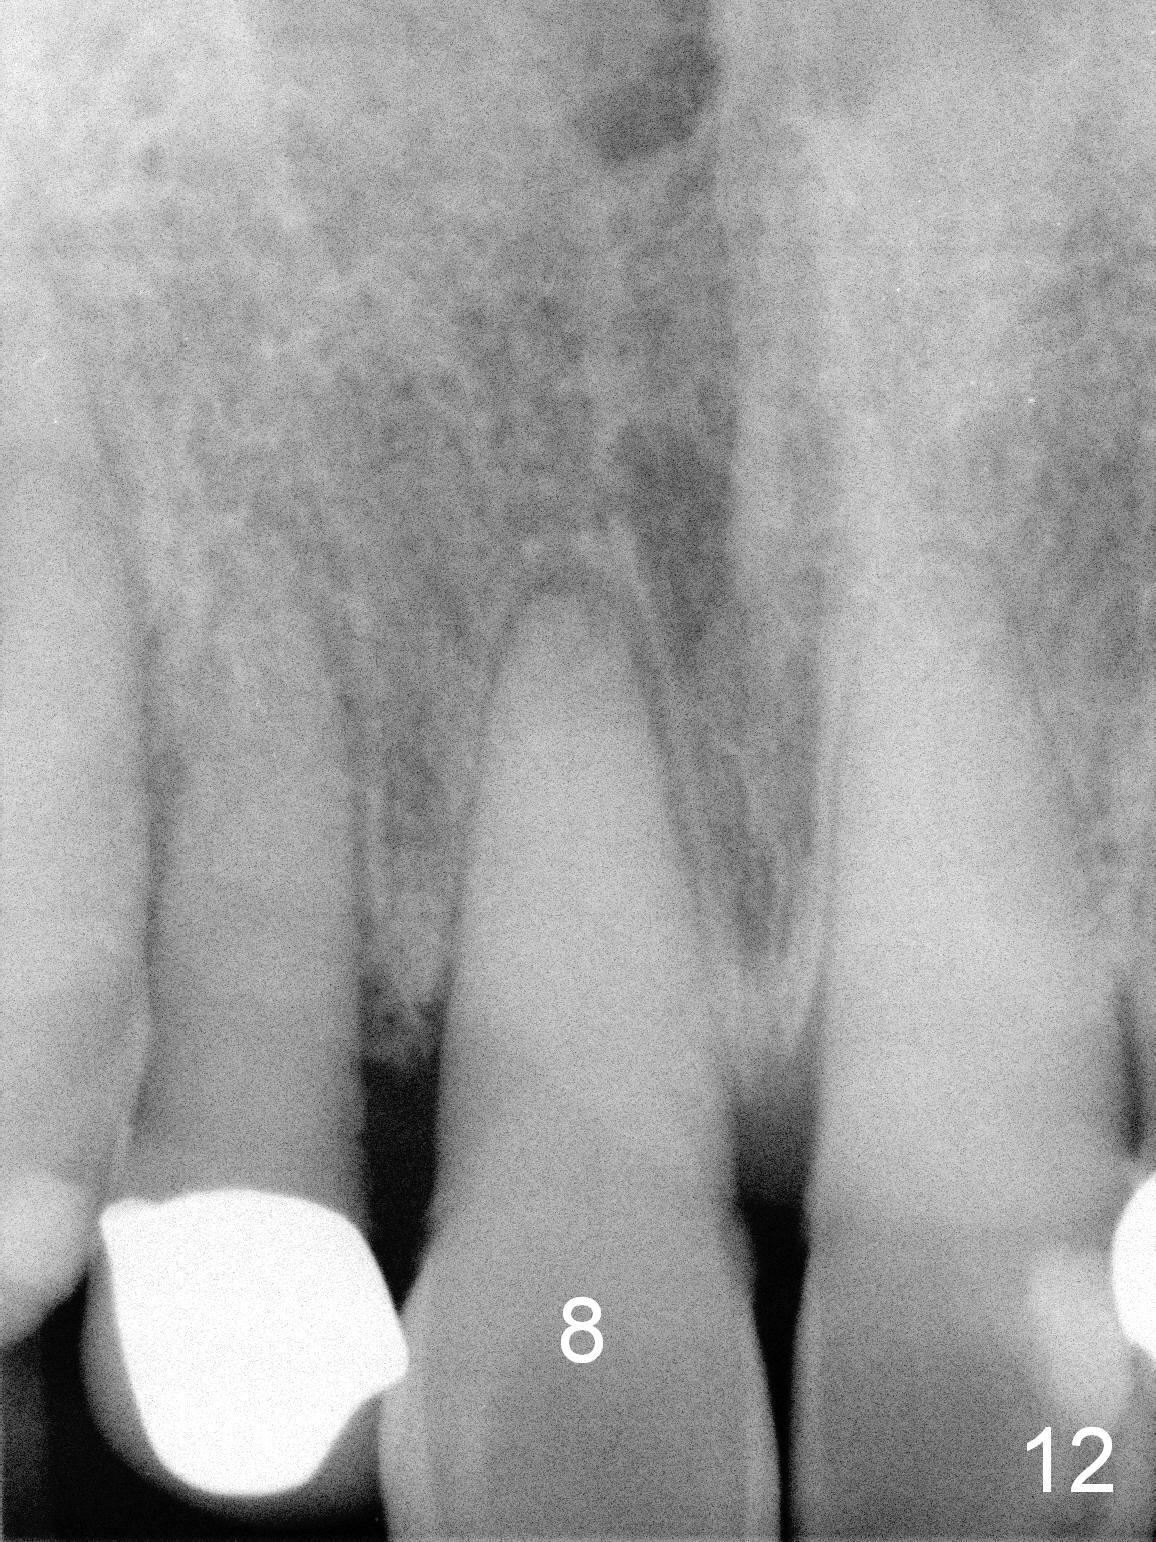
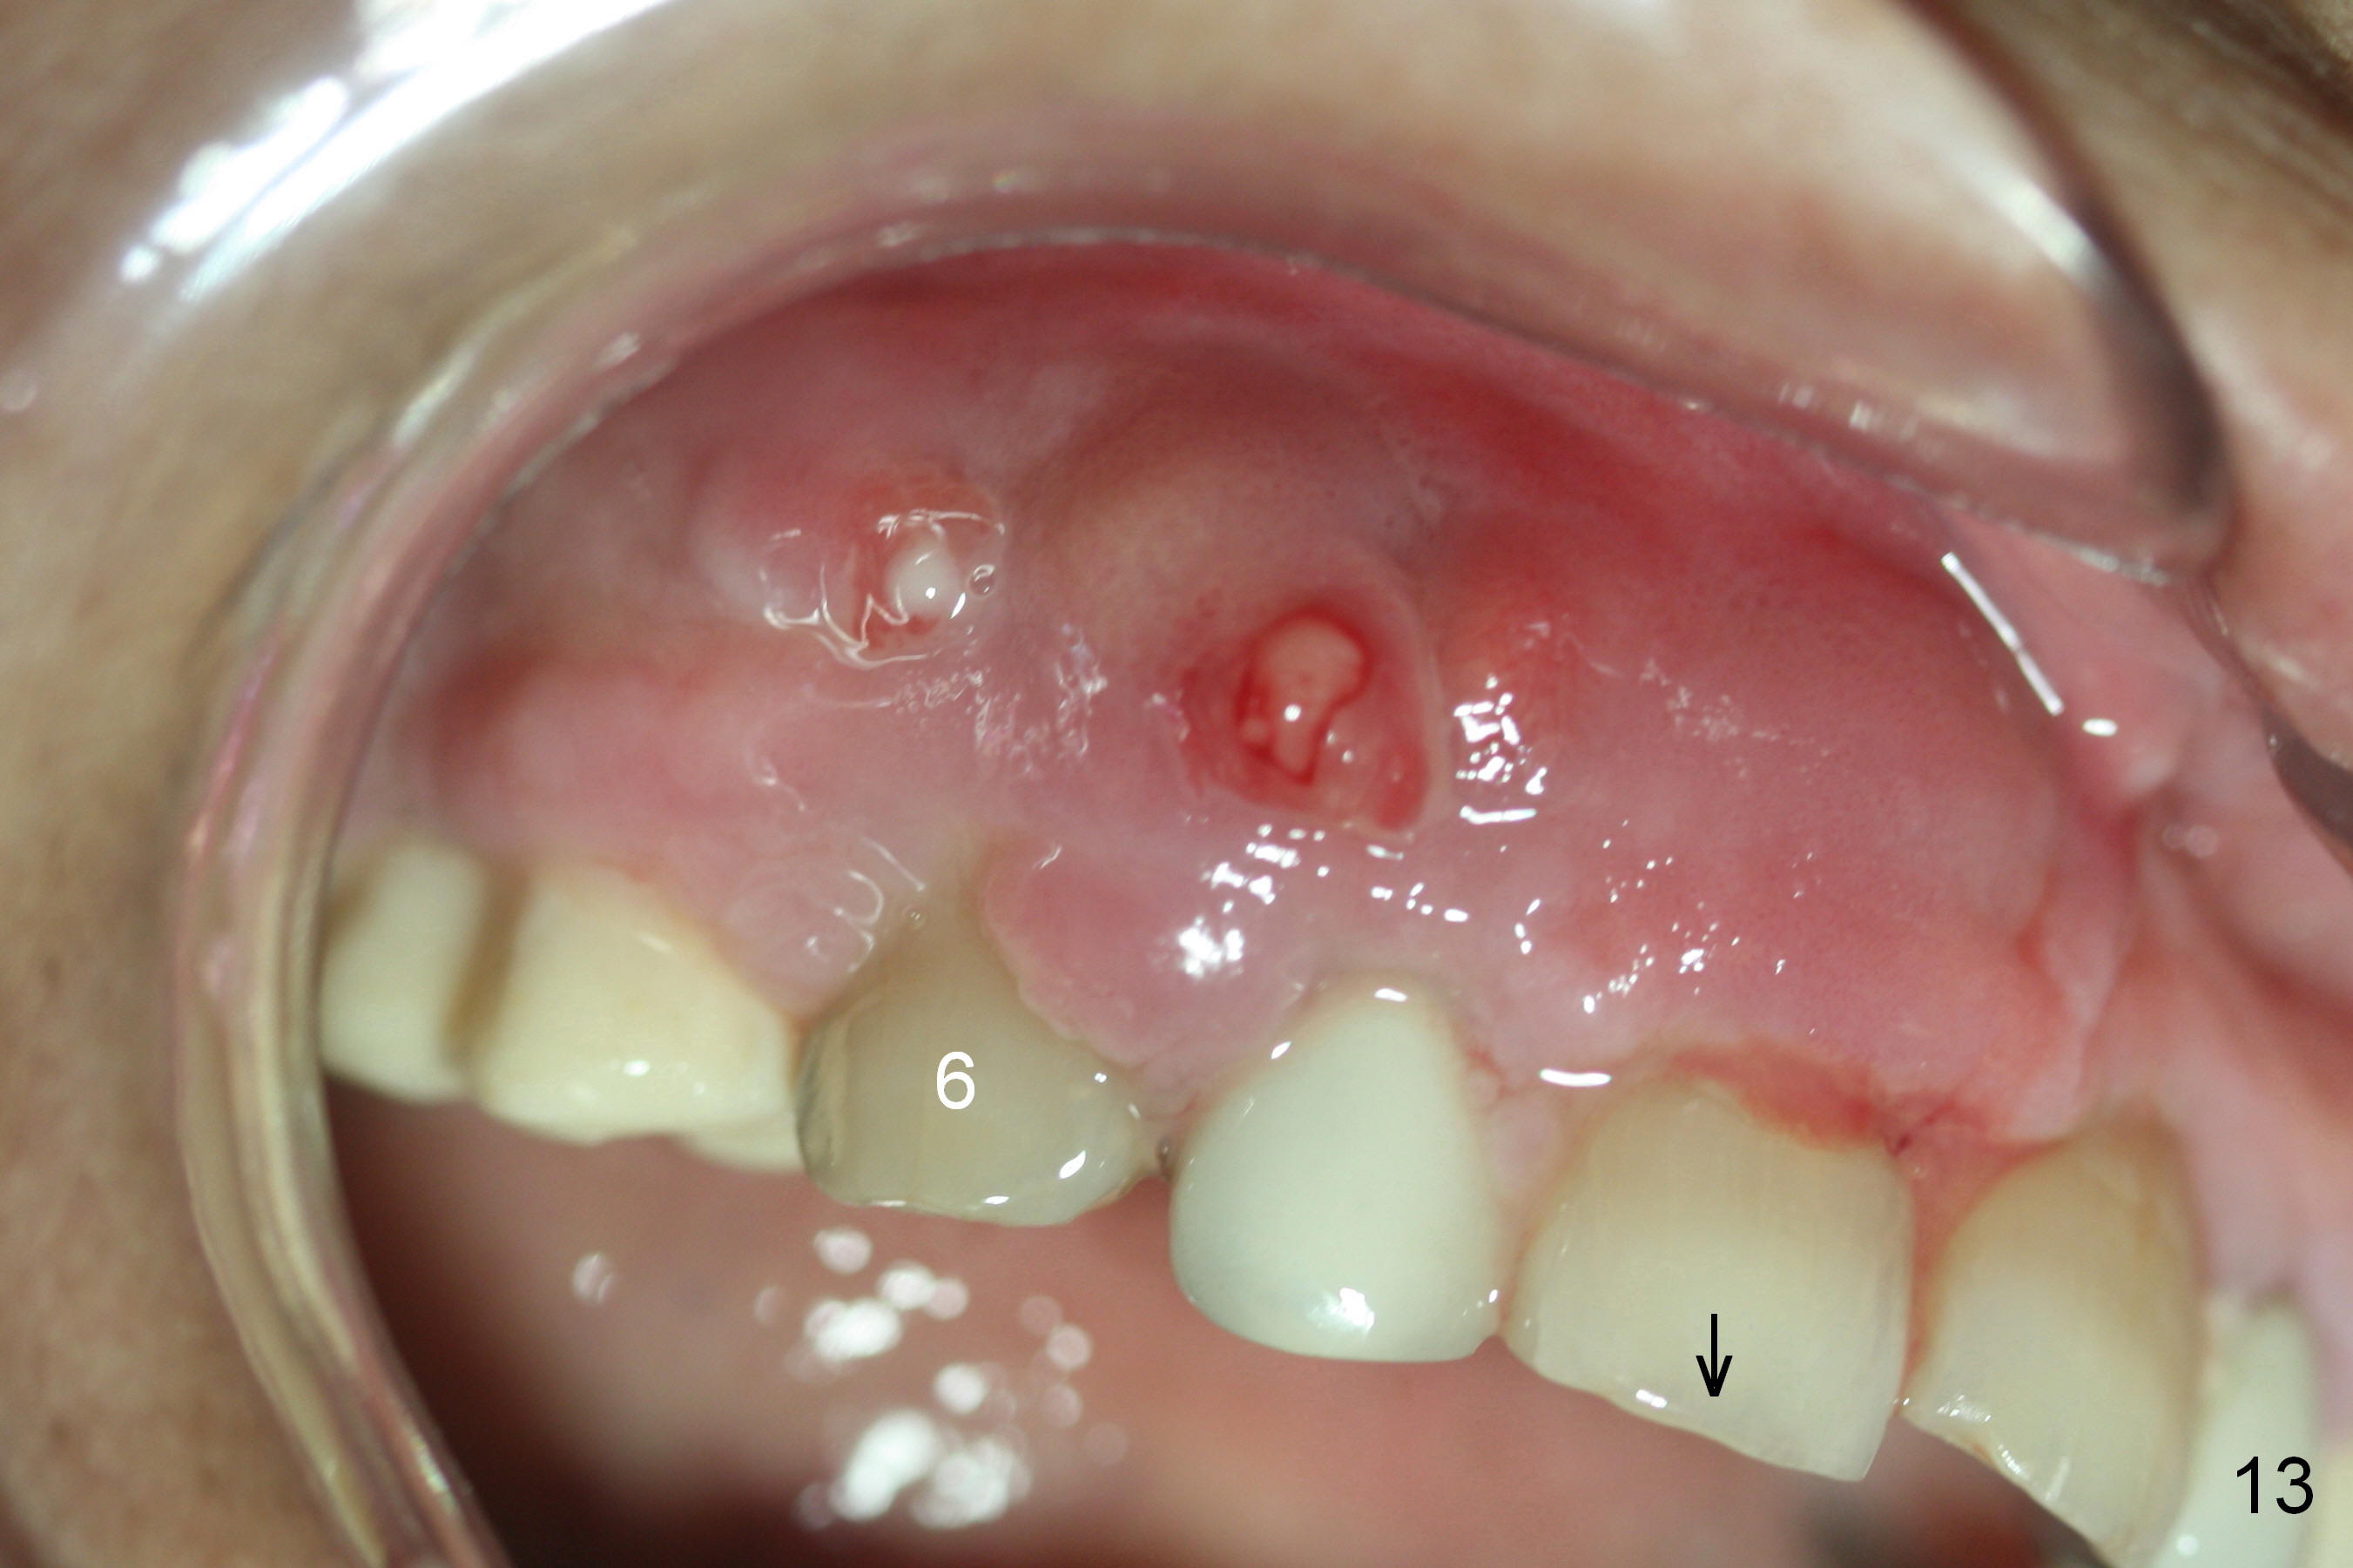
Although the patient feels better after taking Amoxicillin, the infection remains at #6-8 five weeks postop (Fig.12,13). The tooth #8 appears to be extruded with >10 mm buccal pocket. Water pik is recommended. It seems that the teeth #6-8 should be extracted and replaced with implants. Scaling & root planing should be tried first (Fig.11,12).
Two months and a half postop (#3,5 implantation), the patient agrees to have #6-8 to be extracted because of persistent infection. She reports dislodgement of the provisional at #3-5 using water pik. The provisional is found to be mobile. PA shows decrease in bone density around the implant at #5, probably due to proximity to the infection (Fig.14 *).
When the patient returns, take photos to show the infection is more severe than before (Fig.13). After local anesthesia, remove #3-5 provisional to determine whether the implant at #5 has mobility or not. If not, recement the provisional. If yes, place it back to be used a reference for #6 implant placement. Also keep #7 temporarily as a guide for #8 implant placement. After placement of abutments at #6 and 8, remove #7 and fabricate a splinted provisional (#3-8 if #5 implant is mobile; #6-8 if #5 implant is stable). No antibiotic is to be used for socket treatment. Surgical stents are available.
Return to Upper Arch Immediate Implant,
Immediate Posterior Provisional,
Professionals
Xin Wei, DDS, PhD, MS 1st edition 03/08/2016, last revision 05/30/2016