

%20later.jpg)
|
|
|
|
|
|
|
|
|
|
|
|
|||
Guided Sinus Lift
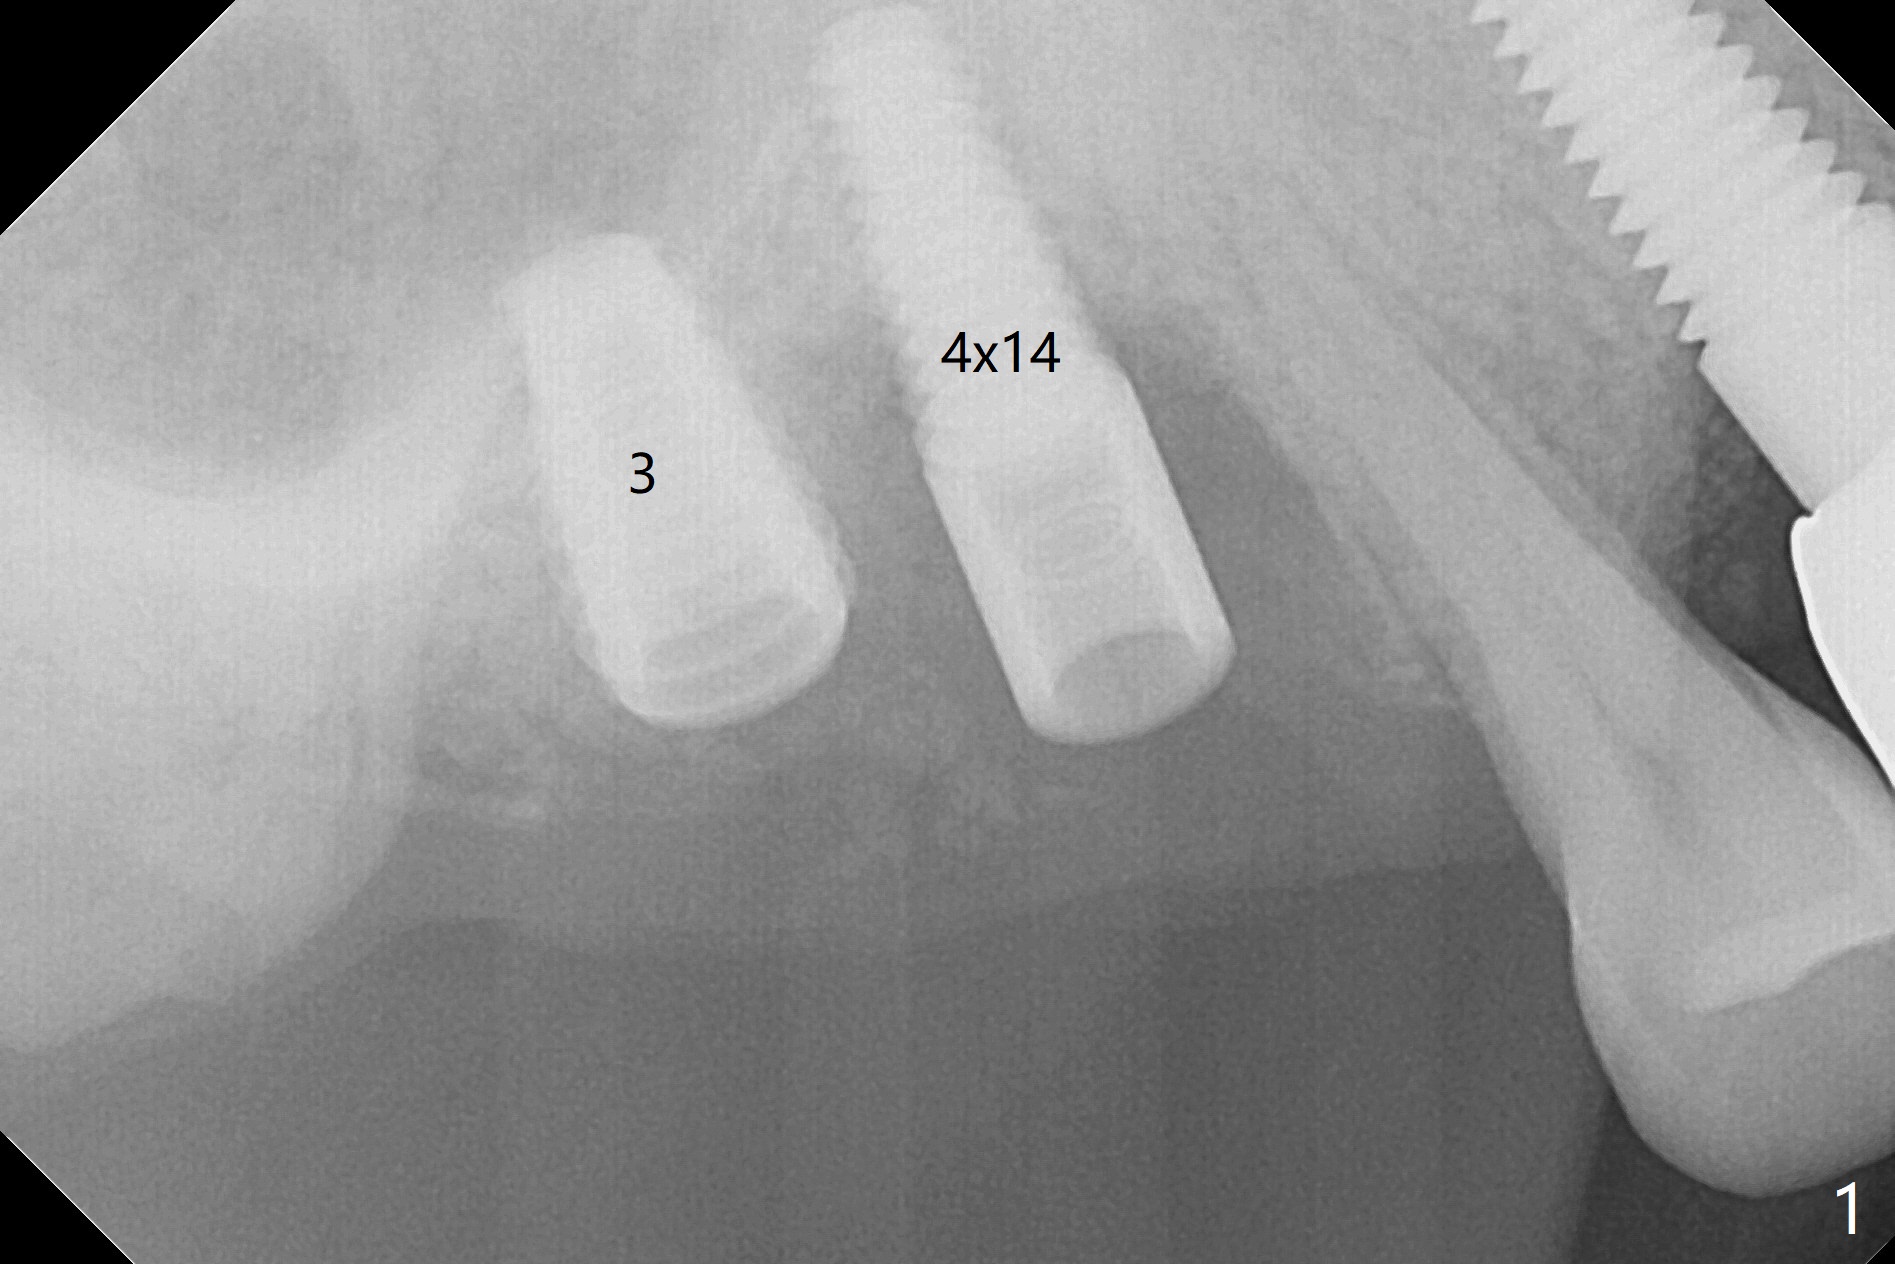
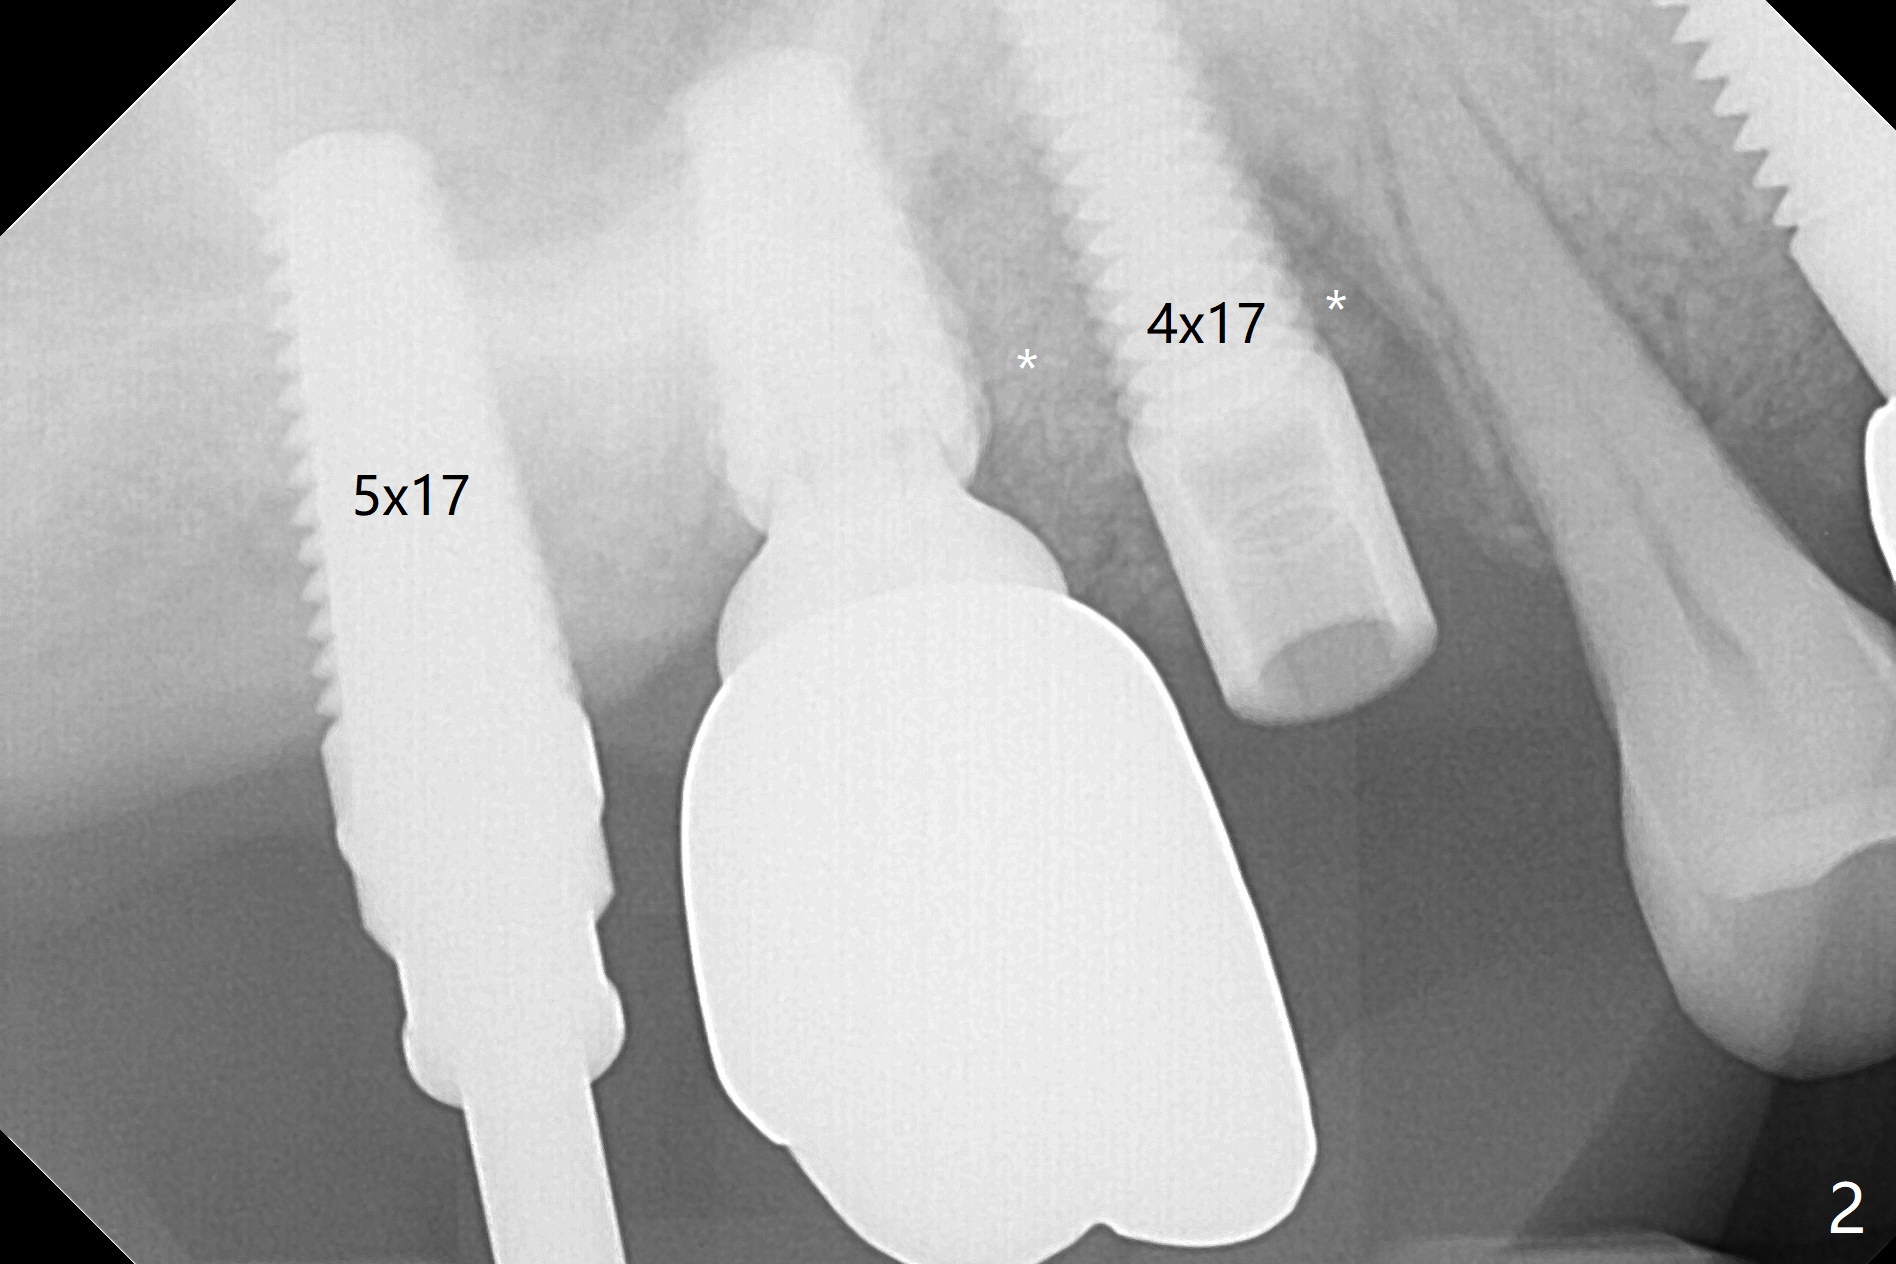
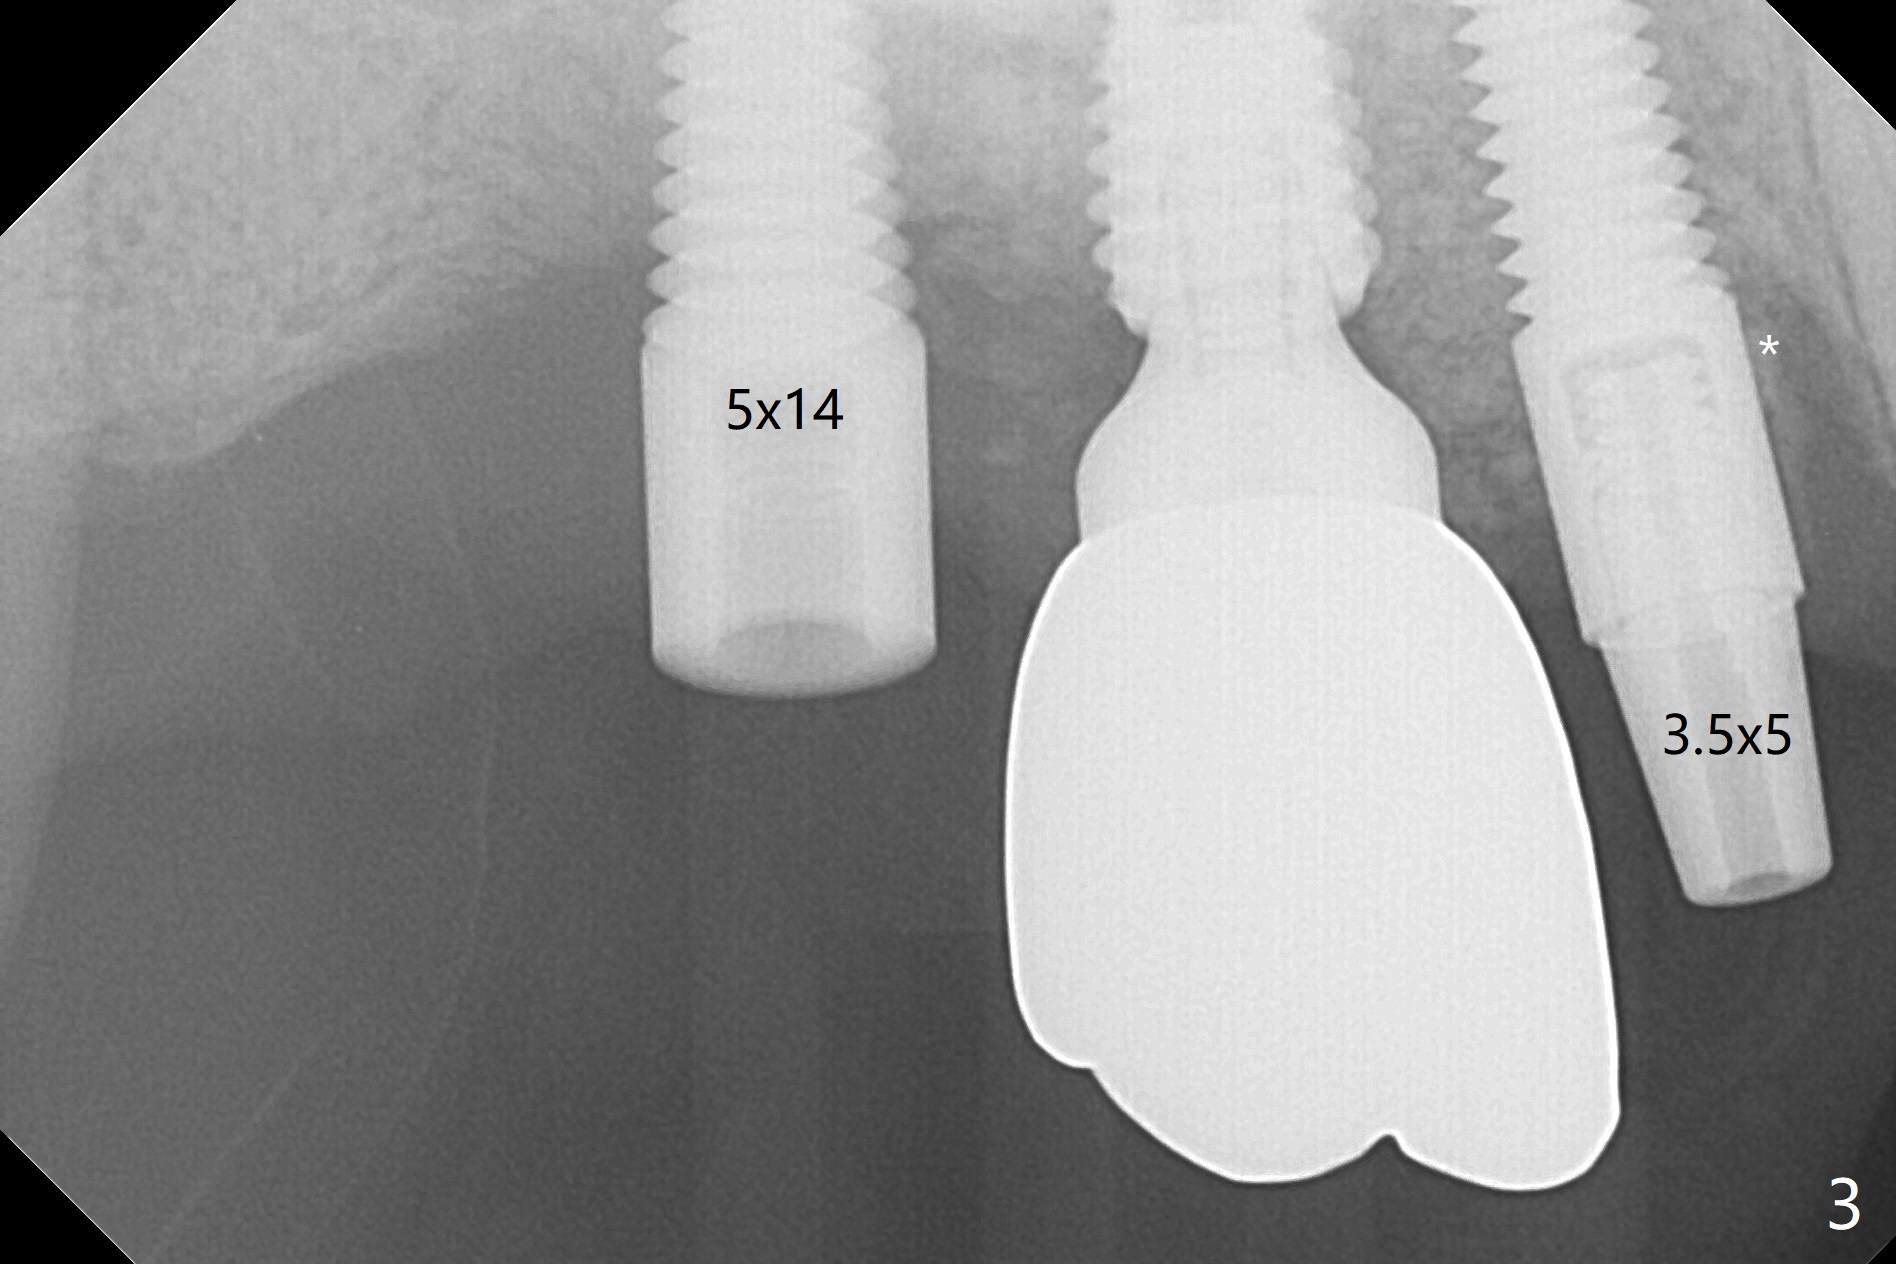
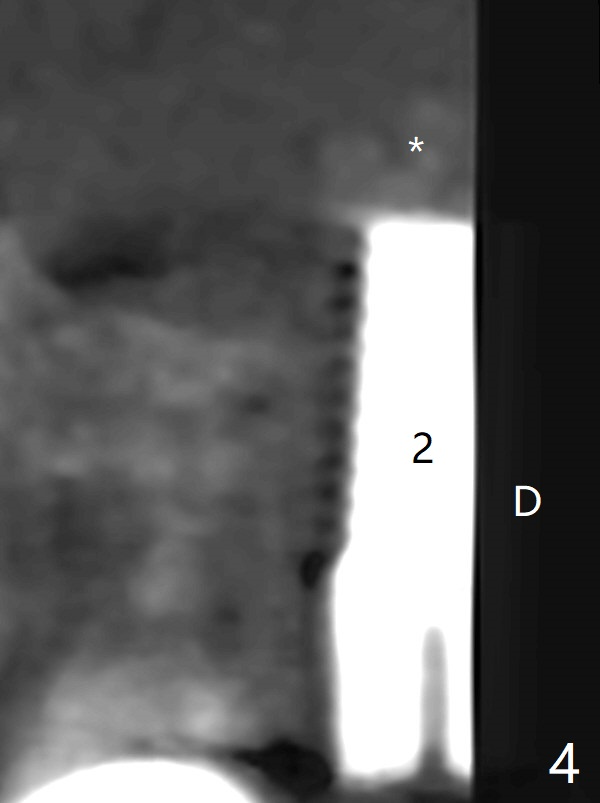
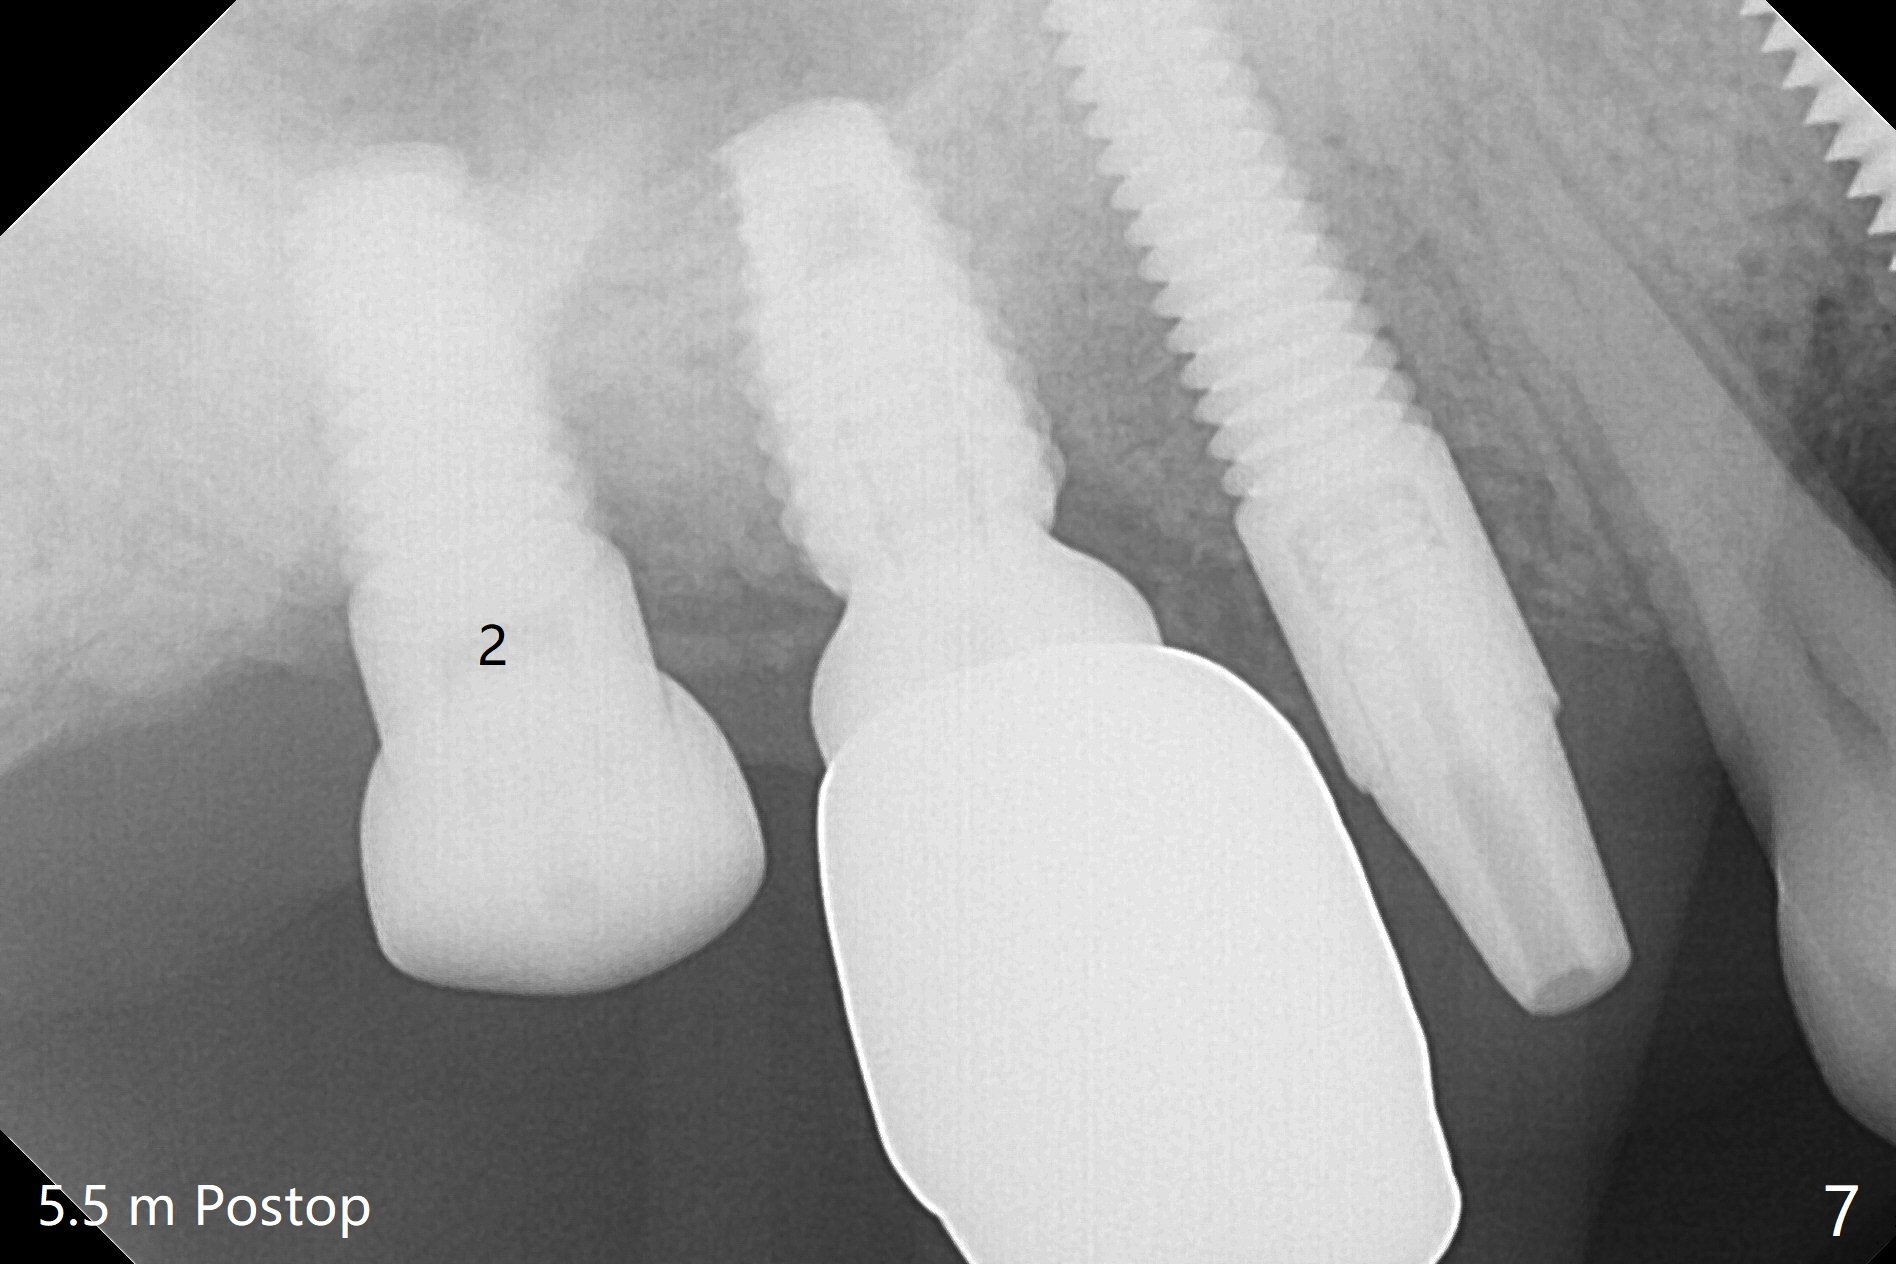
After osteotomy using bone-level implant guide at #4, the crown and abutment at #3 has to be removed to place a 4x14 mm tissue-level dummy implant because of the narrow space of #4 and implant placement angulation (Fig.1). Following initial placement of a final 4x17 mm implant and bone graft (Fig.2 *), the crown and abutment of #3 and the guide are reseated for correct implant trajectory. The guide has to be removed for final depth control. With the same mode, a 5x17 mm tissue-level tap is used at #2 following bone-level osteotomy with guide. A 5x14 mm tissue-level implant is placed with >50 Ncm (later placed deeper), while more bone graft is inserted mesial of #4 implant with a 3.5x5 mm abutment (Fig.3 *). Bone graft is introduced into the sinus using guided sinus lift kit (Fig.4,5 (CT sagittal and coronal sections)) * (D: distal, P: palatal)). The coronal half of the implant at #4 is covered by bone graft (Fig.6 *) buccal (B) and palatal within the deep socket. The implants at #2 and 4 seem to have osteointegrated nearly 5.5 months postop (Fig.7,8 (BW)). A 4.5x5 mm unipost is later placed at #2 with long chamfer margin. It appears that the abutment at #3 is wide. The hex is worn. It changes to a 5.5x7(4) mm one. After abutment adjustment for parallelism, a provisional FPD is fabricated. The latter will be adjusted for papilla formation between implants to reduce food impaction.
Return to
Upper
Molar
Premolar Immediate Implant,
Trajectory, SkKisaeHPDU-t=197
6
Xin Wei, DDS, PhD, MS 1st edition
04/30/2019, last revision
11/17/2019