Close to Neighboring Curved Root 3
10
12
18
30
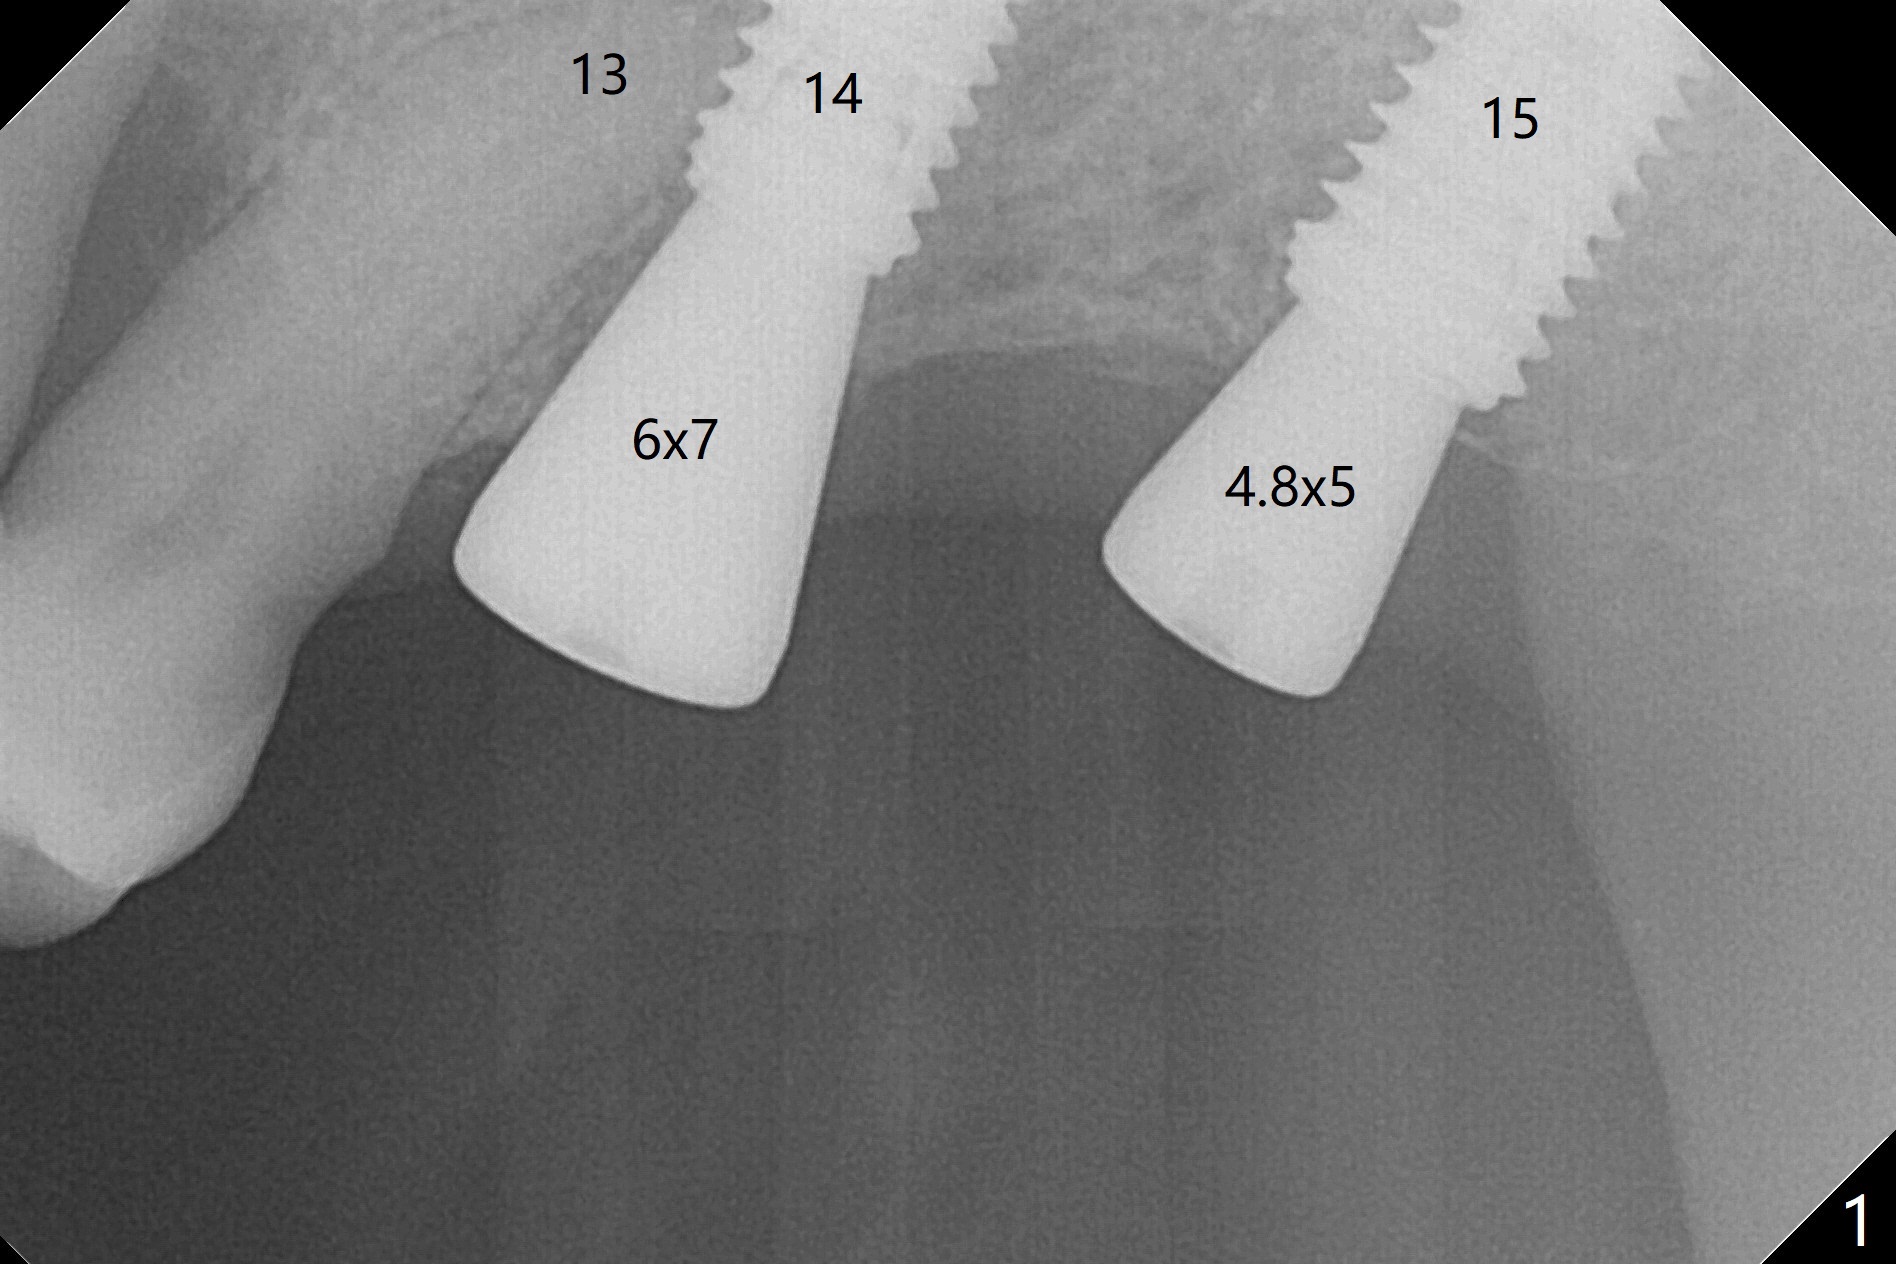
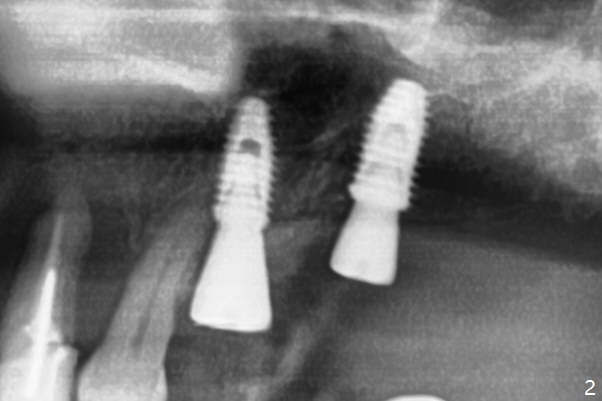
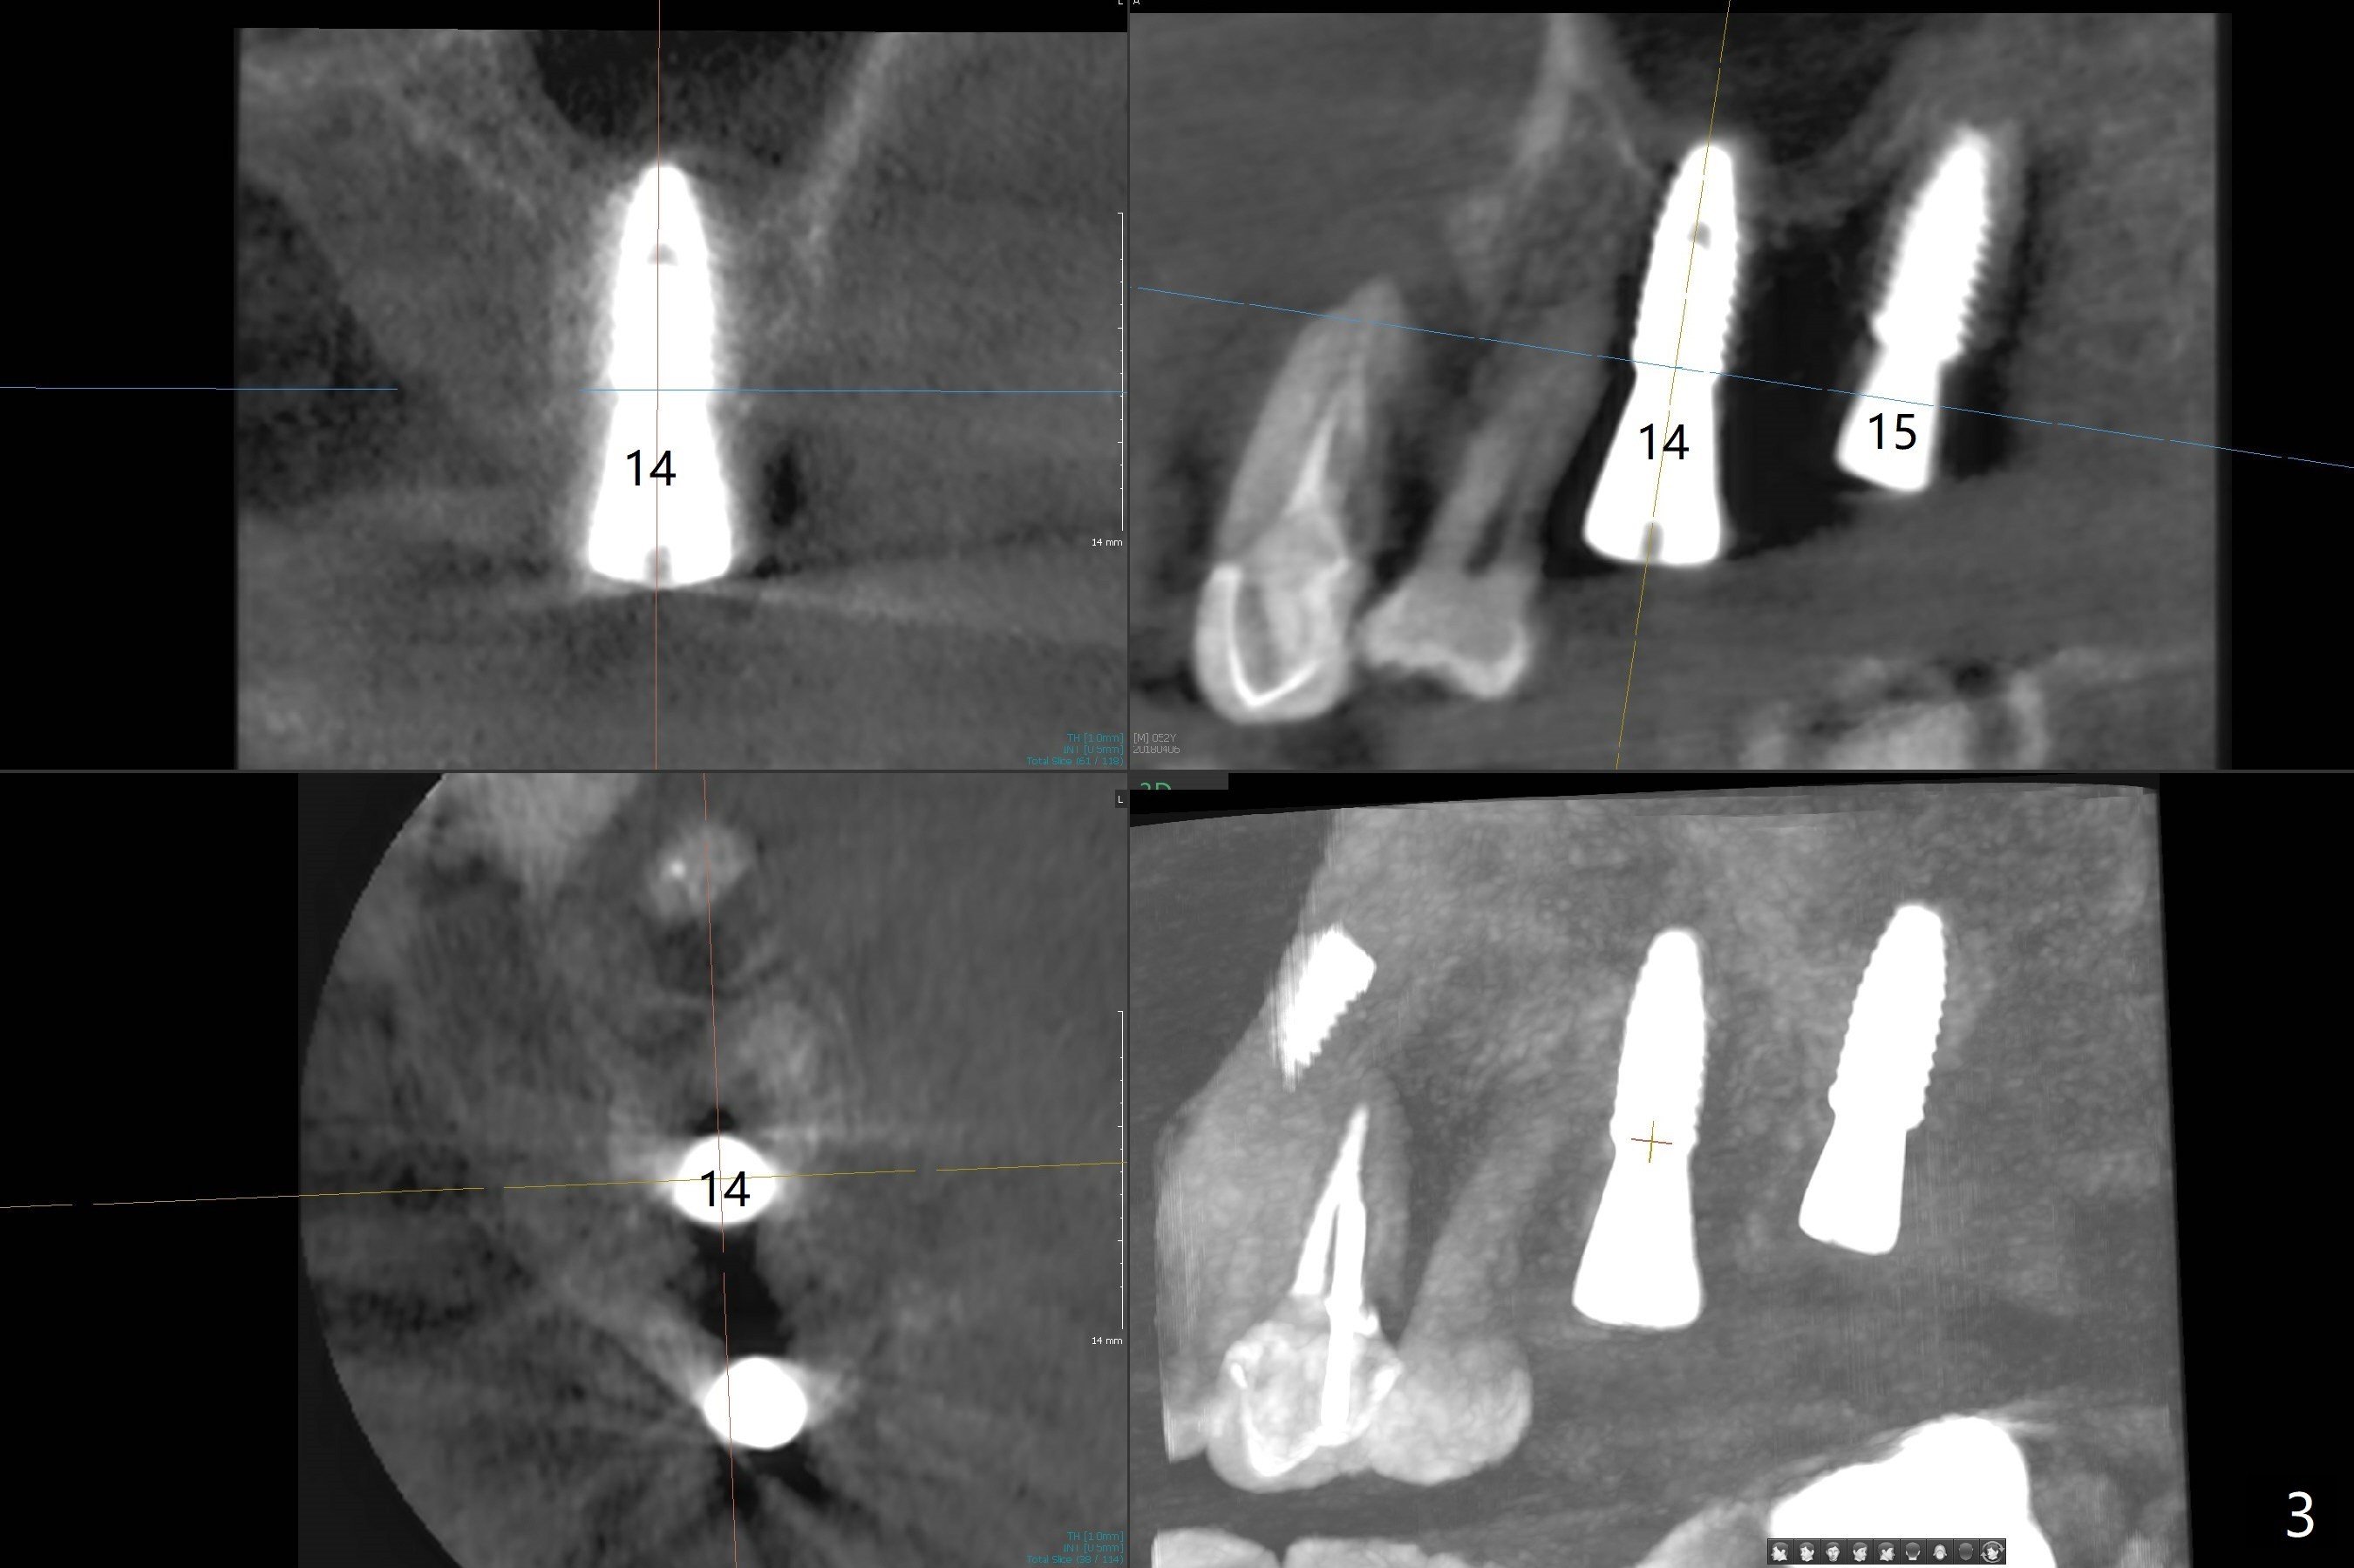
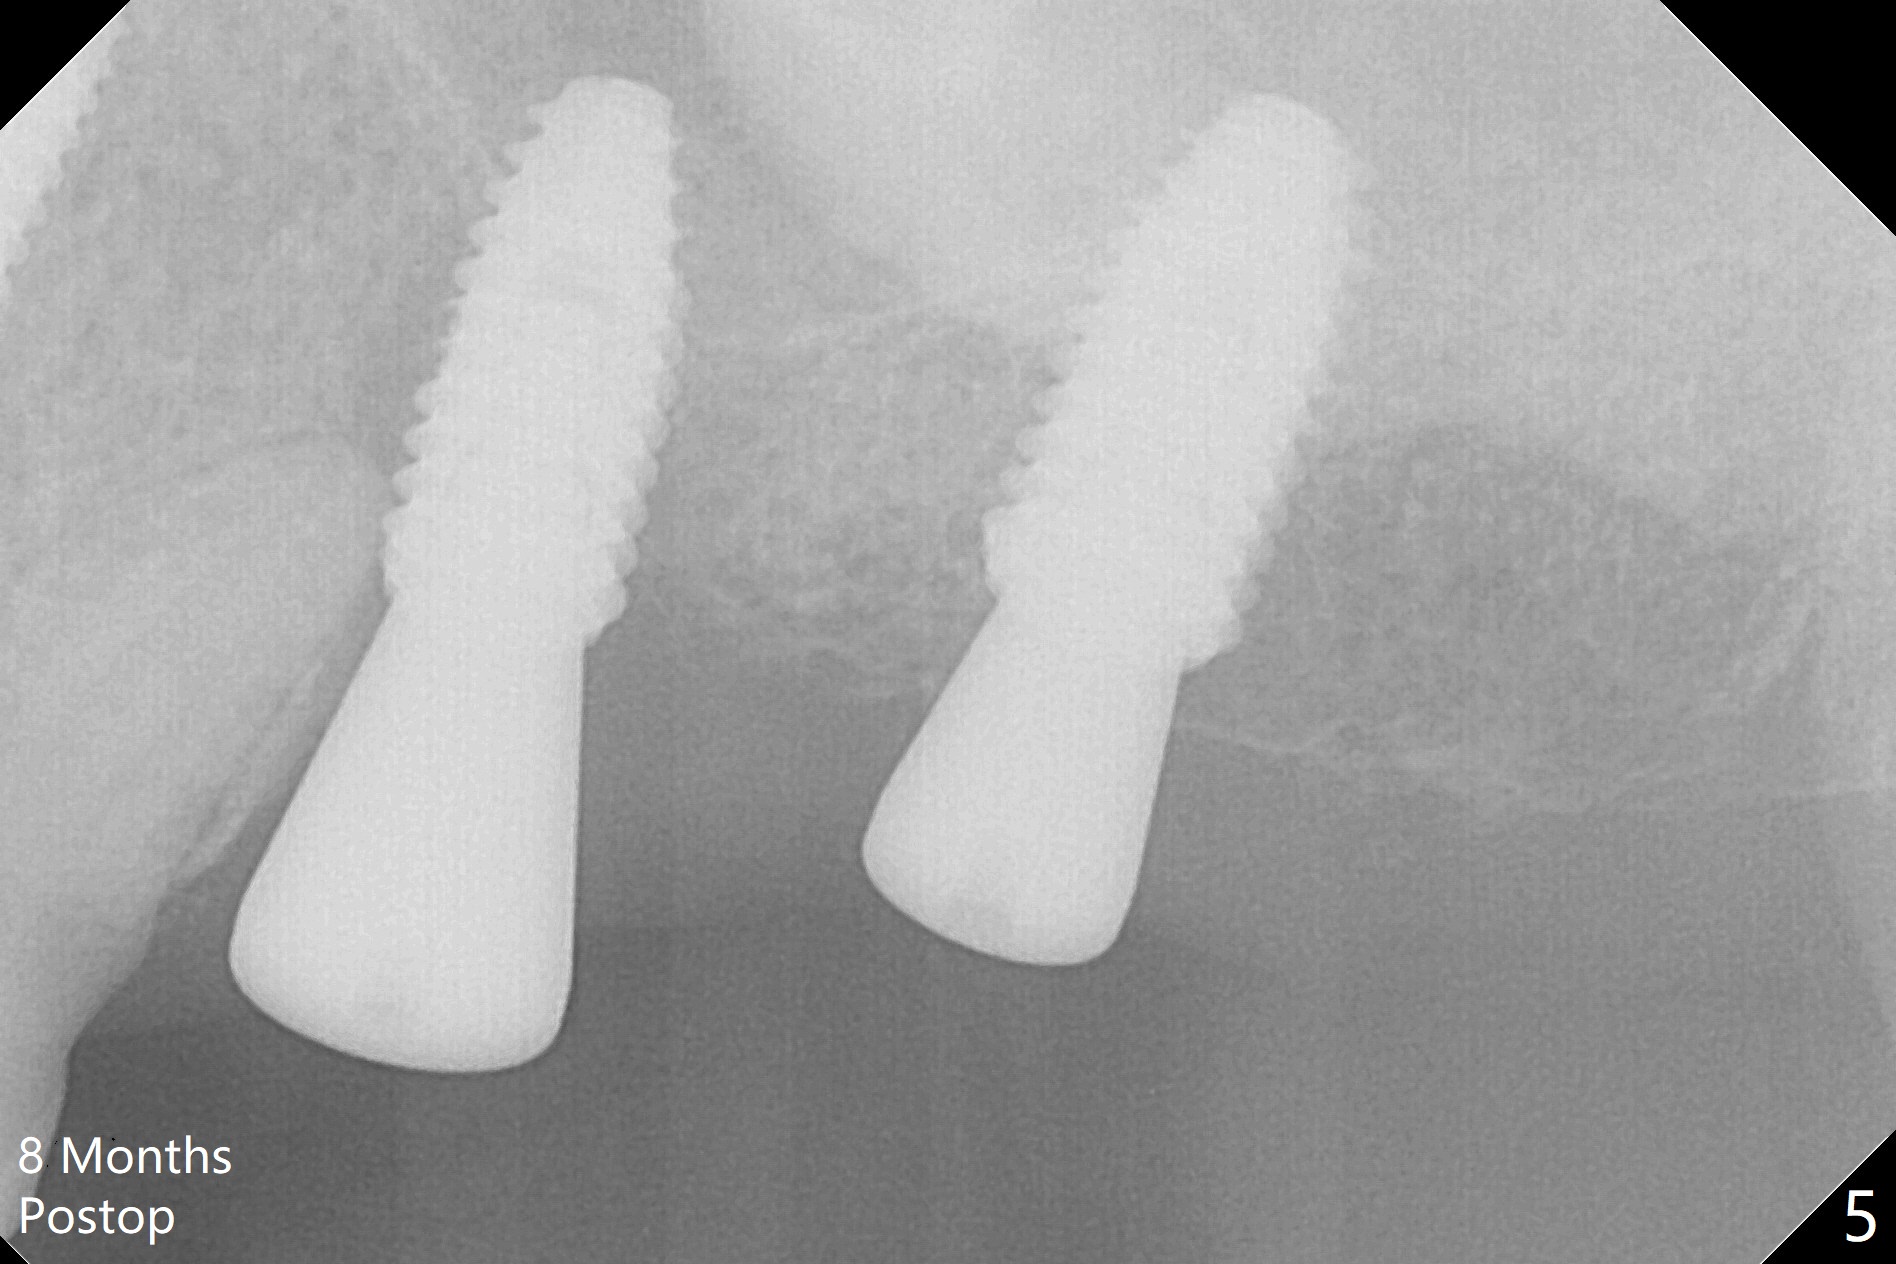
Immediately postop PA (Fig.1) and panoramic X-ray (Fig.2) show that the
implant at #14 is close to the root of the tooth #13. Clinic exam and CBCT
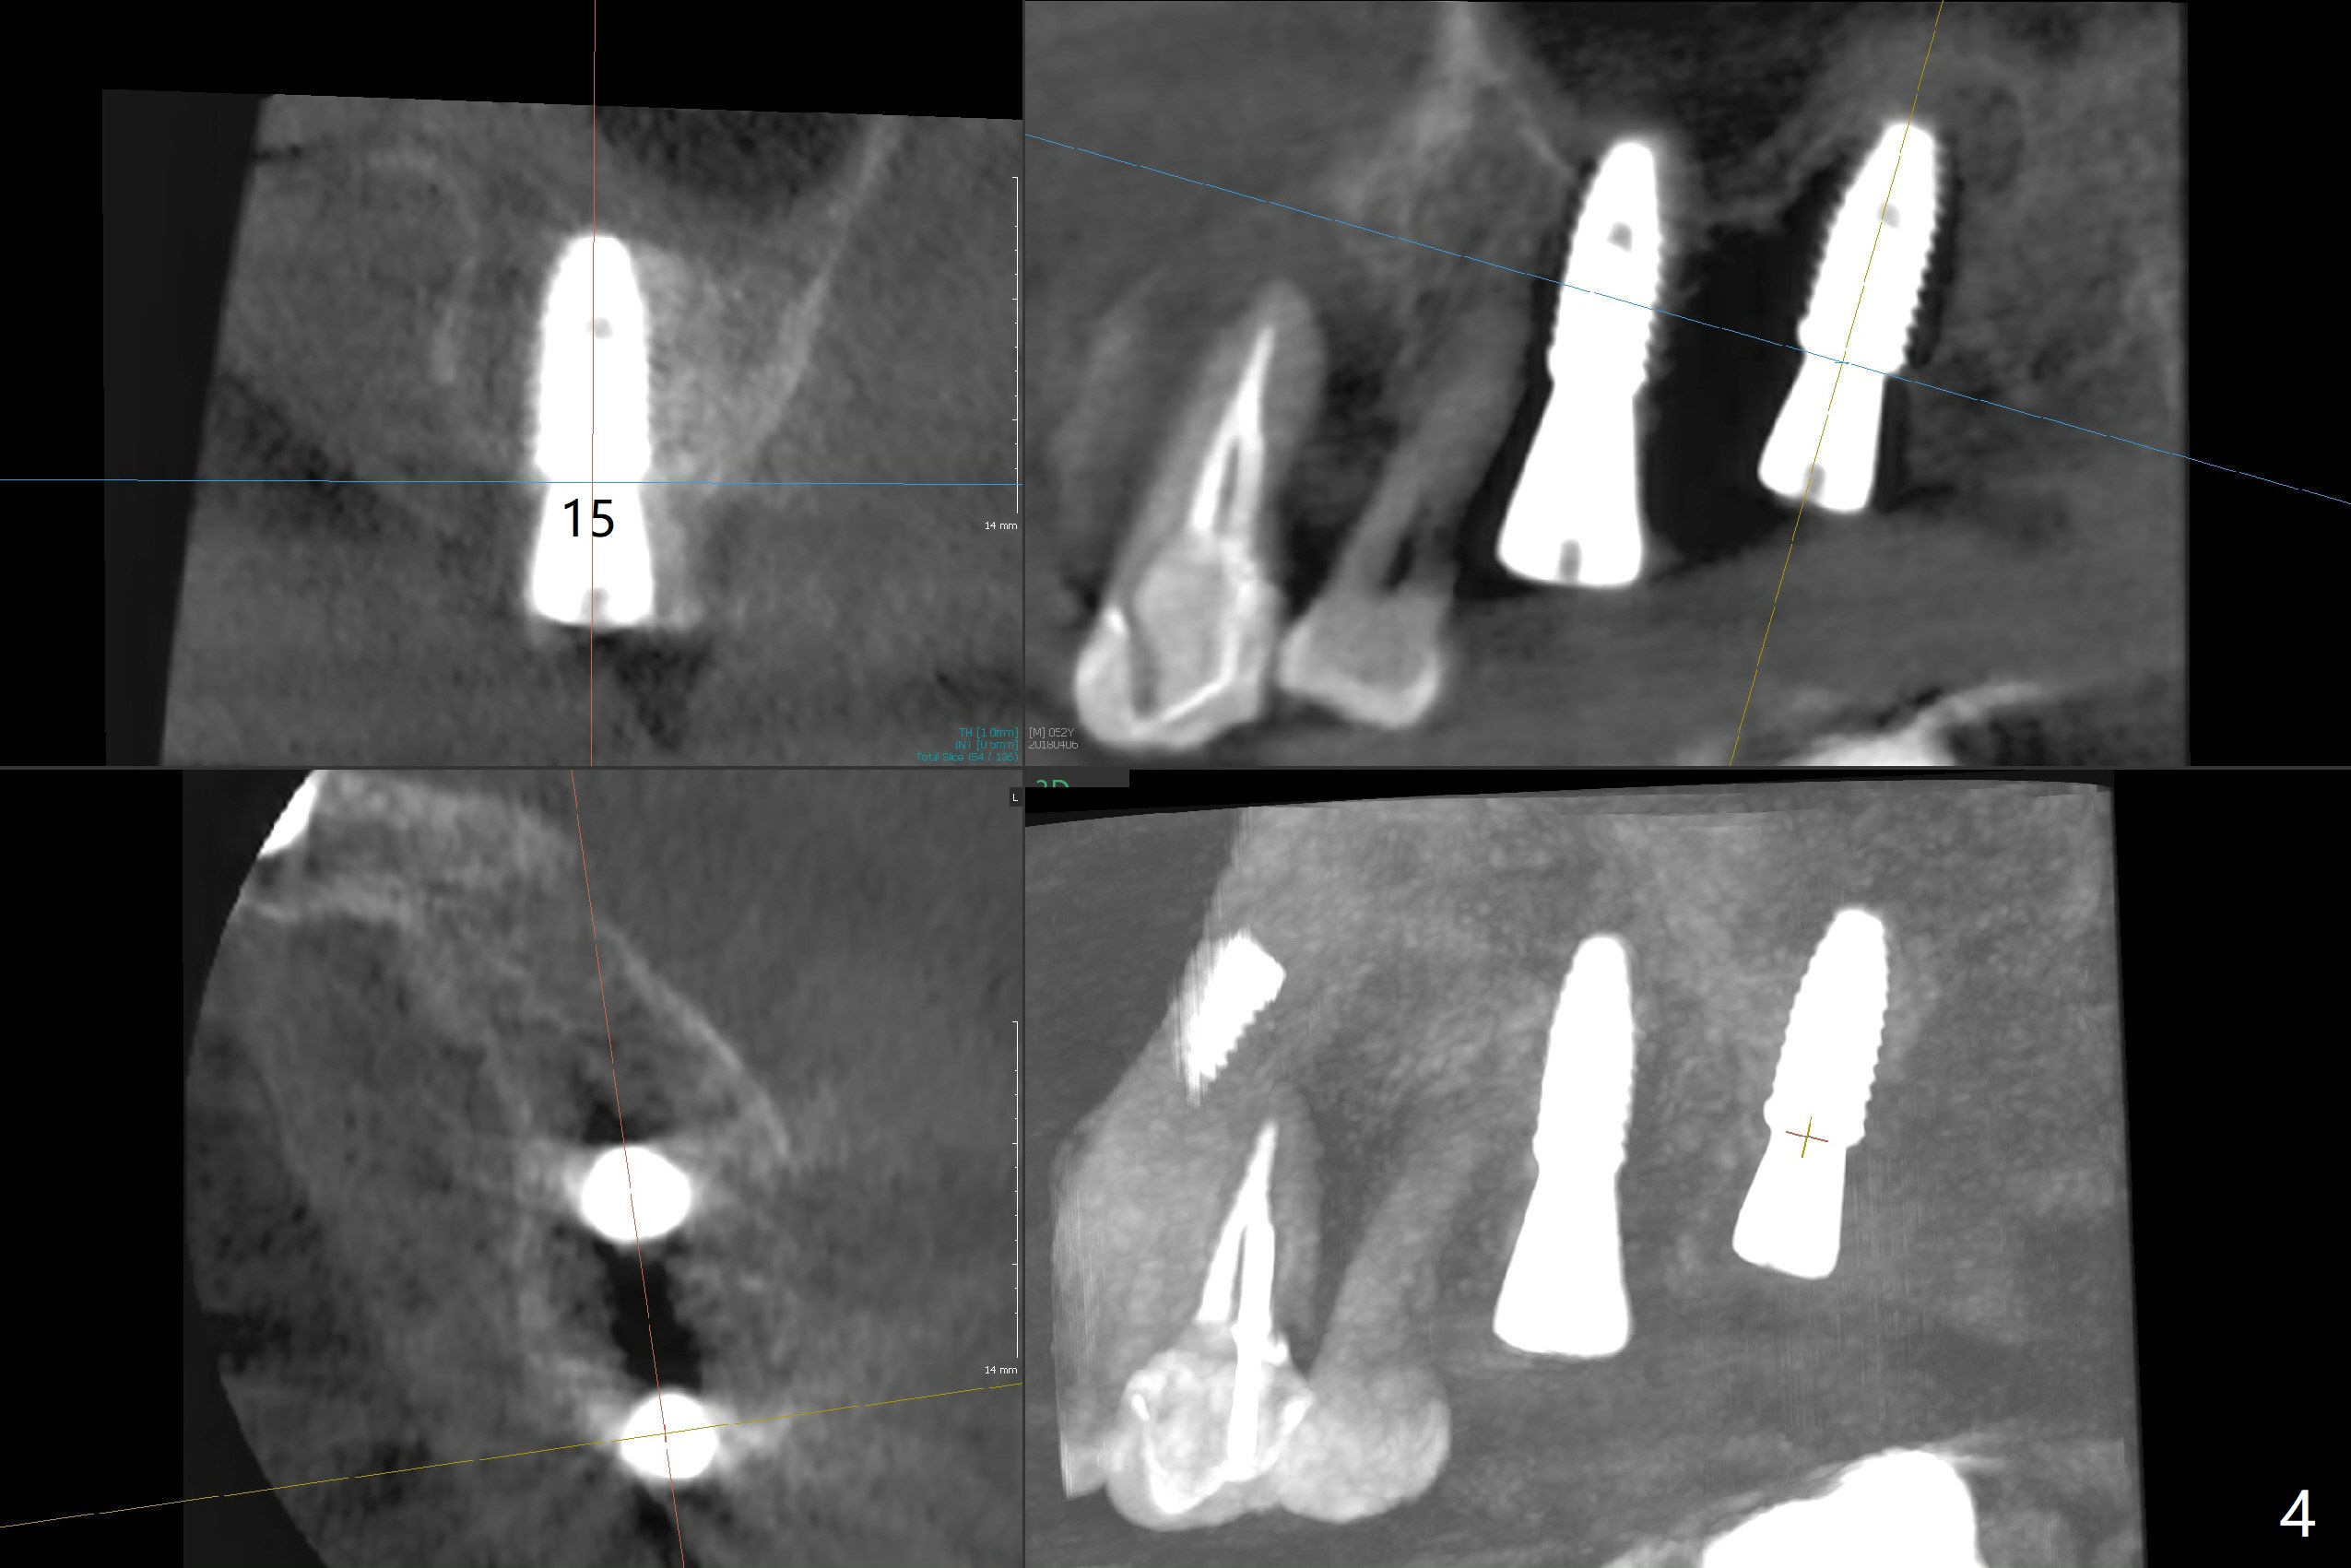
(Fig.3,4) demonstrate a reasonable separation. The trajectory of #14
osteotomy may be altered while using 2.8 mm round drill for 7-9 mm for sinus
lift (free hand). There is no bone loss 8 months
postop (Fig.5).
#15 looks good as planned and #14 seems quite close to the neighboring tooth
and quite off from the planed position.
I am just wondering...Have to try to engage the fixture to the metal sleeve
perfectly for implant placement after performing the sinus elevation?
After performing the sinus elevation, you placed the surgical guide back and
placed implant right?
I followed the steps faithfully. As CT indicates, the implants are pretty
parallel to each other. The suspected step is sinus lift using reamer (free
hand). Initially I placed the drill pretty parallel to the crown #13. Later
more or less oblique. When the guide returned, I had no option other than to
follow the guide. If the implant really touches the root, can I redirect free
hand?
Yes that may be one of the reasons for difference from the planning.
As surgical guide has been made with precise digital software, there's not
much possibility of going off from the original planning.
But to answer your question, if you don't think the implant is placing as it
was planned, you can always go with freehand redirecting the position
Jennifer: Thanks for the reply. In fact, I did something deviated from
you instruction as I restudied the model and the guide. When the implant
at #14 was being placed between the 2nd and 3rd lines of the manual implant
driver, the neighboring teeth prevented the wrench from turning. I wish
using a latch type implant driver to finish placement. I did not because
of warning of using manual one. Instead the guide was removed; free hand
for the last 1-2 mm. The guide returned for depth confirmation. When
the patient returns for follow up 1 week postop, can I remove the implant free
hand and place with the guide and the latch type implant driver 15 RPM?
Thanks again.
I double checked the sequence and based on what you meant by in between 2nd
and 3rd line, I think you got confused with the line. It was supposed to be
stopped at the exact 3rd line. Not in between 2nd and 3rd line.
Please refer to the image below.
When you check the drilling sequence sheet you'll also notice that it was
originally send as the right one.
So the reason why you had to go 1-2mm deeper than the surgical guide was
that the fixture driver wasn't stopped at the intended line.
I should've been gone down deeper like as the right side picture.
And as I read your email, I am little confused. So please let me clarify
whether I've understood you right so that I could answer your question.
I am trying to understand that, the torque ratchet connected with wrench was
hitting the neighboring teeth so that it made you hard to rotate the
ratchet? You were not keep rotating it right? Neighboring tooth were
blocking you from moving forward and backward motion?
Lastly, is this what you meant by latch type?
If so, yes you can use this with really low RPM after fully engaging the
contra angle type fixture driver to the metal sleeve.
Manually implant placement was suggested because we wanted to make sure that
the operator was placing implant with really low rpm following the wall of
the metal sleeve.
I have a question, which torque did you get for placing #14?
And for removing the implant, I am not sure which torque you have got for
#14 when you were placing implant therefore I have no idea whether it will
be possible to easily remove the implant with free hand, but if the bone is
really soft, it won't work with the same implant size when replacing
implant. So I suggest you to replace with a bigger diameter which is 5.0 for
the replacement.
If there's any other inquiries you have, please let me know.
Hi,
Jennifer: Thanks for detailed explanation, which will be copied to my web.
I did not have any problem reading the lines this time, but how to get to
the 3rd line with torque wrench. Torque value is >35 Ncm. I am glad to
learn latch type implant driver could be used. The lowest RPM for my
machine is 15, but I could press the pedal the lightest. The patient will
return this Saturday. If there is no symptom, I may not do anything. With
your help, I am closing to perfecto. The corner of the mouth was also
interfering with torque ratchet turning so that the implant driver did not
go down. Anyway, latch type driver may be a solution.
Return to
Upper
Molar Immediate Implant, Armaments, 3
10
12
18
30
Xin Wei, DDS, PhD, MS 1st edition 04/06/2018, last revision
12/15/2018