|
|
|
|
|
|
|
|
|
|
Cosmetic Incision for Implant Uncover
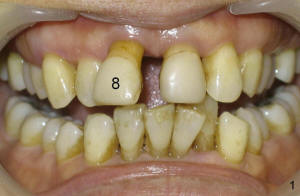
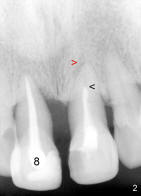
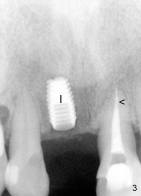
This article reports design of a simple semilunar incision for implant uncover to help form a natural-looking gingiva around anterior crown. A fifty-year-old lady has severe periodontal disease, complicated with endodontic lesion of the teeth #8 and 9 (Fig.1,2). #8 is extracted and Bicon 4.5x8 mm implant (Fig.3: I, Boston, Massachutte) is placed with bone expansion (Tatum Surgical, Clearwater, Fl) 1 year later . After RCT retreatment for #9 (compare Fig.2,3: black arrowheads), periapical radiolucency (Fig.2: red arrowhead) resolves (Fig.3).
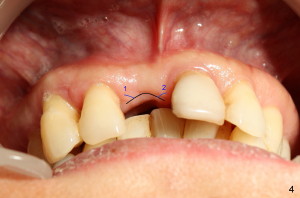
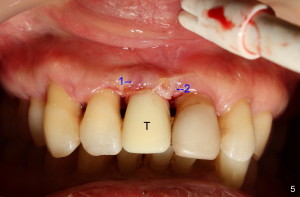
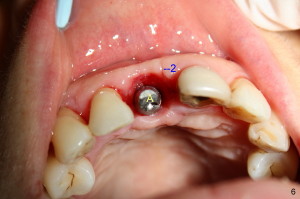
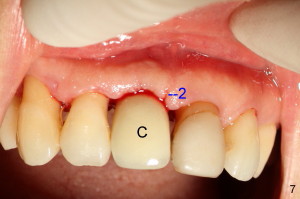
Fig.4 shows incision design for implant uncover (following osseous surgery in the upper right quadrant). The main incision is indicated by black line, lingual to the crest so that the buccal flap is more bulky. It is curved and festooned to create the future cosmetic buccal gingival margin. If the main incision is placed too lingual to expose the implant, one or two accessory incisions (red) can be made. After insertion of 4x6.5 mm non-shouldered abutment 3 mm post, PVS impression is taken. Fig.5 shows temporary crown in place (T) with two vertical mattress suture in the mesial and distal papillae. Two accessory incisions are approximated. Two weeks later, the temporary crown is removed. The accessory incision #1 has healed, while #2 is healing (Fig.6). The temporary crown helps form a nice socket around the abutment (A). Fig.7 shows the gingiva around the crown (to be cemented) with healing incision #2. Five months after crown cementation, the gingiva looks healthy.
Xin Wei, DDS, PhD, MS 1st edition 05/14/2011, last revision 10/10/2011