
|
|
|
|
|
|
CT Scan Stent and Bone Density
One of prosthodontists says that CT without scan stent is worthless. It is true when focal field is limited, especially using Carestream 9000. The opposing dentition cannot be scanned at the same time.
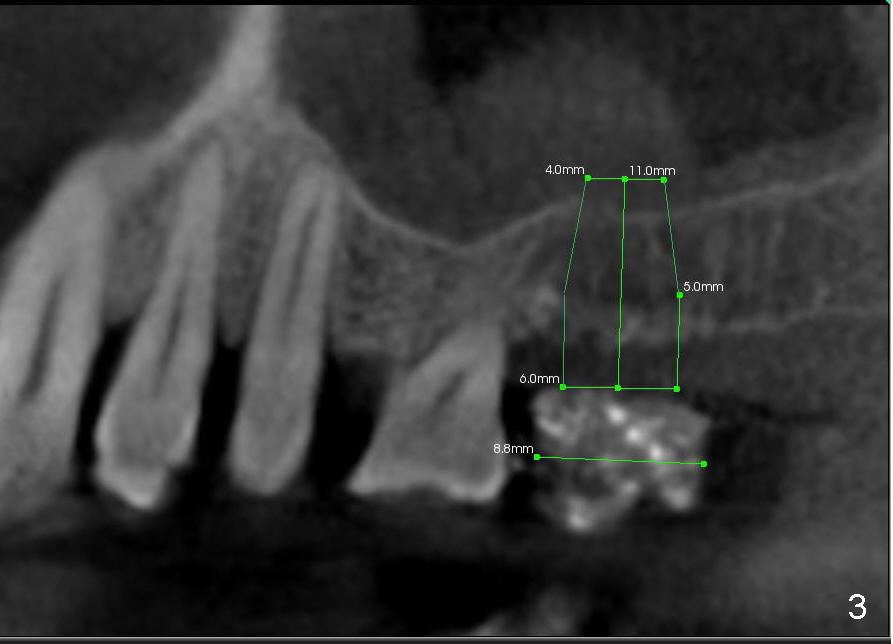
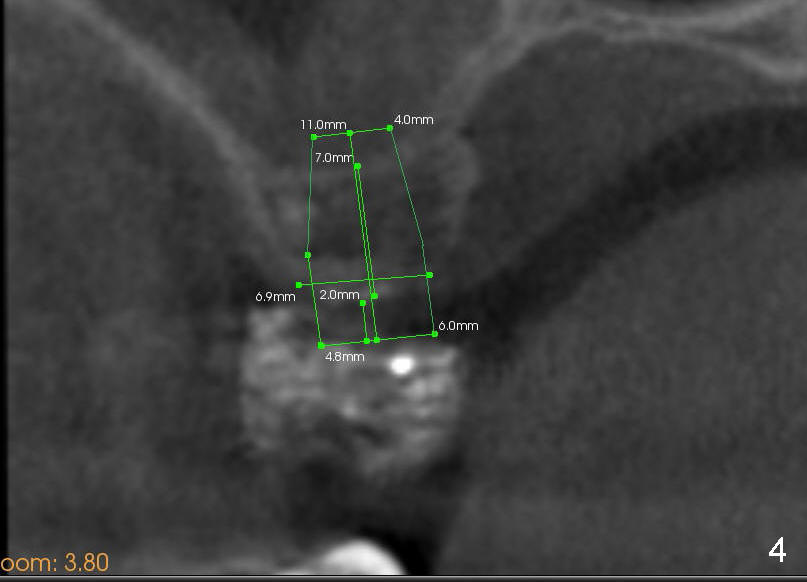
Davis is 53 years old. This Wednesday an implant will be placed at the site of #2. Since the case is complicated (involving multiple implant restoration), CT scan stent is fabricated using Calcium Sulphate (Fig.1 (sagittal section) S). The stent helps treatment planning: placing 6x11 mm gingiva-level tapered implant in the most ideal restorative position (Fig.3,4 (coronal section)). Since bone height is less than 7 mm (Fig.1), sinus lift is planned (Fig.3,4).
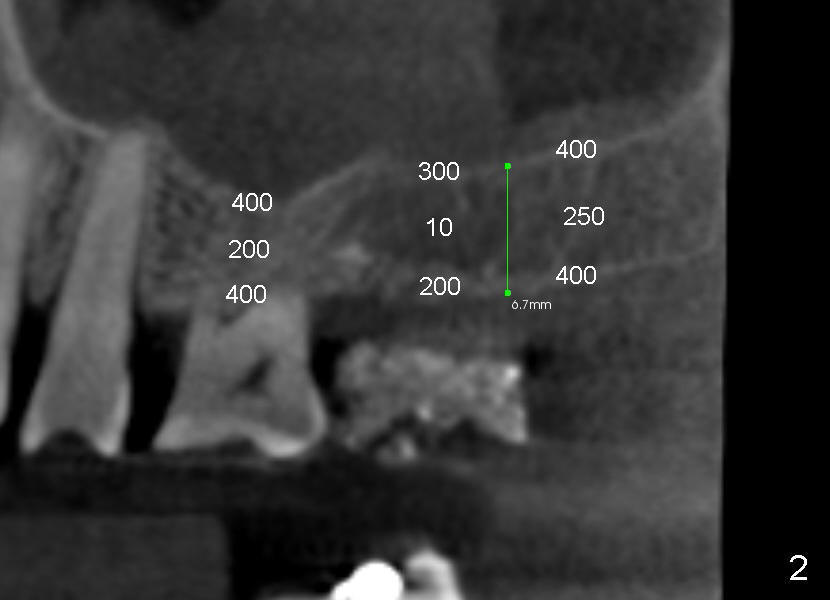
The method of sinus lift depends upon bone density. A brief look at the CT scan reveals that bonedensity is high (H, Fig.1) in the dentulous area (1st molar), medium (M) in the tuberosity and low (L) in the edentulous area (2nd molar). The lower right of every CT planar image shows Hounsfield unit of a particular area where the mouse curse rests. The map of bone density is shown in Fig.2.
The density of the medullar area of the edentulous is so low (10) that the sinus floor (bone density 300) has to be used for primary stability of the implant. Additionally, an osteotome may encounter resistance when it penetrates the crest (bone density 200; a cortical plate). Once past the crest, tapping the osteotome through the cancellous bone should be easy until reaching the sinus floor (cortex).
In brief, instruments for this procedure include 4 mm spacer, RT osteotomes (round tapered, 2-5 mm in diameter), tapered taps and hand tools for implant placement (torque wrench, ratchet wrench). Scalpel and suture may be not required. Bone expander kit is prepared to replace osteotomes in case the crest is too tough for osteotome penetration.
Xin Wei, DDS, PhD, MS 1st edition 01/12/2014, last revision 01/12/2014