
|
|
|
|
||||
|
|
|
|
||||
|
|
|
|
|
|
||
Keep 3rd Molar for Guide Fabrication M
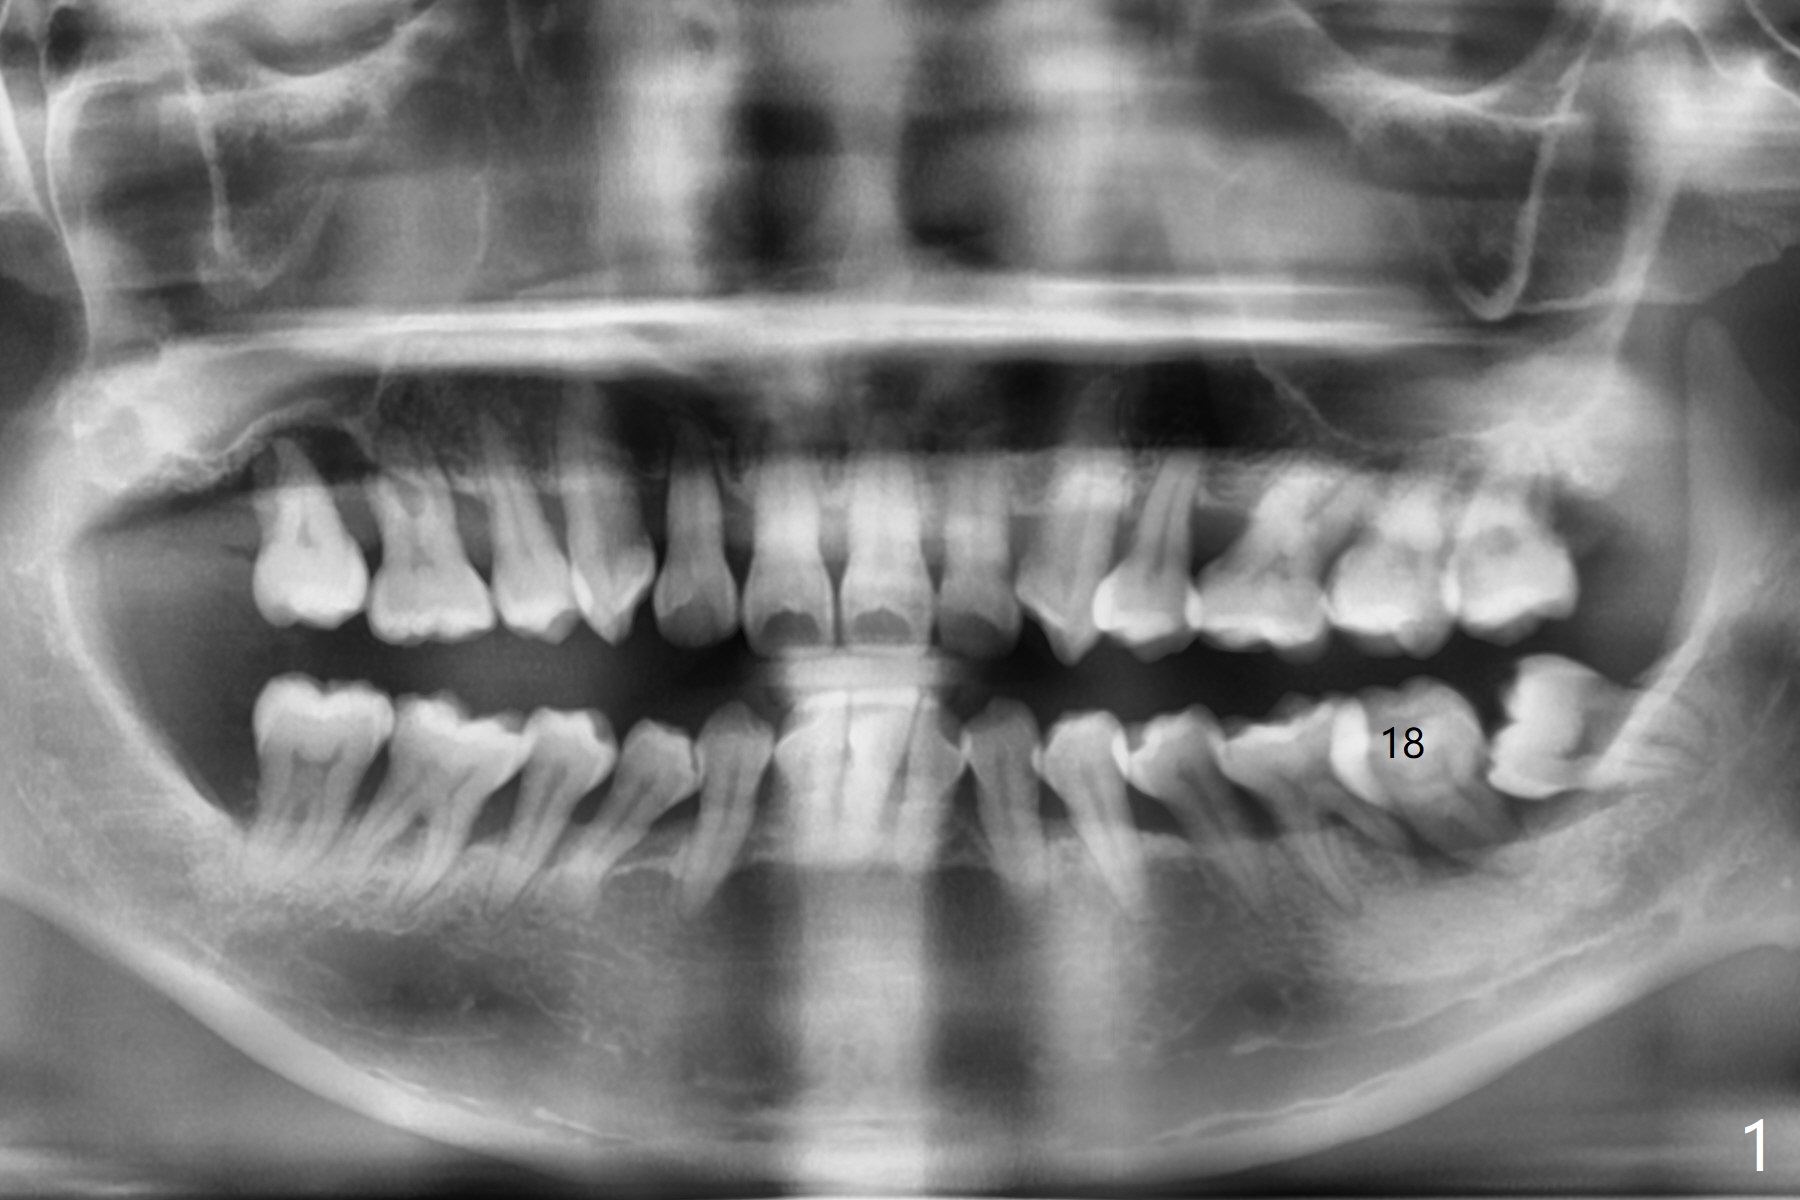
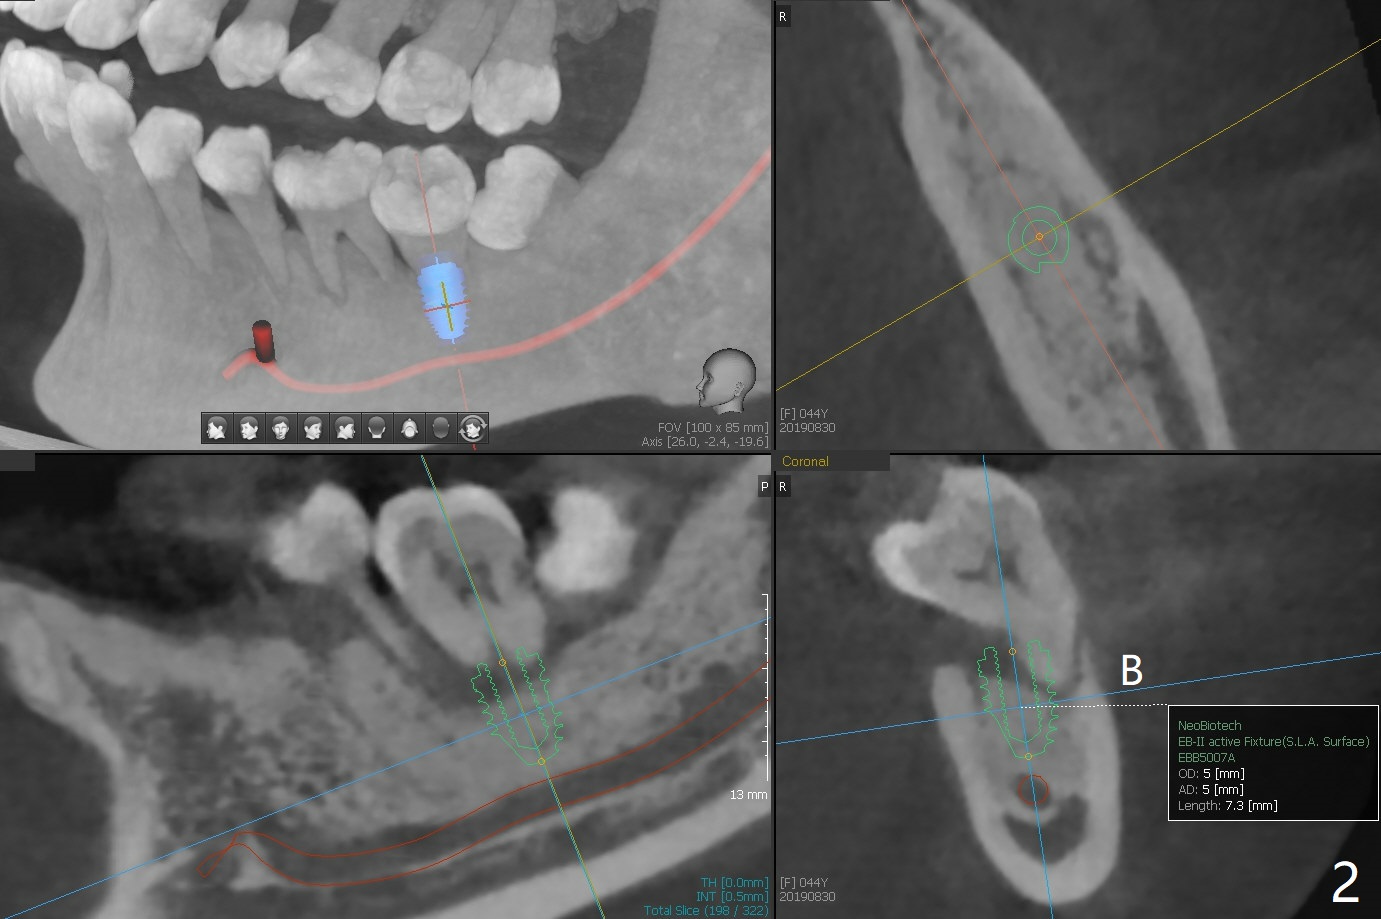
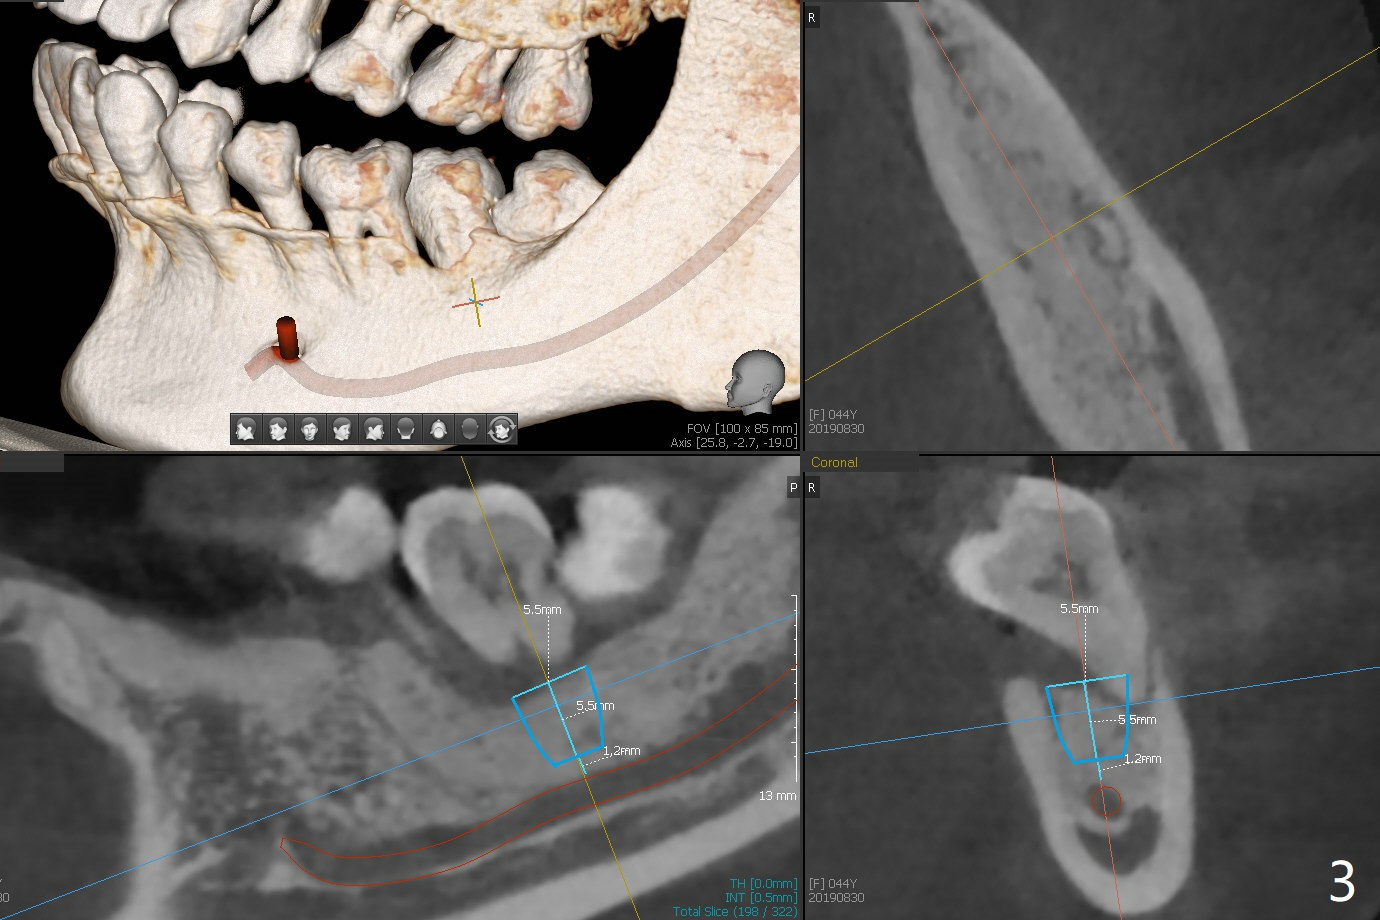
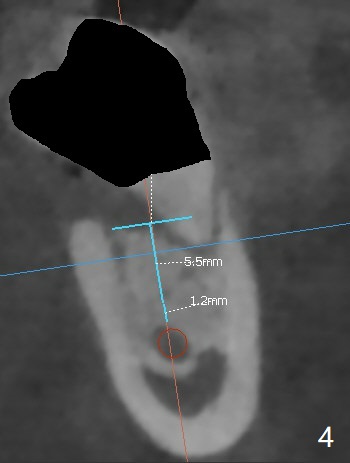
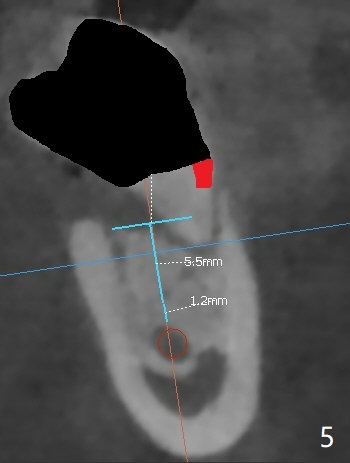
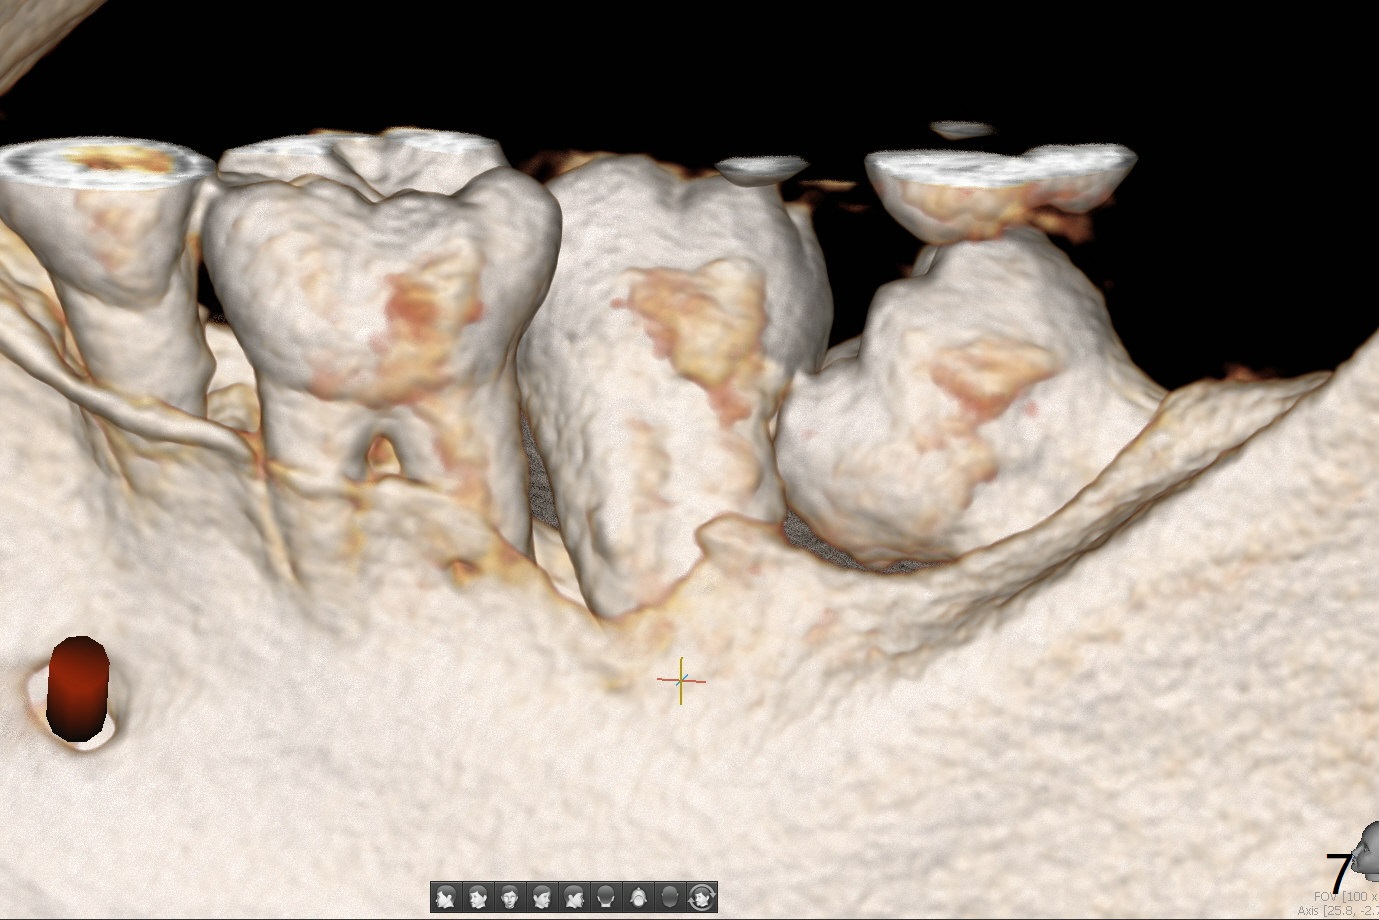
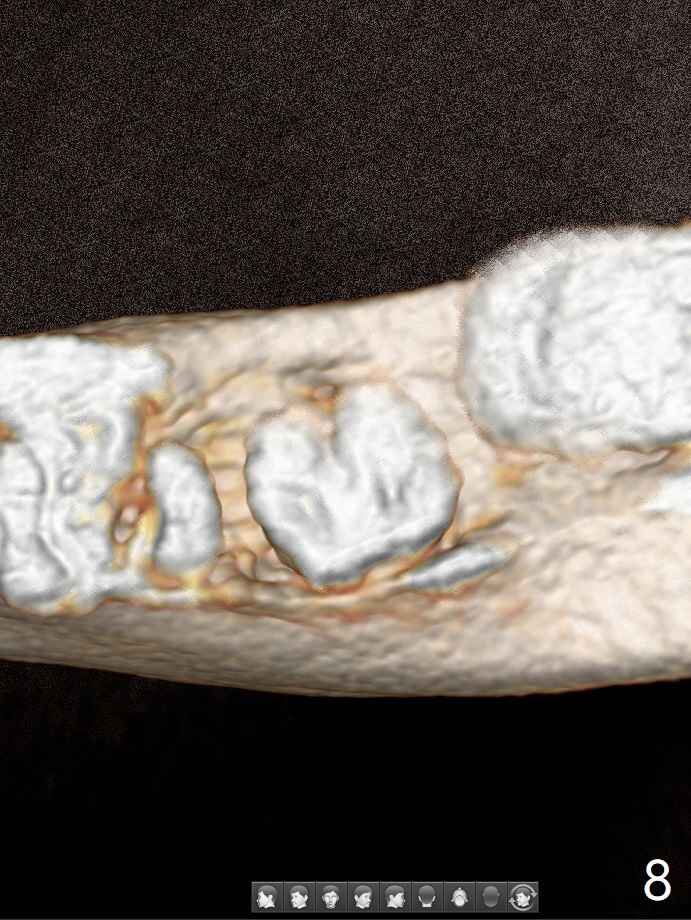
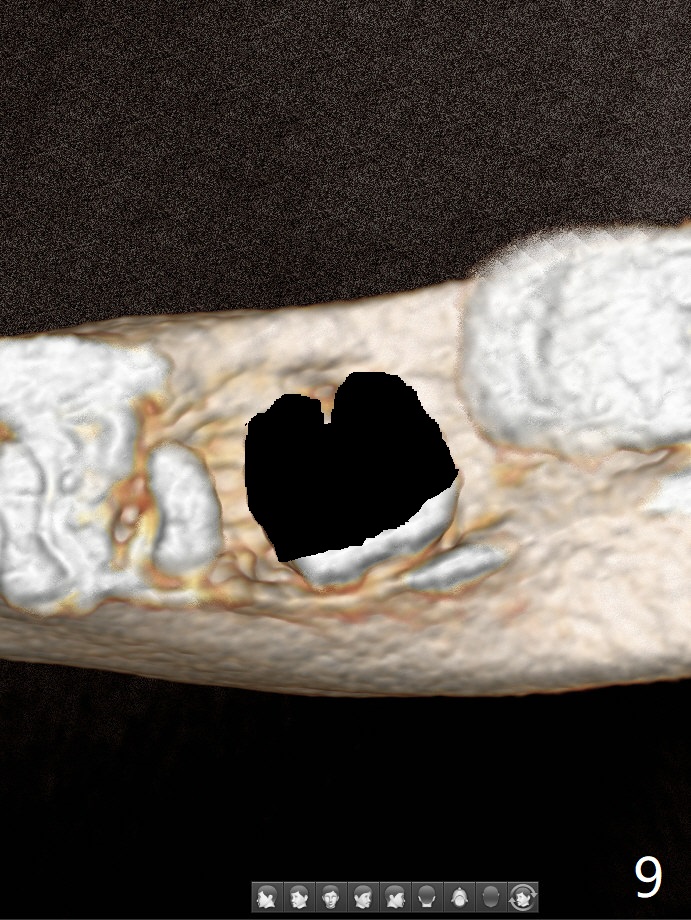
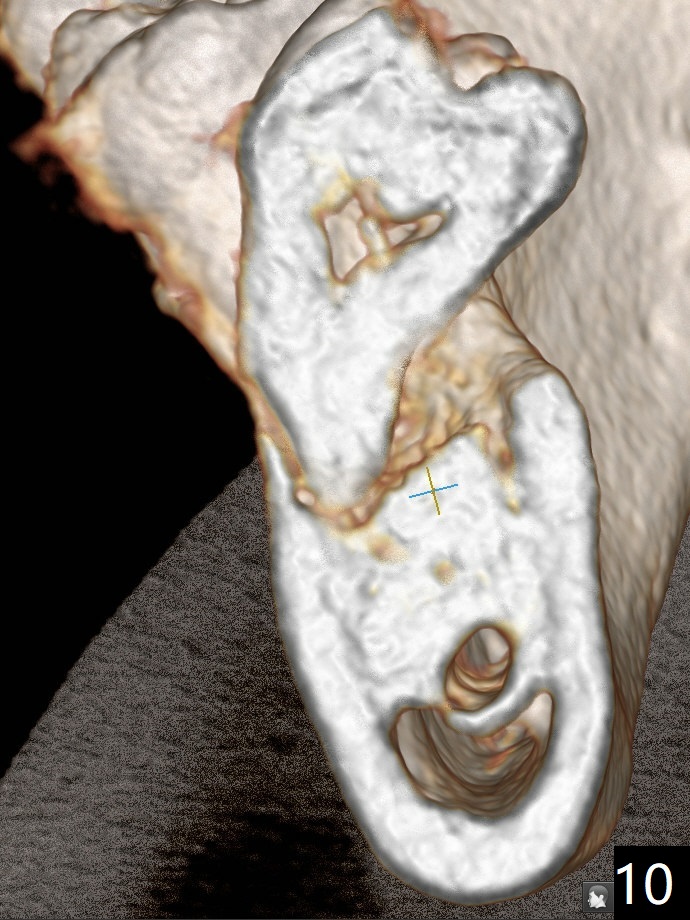
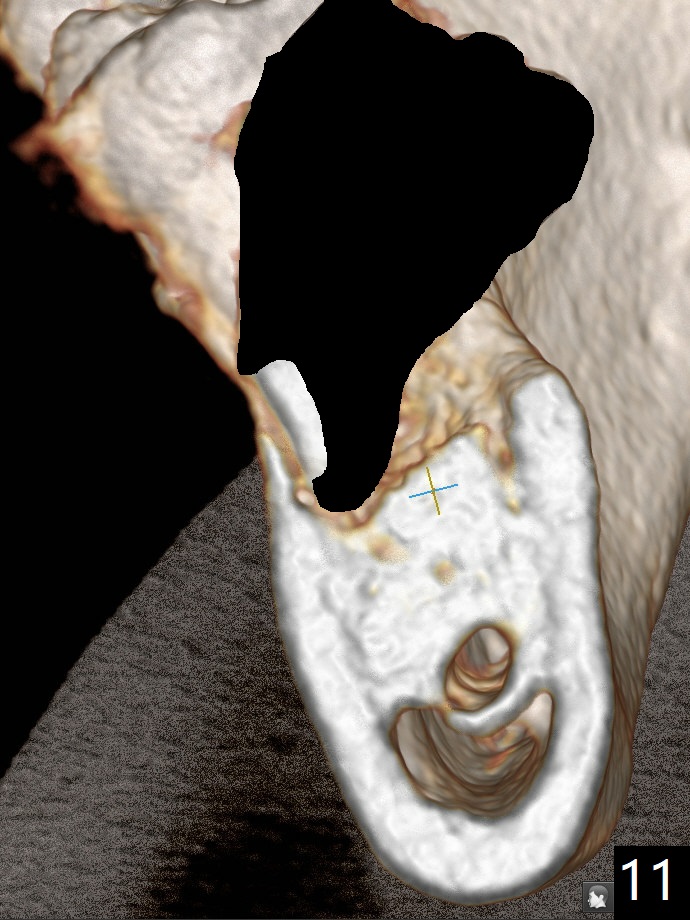
A 44-year-old woman has severe chronic periodontitis. The tooth #18 is nonsalvageable (Fig.1). To avoid distal end guide, do not remove the 3rd molar in the lab. While a 5x7.3 mm implant is long for the site (Fig.2), a 5.5x5.5 mm one seems to be a better option (Fig.3). The latter could be 1 mm more coronal. The last drill (5.0 mm) and cortical tap will be used free hand. #17 will be extracted after implantation. Since the patient is reluctant to have #16 to be extracted, place #18 implant ~ 1-2 mm more distal so that the implant crown will have some occlusal contact with #16. Prepare IS extra wide kit. Or use a 8/7 mm trephine bur to harvest cortical bone from the ramus. Drill a hole for fixation screw before removing the onlay graft. Keep the 3rd molar if possible. Prepare Tatum spacers to measure the size of #18 socket opening. In fact, the lab is able to place a 5x7.3 mm implant with 2 thread exposure buccal. Prepare sticky bone and PRFx2 to prevent periimplantitis. Soak one O-ring in case of having to extend osteotomy by .5 mm (next longer drill (1.5 mm) - 1 mm (O-ring)). For socket shield at #18 (Fig.6 *), section the tooth horizontal with a new surgical fissure bur (Fig.4 black area), use an end-cutting bur to remove buccal edge of the root (Fig.5 red area) and finally remove the lingual portion of the root (Fig.6 pink). Insert 4.5x10 mm dummy implant to determine whether the final implant 5x7.3 mm (bottom of the 1st line) will probably contact the shield. Buccal view of the lingually inclined 2nd molar (Fig.7). After removal of the crown of the 2nd molar (Fig.8 occlusal view), the lingual portion of the root is resected (Fig.9 black area). CT coronal sections show socket shield formation (Fig.10,11).
Lower Molar Immediate Implant, Prevent Molar Periimplantitis (Protocols, Table), Trajectory II, No Antibiotic Xin Wei, DDS, PhD, MS 1st edition 08/30/2019, last revision 02/02/2020