


|
|
|
|
|
|
|
|
|
|
Bone-Level Guide for Tissue-Level Implant
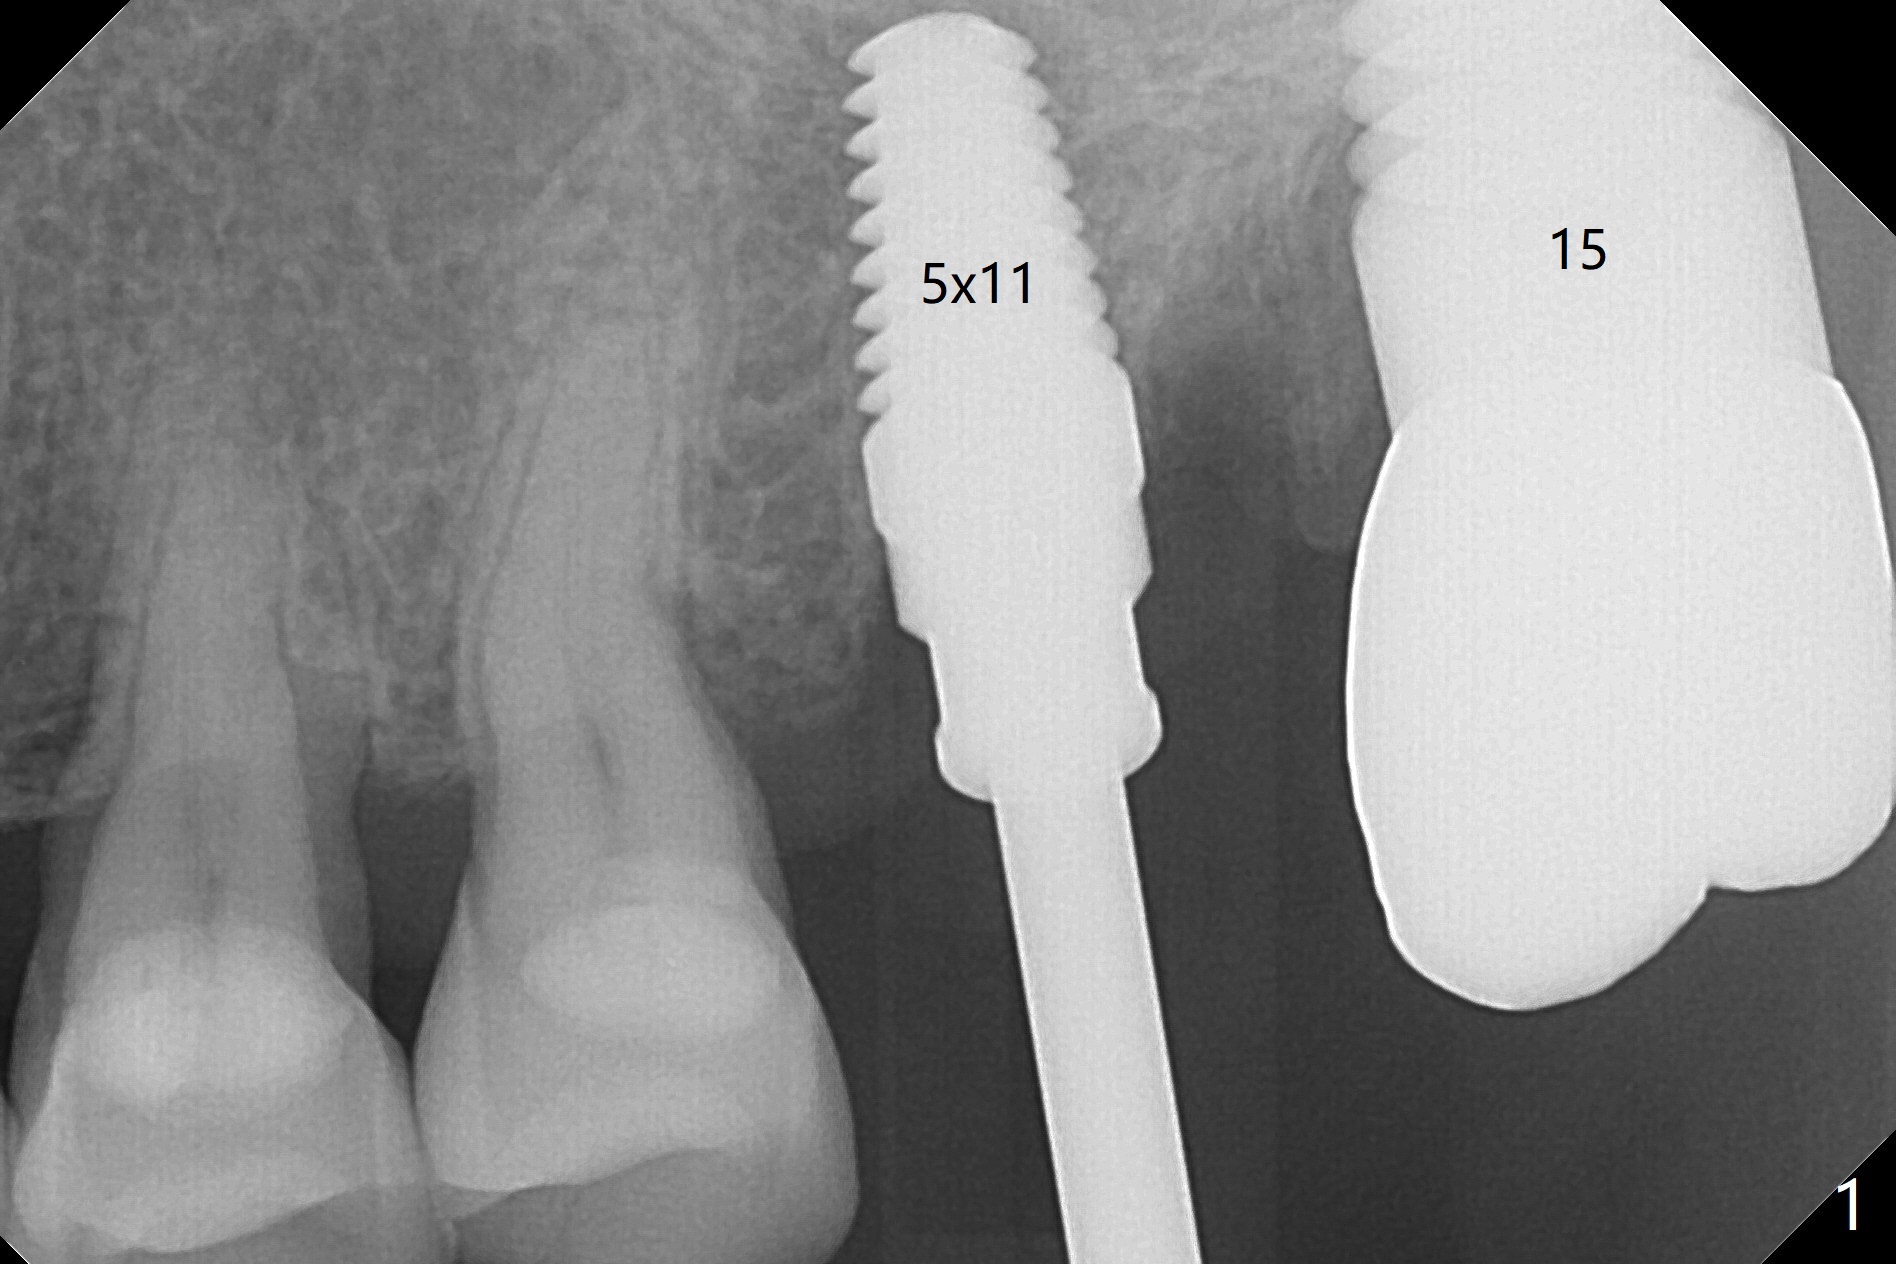
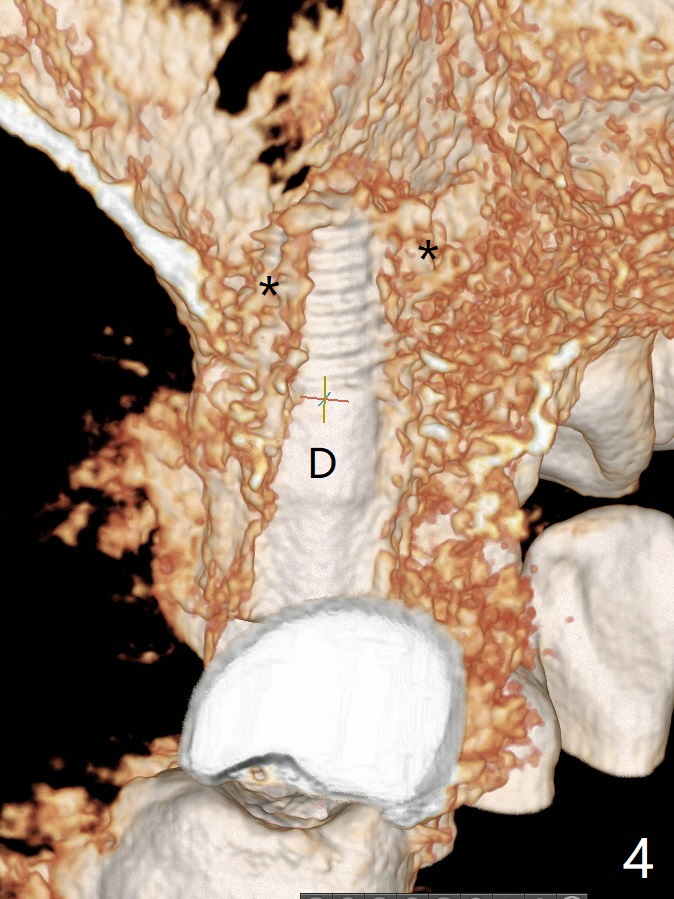
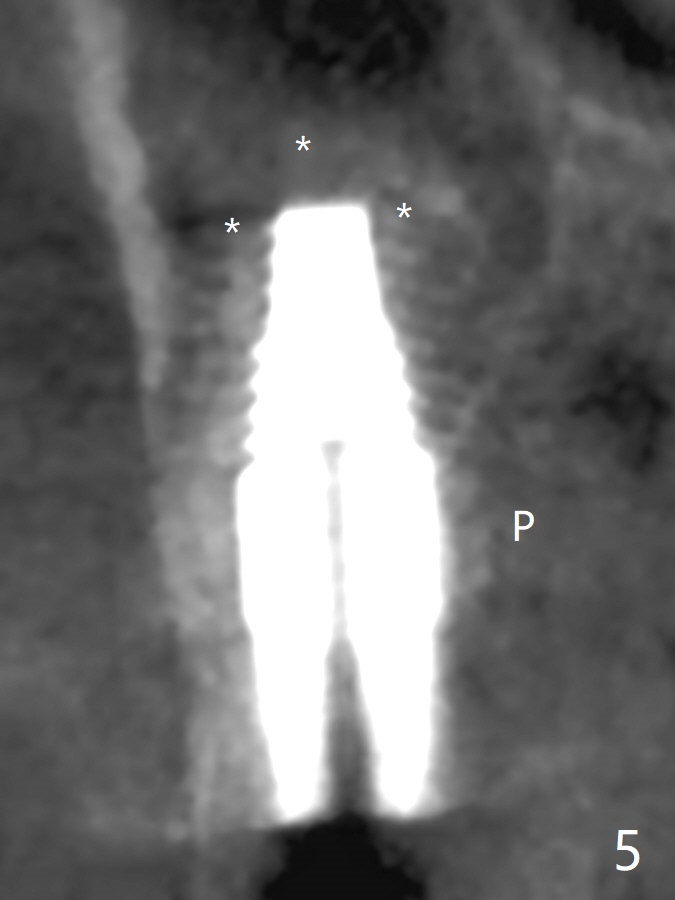
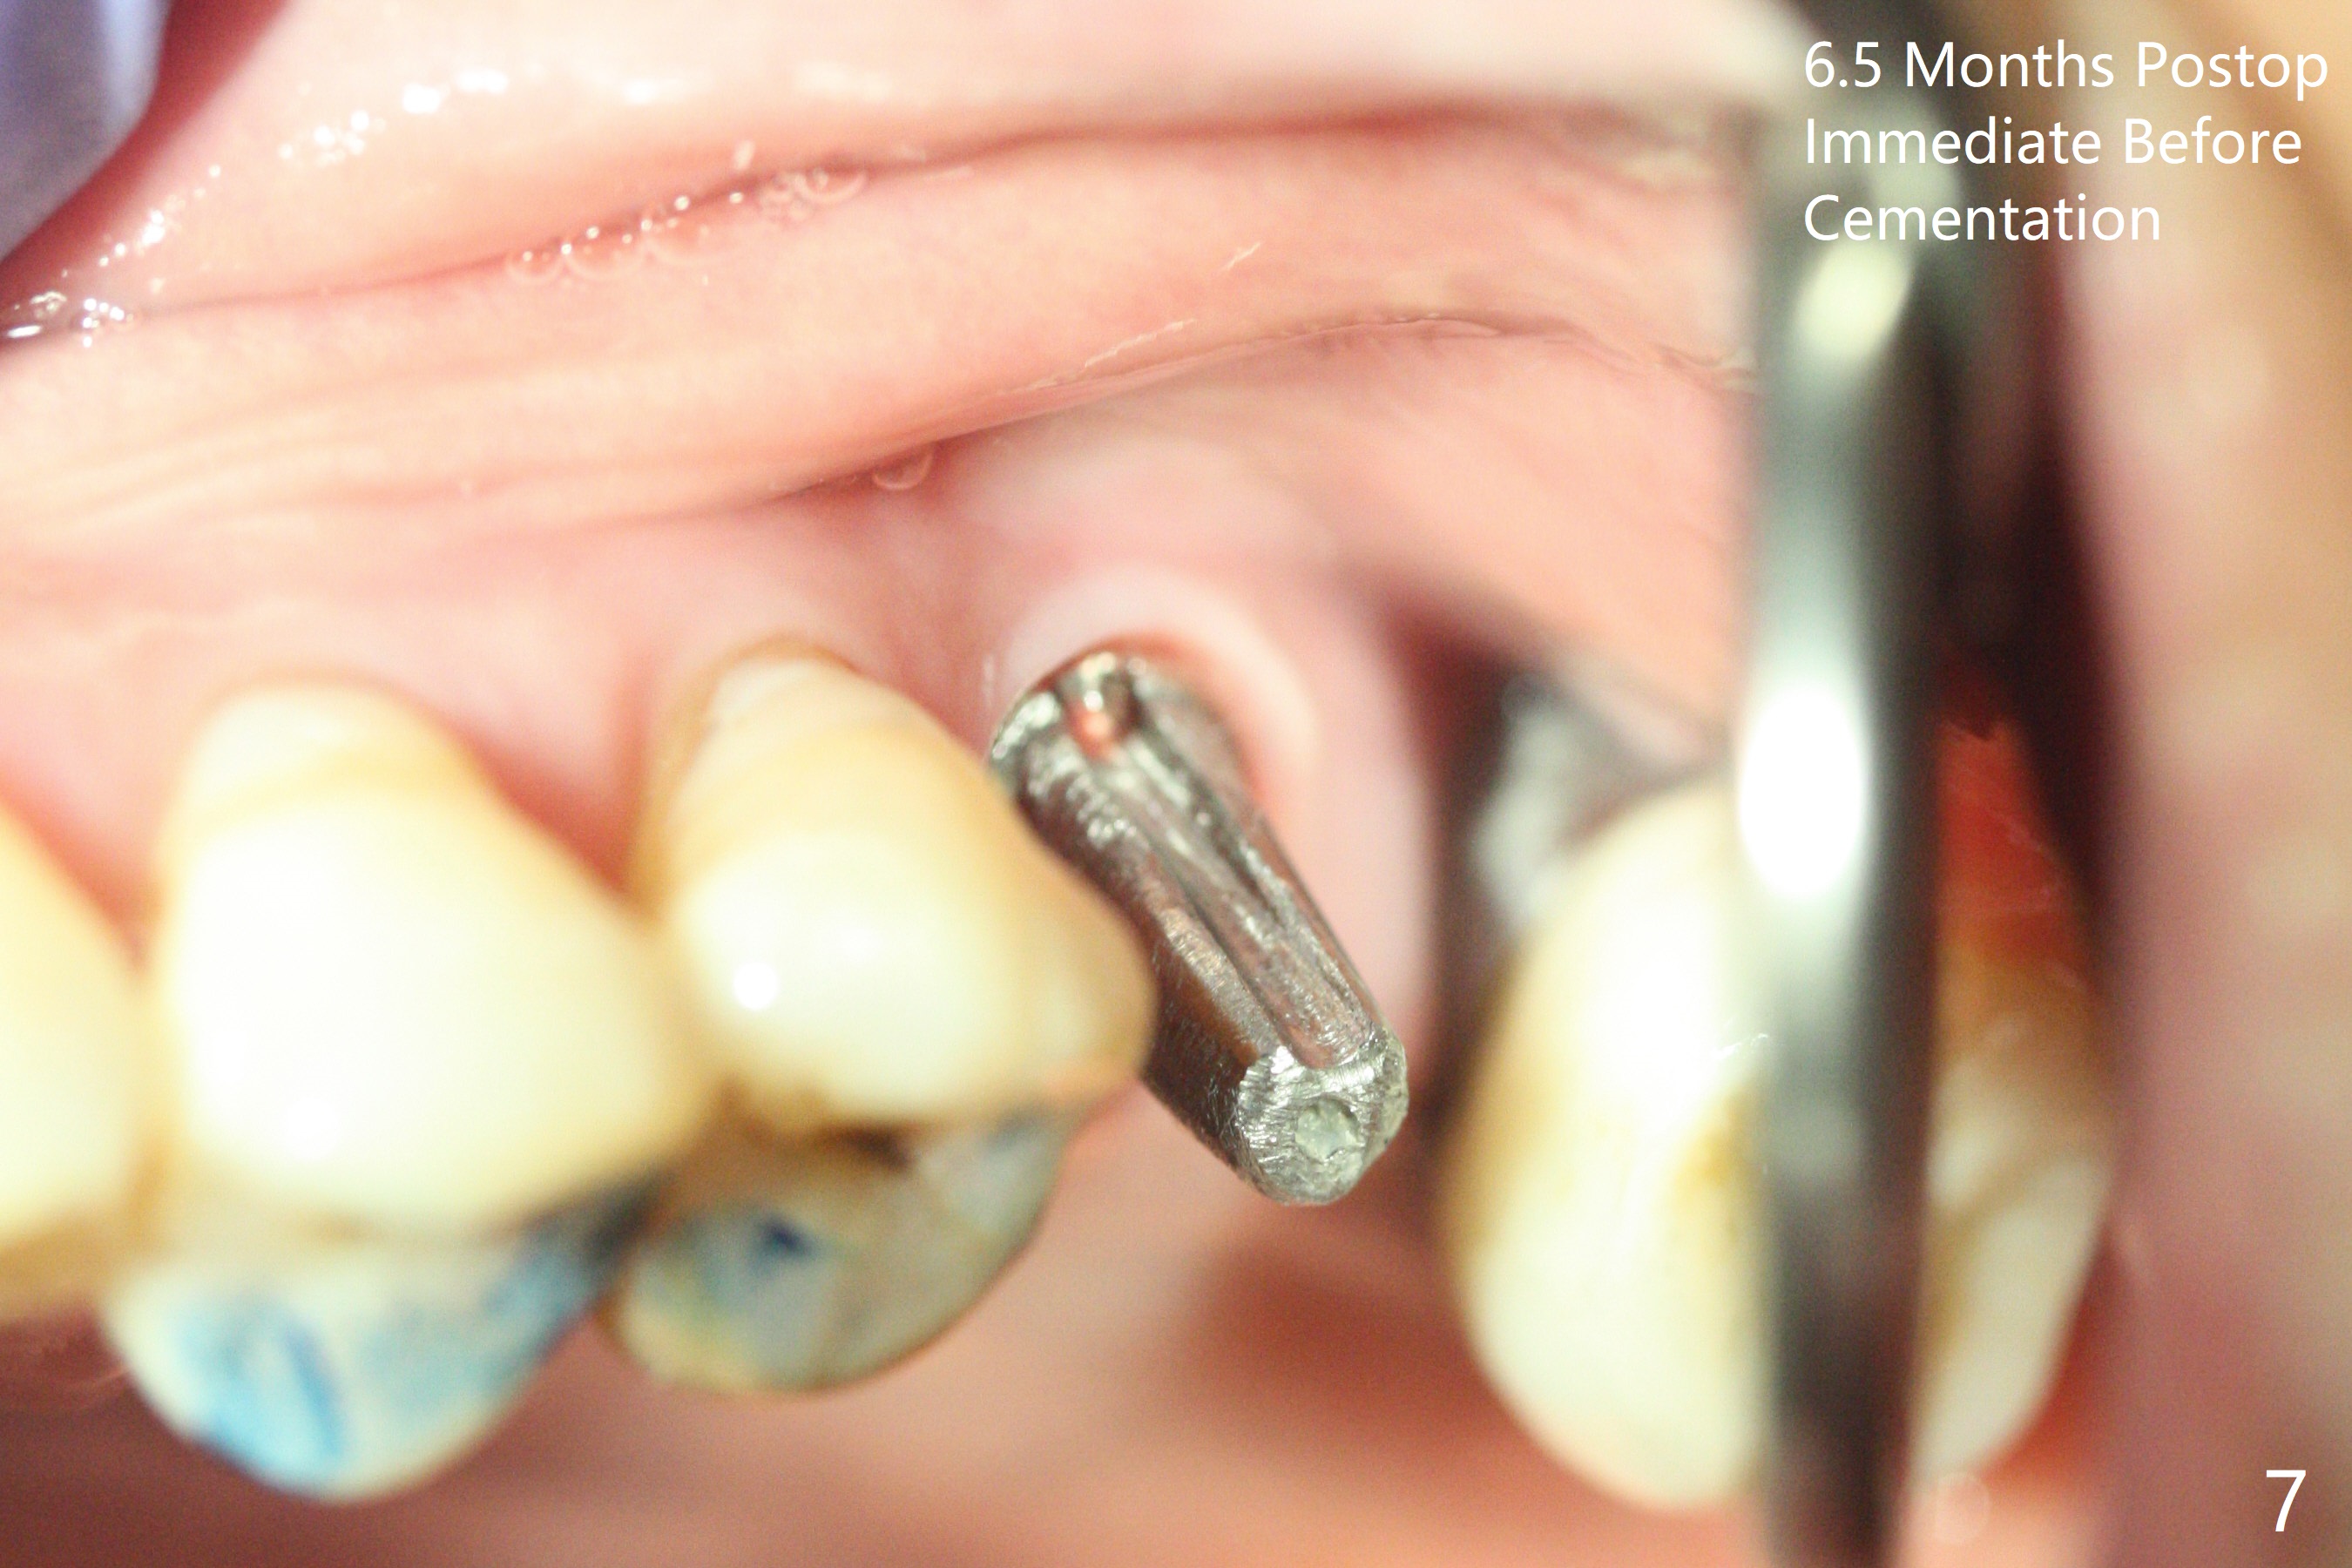
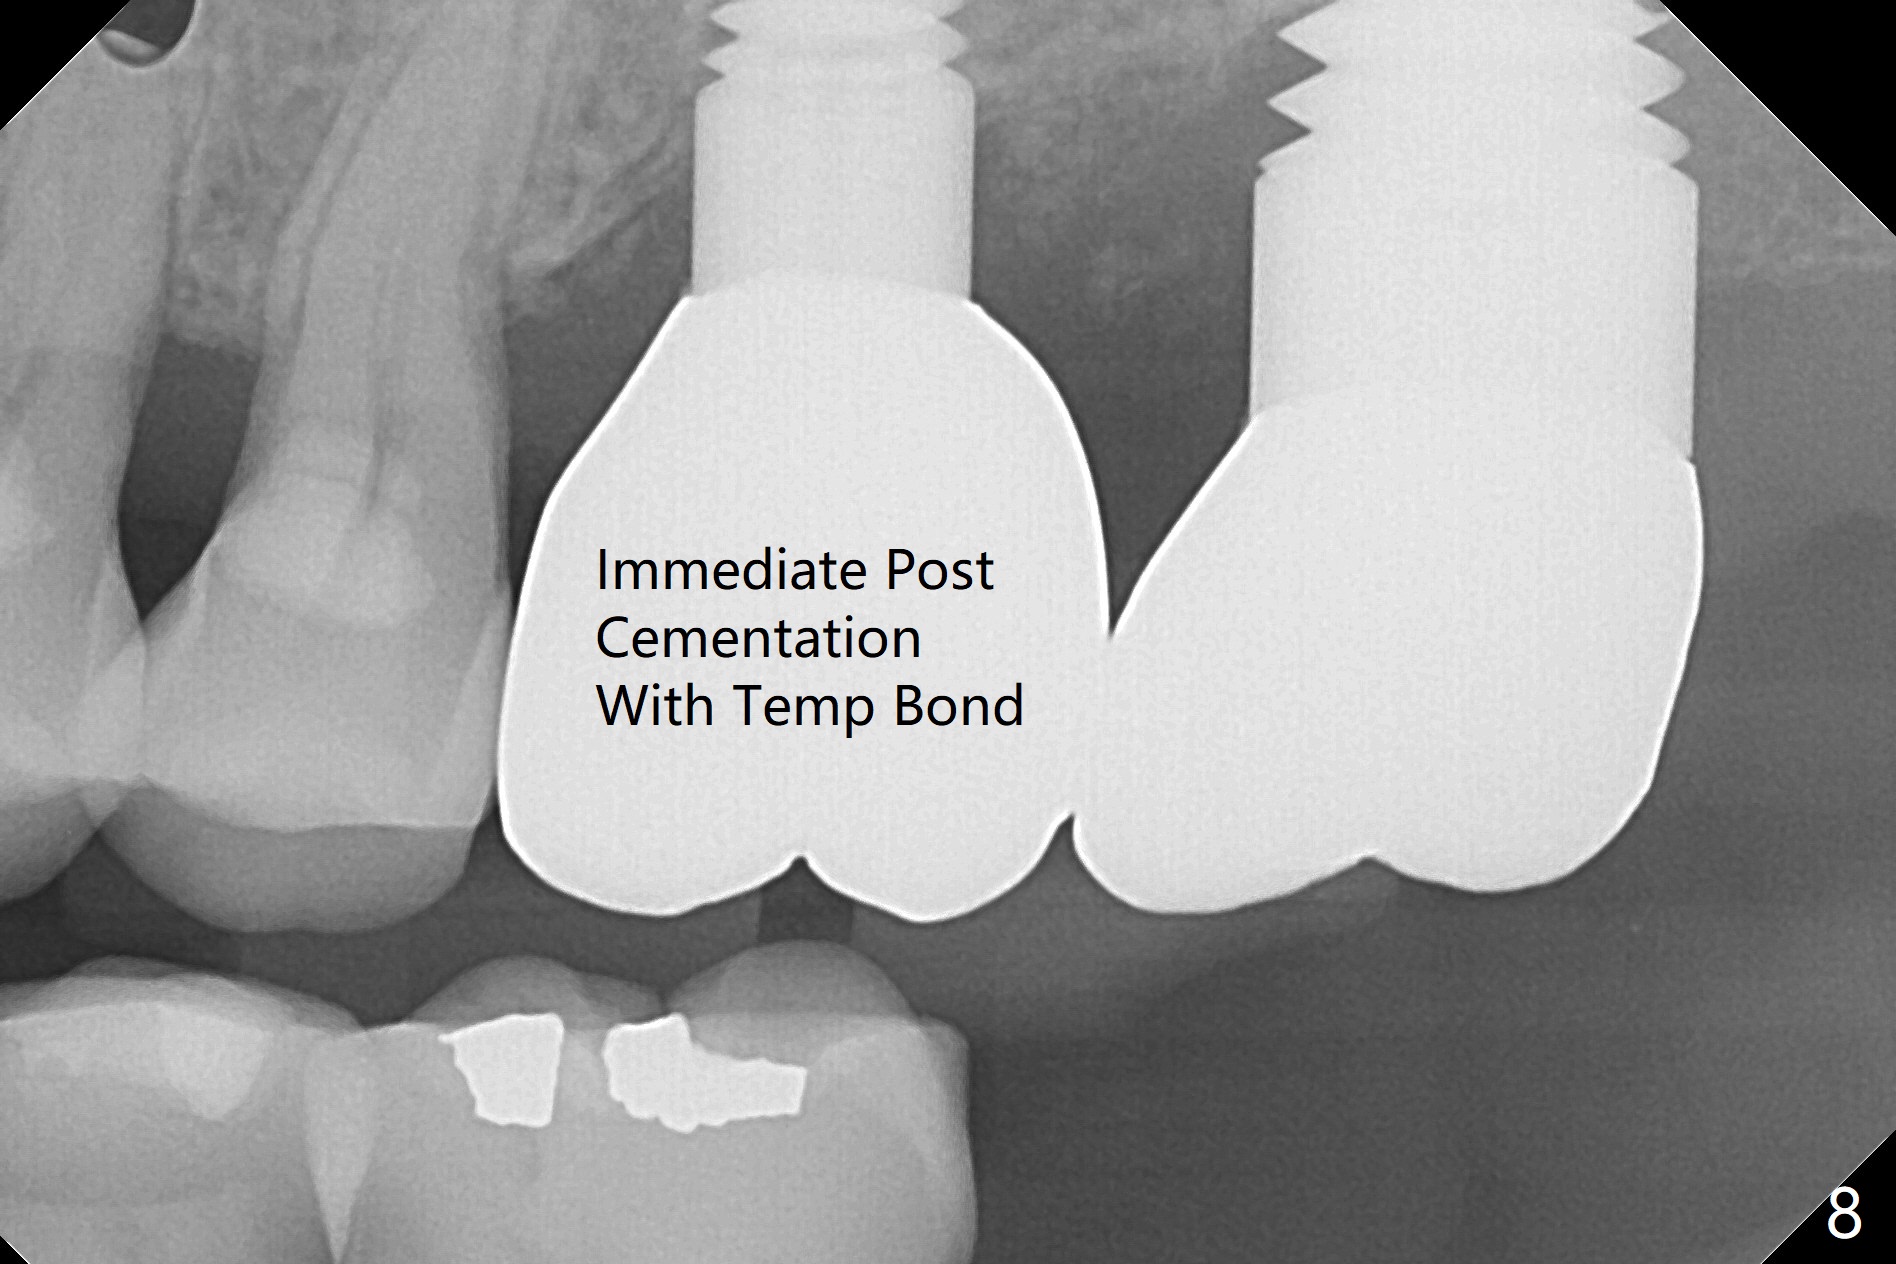
After osteotomy with guide at #14 (4.5x7.3 mm last drill with 1 O-ring/10.5 mm offset for bone-level implant), a 5x11 mm tissue-level tap is used with allograft for sinus lift (Fig.1). With one more round of allograft for sinus lift, a 5x11 mm tissue-level implant is placed with ~ 50 Ncm (Fig.2). CBCT 3-D images (Fig.3 (palatal view), 4 (distal view) (D: distal)) and coronal section (Fig.5 (P: palatal)) show the bone graft in the sinus (*). The patient returns for restoration 5 months postop in spite of running out insurance benefits because of discomfort with the immediate provisional. When the latter is removed (Fig.6), the gingiva is erythematous. It appears that the implant was placed deep. The abutment is removed for easy local oral hygiene. A healing cuff will be used or the implant will be reversely torqued. If the former is placed, a 4 mm longer abutment (4.5x9 mm) should be used to increase crown retention using temp bond . In fact the provisional forms a nice gingival cuff before cementation (Fig.7,8). Return to Upper Molar Immediate Implant, Prevent Molar Periimplantitis (Protocols, Table), Trajectory 18 Xin Wei, DDS, PhD, MS 1st edition 04/22/2019, last revision 02/28/2020