,%20complete%20seating.jpg)
,%20incomplete%20seating.jpg)
.jpg)
|
|
|
|
|
|
|
|
|
|
|
|
|
|
Abutment Seating I
Two topics will be discussed: 1. steps of bone graft involving sinus lift and immediate implant; 2. how to place abutment securely in immediate implant.
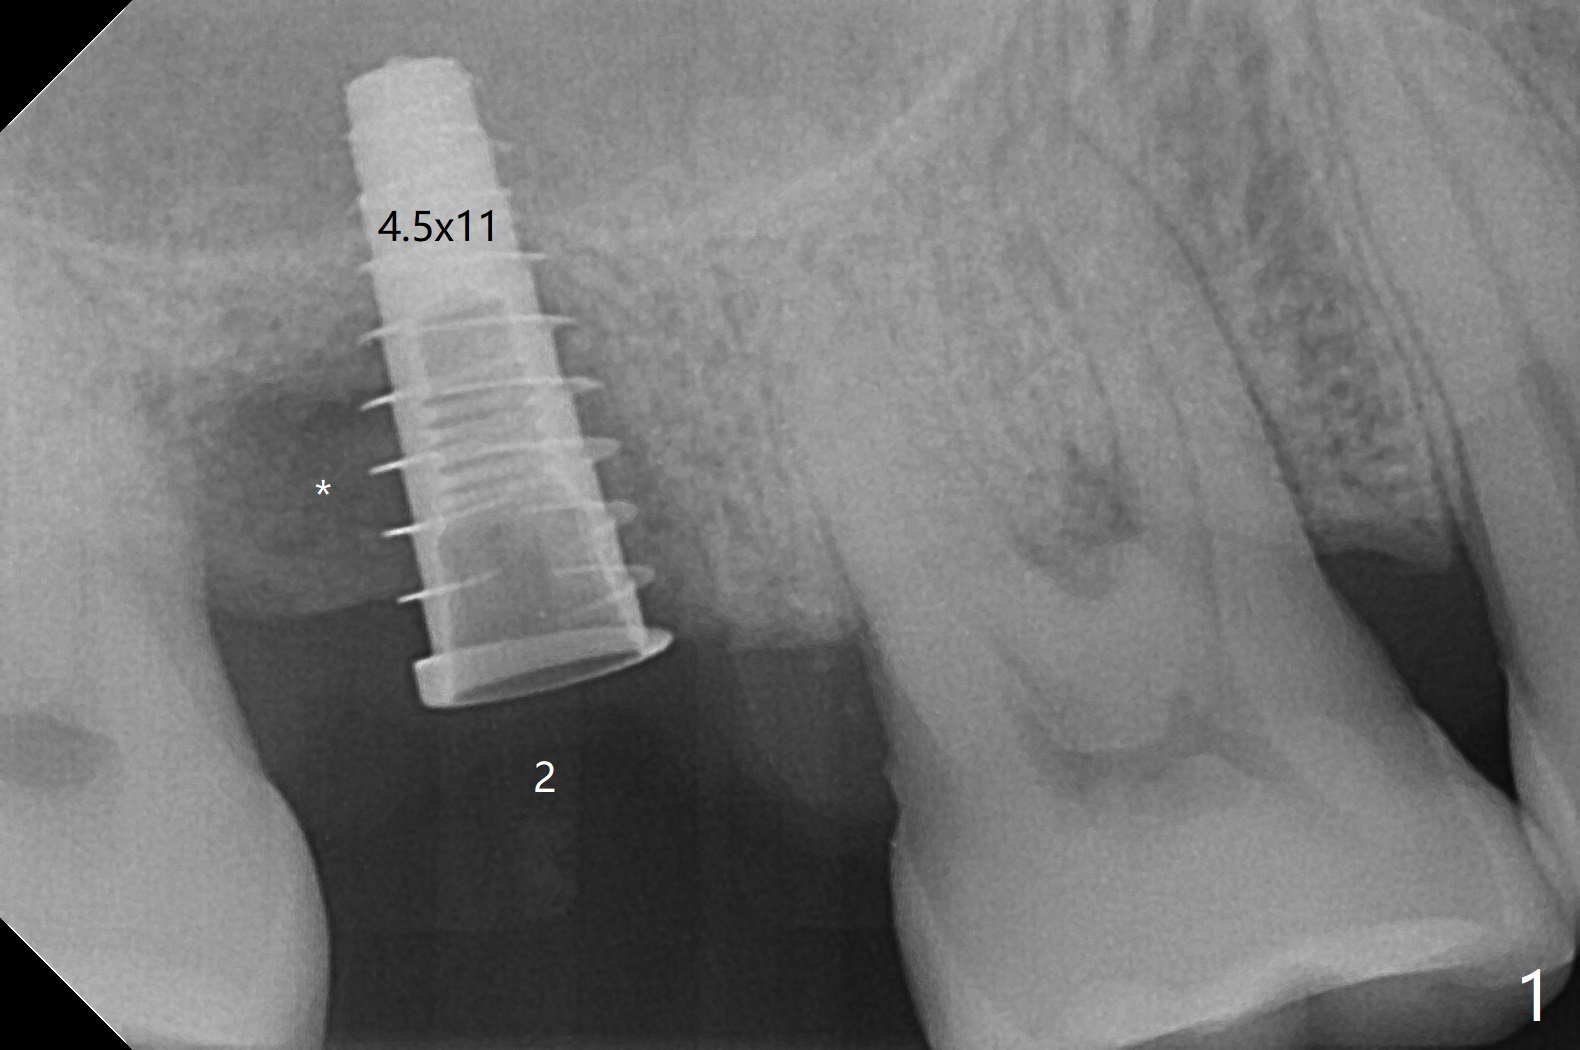
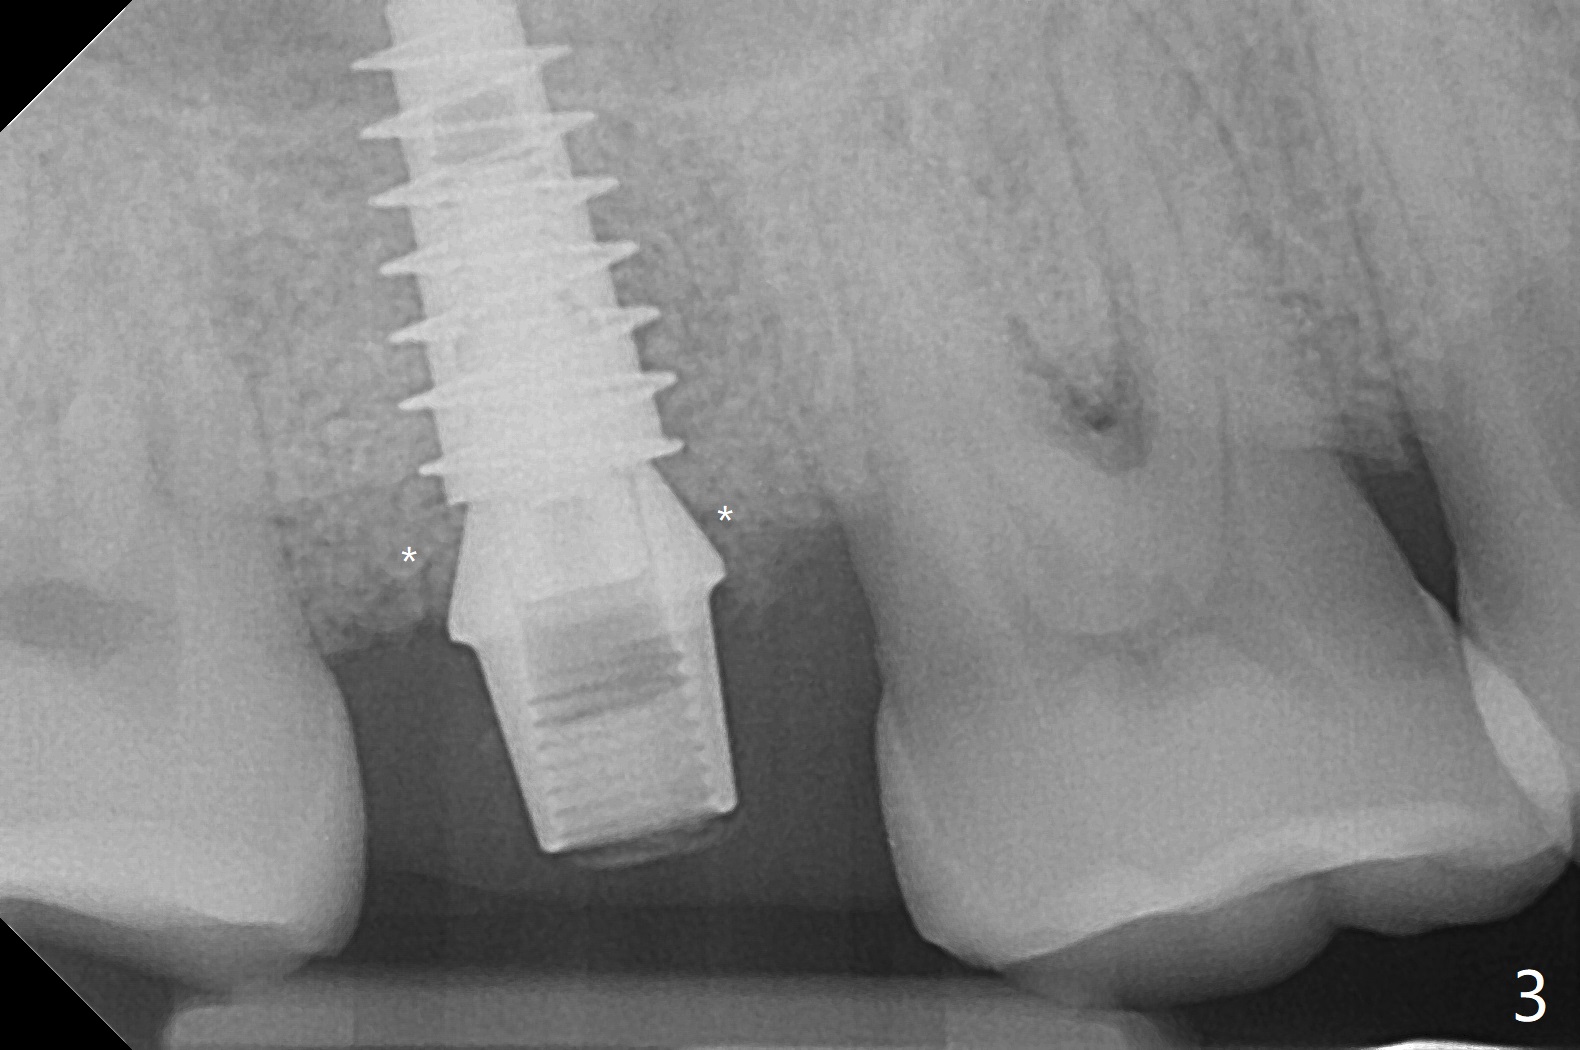
The tooth #2 has severe distobucal (DB) infection before and after extraction (Fig.1 *); sinus lift is done with 4.5x11 mm dummy implant using guide. After placing bone graft into the sinus and the osteotomy (Fig.2 black *), a 5x9 mm implant is placed with >30 Ncm. Second round of bone graft is placed around the implant, including DB defect (white *). Then a 5x4(2) mm pair abutment is placed, followed by the third round of bone graft (Fig.3 *). Finally an immediate provisional is fabricated to keep the graft in place. The implant is loose nearly 4 months postop.
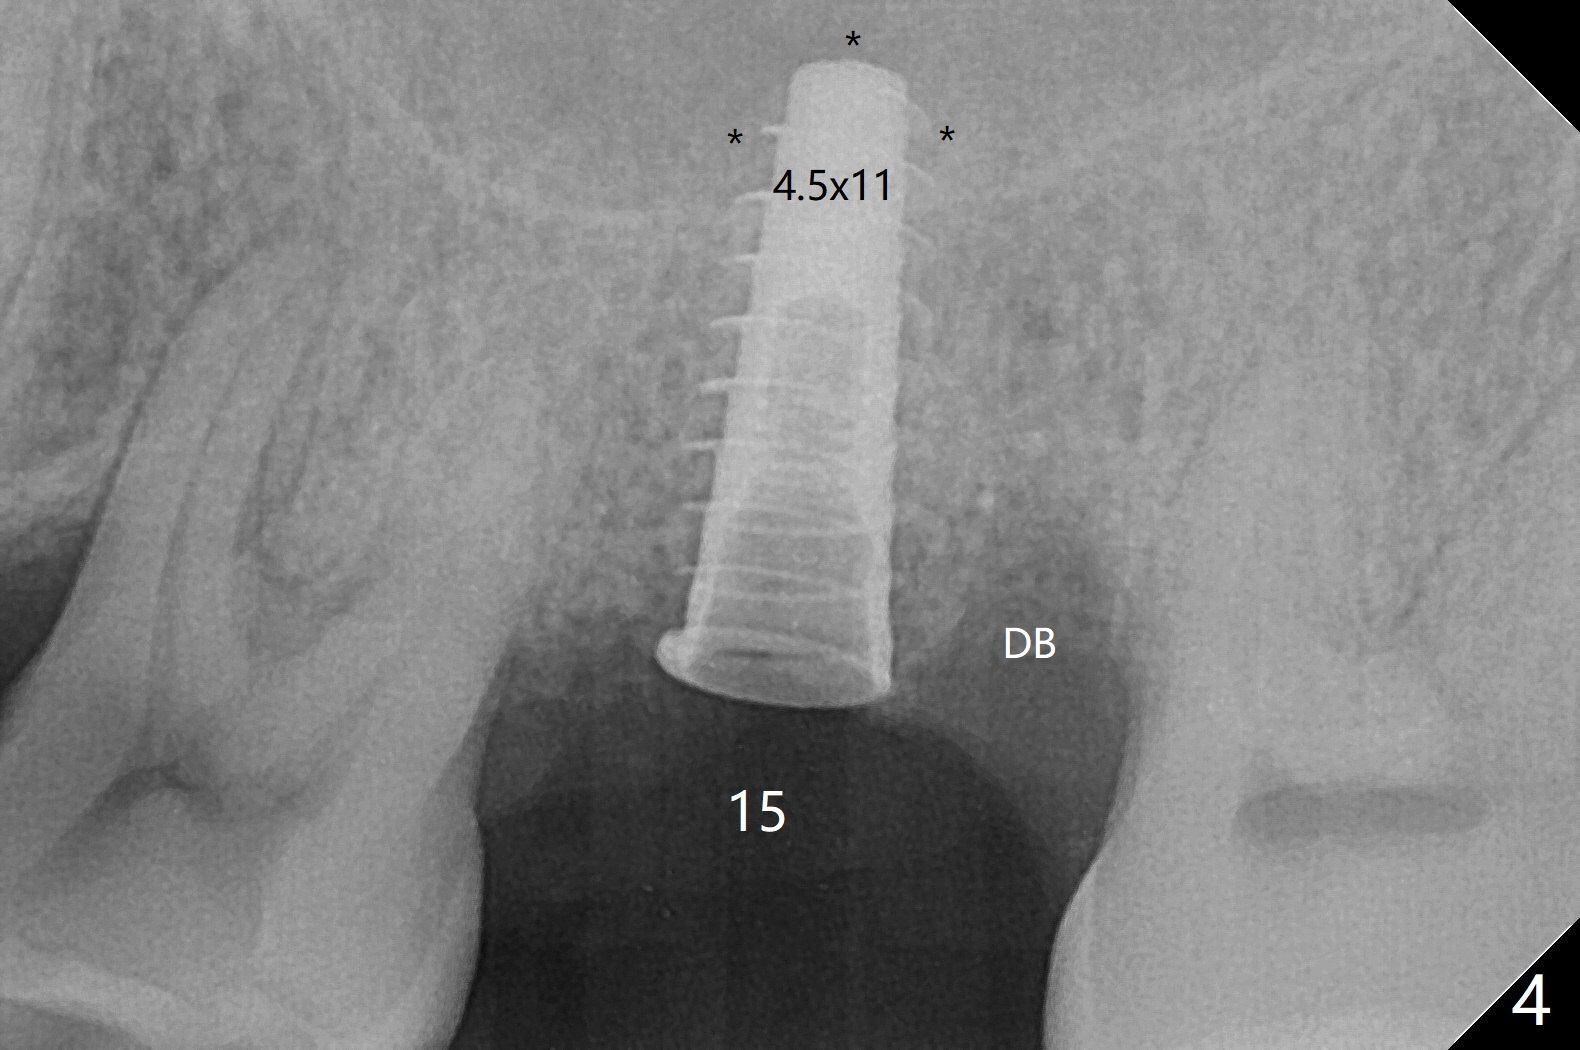
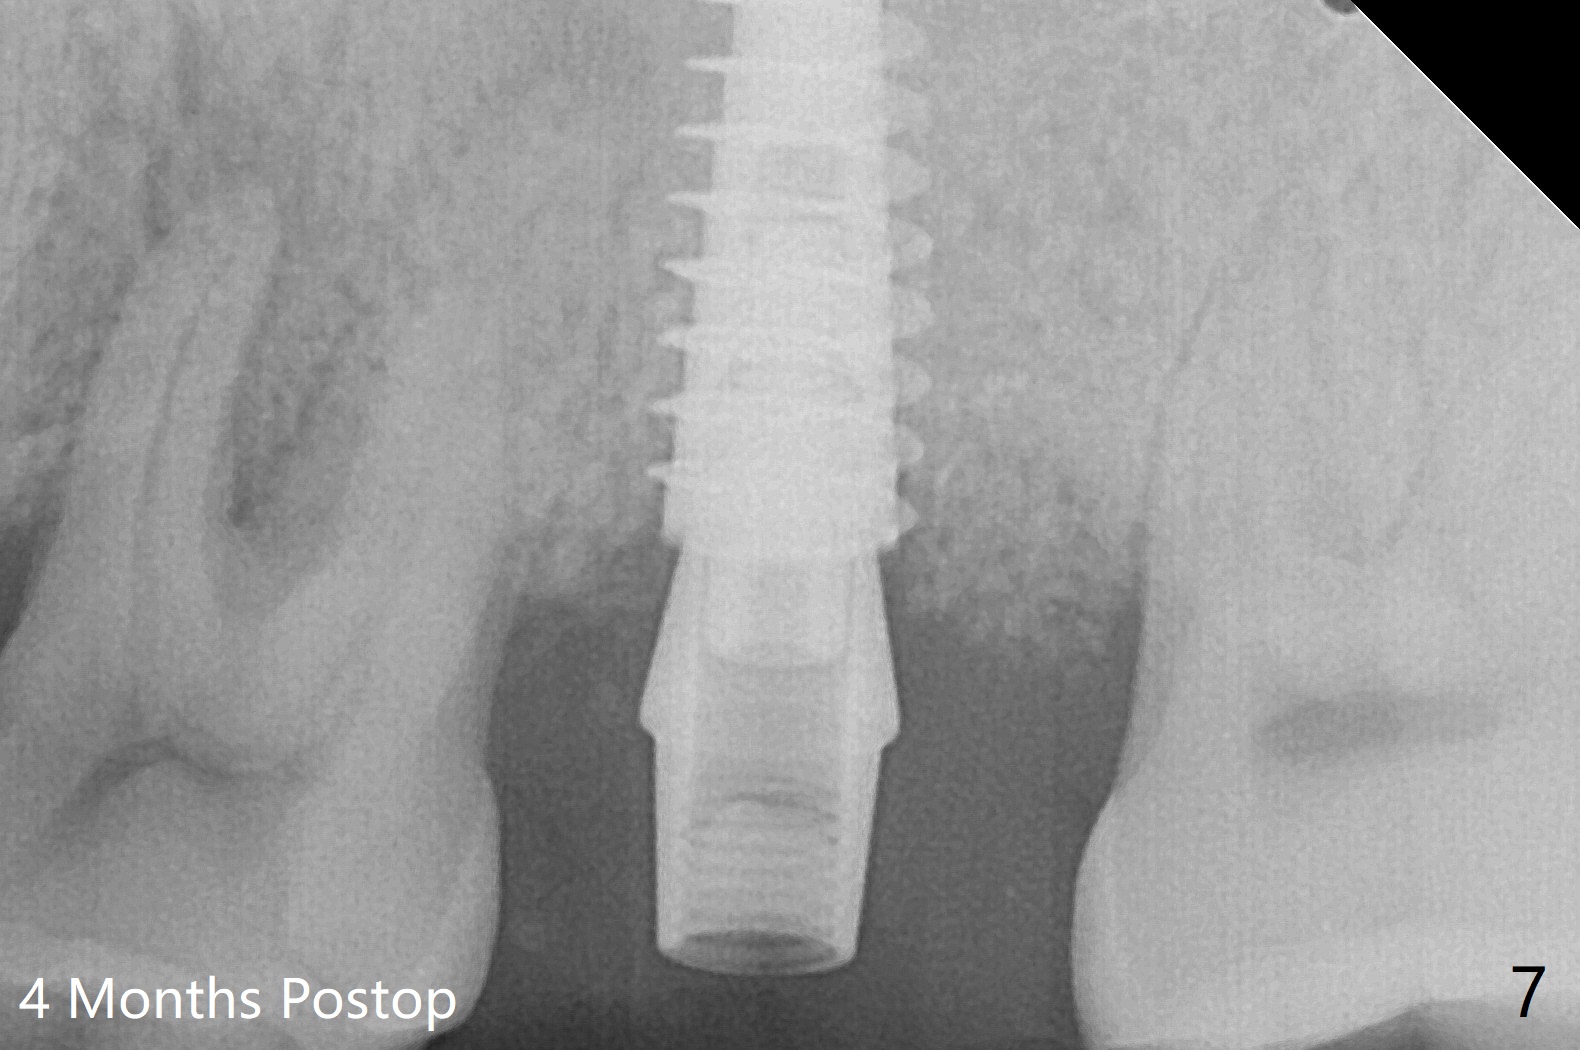
At #15, the sinus floor is initially perforated with modified drill sequence. With placement of PRF and bone graft in the osteotomy, the same 4.5x11 mm dummy implant is inserted to start sinus lift (Fig.4 *). When the dummy implant is removed, more bone graft is placed into the osteotomy and pushed into the sinus with the 5x11 mm final implant (Fig.5). Second round of bone graft is placed next to the implant before placing a 4.5x4(2) mm abutment, but the latter appears not to be seated completely, as indicated by the arrowhead. After use of 6 mm profile drill, a 4.5x4(3 (cuff)) mm abutment is able to be seated apparently completely without a gap (Fig.6 <). The third round of bone graft (Fig.6 *) is placed around the abutment to make sure that the underlying implant is fully covered to reduce periimplantitis in the future. The bone graft around the abutment disappears most coronally, while that around the implant remains 4 months postop (Fig.7). The implant is stable.
Return to
Upper
Molar Immediate Implant,
Prevent Molar Periimplantitis (Protocols,
Table)
No Deviation
Prevent
Screw Loosening
Xin Wei, DDS, PhD, MS 1st edition
02/07/2020, last revision
06/02/2020