
%20t.jpg)
|
|
|
||
|
|
|
|
|
Engagement as much Bone as Possible
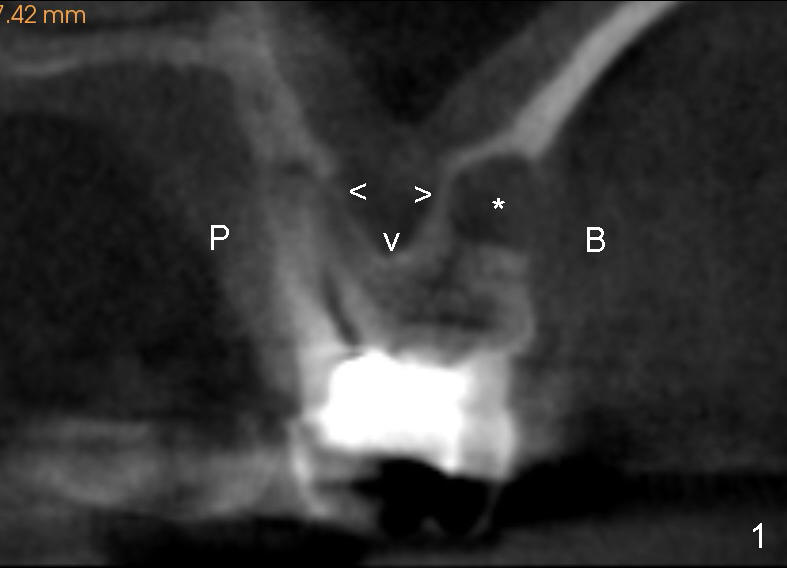
Fig.1 is a CBCT coronal section of the tooth #14. It shows that the sinus floor (arrowheads) extends coronally between roots (P: palatal; B: buccal). *: apical radiolucency associated with the mesiobuccal root.
Fig.2 shows the socket after extraction. A series of osteotomes will be used to push the whole septum (*, not just the sinus floor) apically so that a longer implant is placed and the apical end of the implant will be engaged to the side of the sockets (arrowheads).
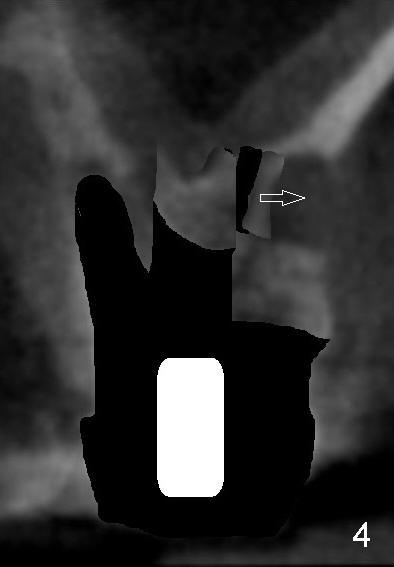
At first, a small pointed osteotomy (Fig.3: white arrow) is tapped upward to bring the middle portion of the septum superiorly (*).
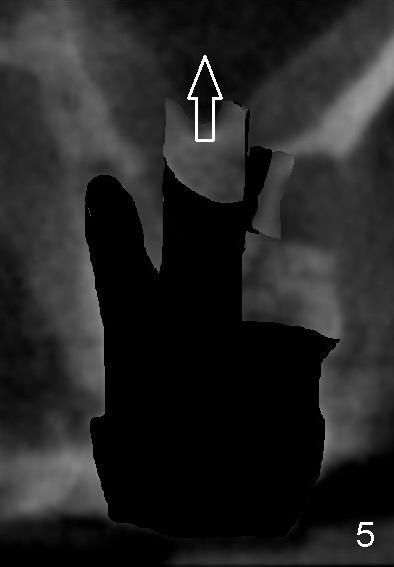
As the diameter of osteotomes increases (Fig.4 white cylinder), the larger portion of the septum is being lifted and the side segment of bone may be pushed buccally (arrow). The bone is also being pushed gradually higher position (Fig.5).
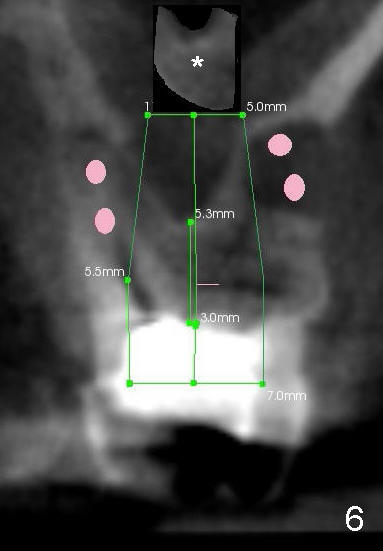
Ultimately, an implant as large as 7x14 mm is placed (Fig.6 green area). Its apical portion is covered by the lifted bone (*, although maybe thin due to continuous compression), whereas the side of the apical portion of the implant contacts the original socket walls (i.e., the side of the inferior extension of the sinus floor). In all, the contact area of the implant is expected to increase; so will be the insertion torque. No bone graft is needed over the sinus lift, while it may be placed in the sockets (pink circles).
Return to Sinus Lift
Xin Wei, DDS, PhD, MS 1st edition 05/18/2014, last revision 05/29/2014