|
|
|
|
|
|
|
|
|
|
|
|
|
|
|
|
|
|
Why Should the Upper Molar Immediate Implant be Placed as Deep as Possible?
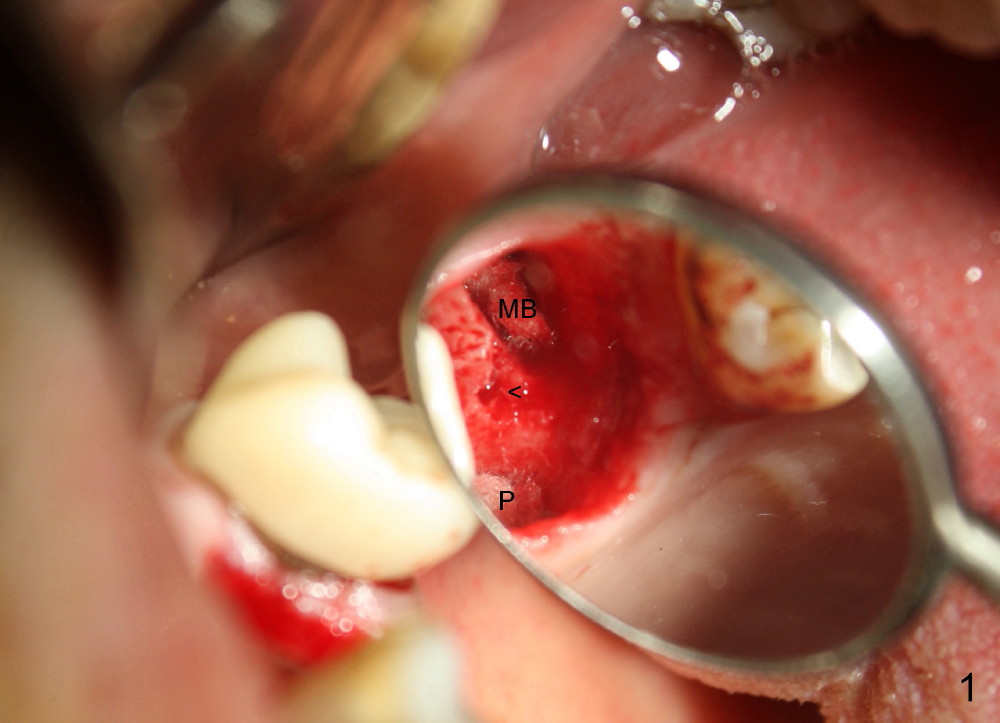
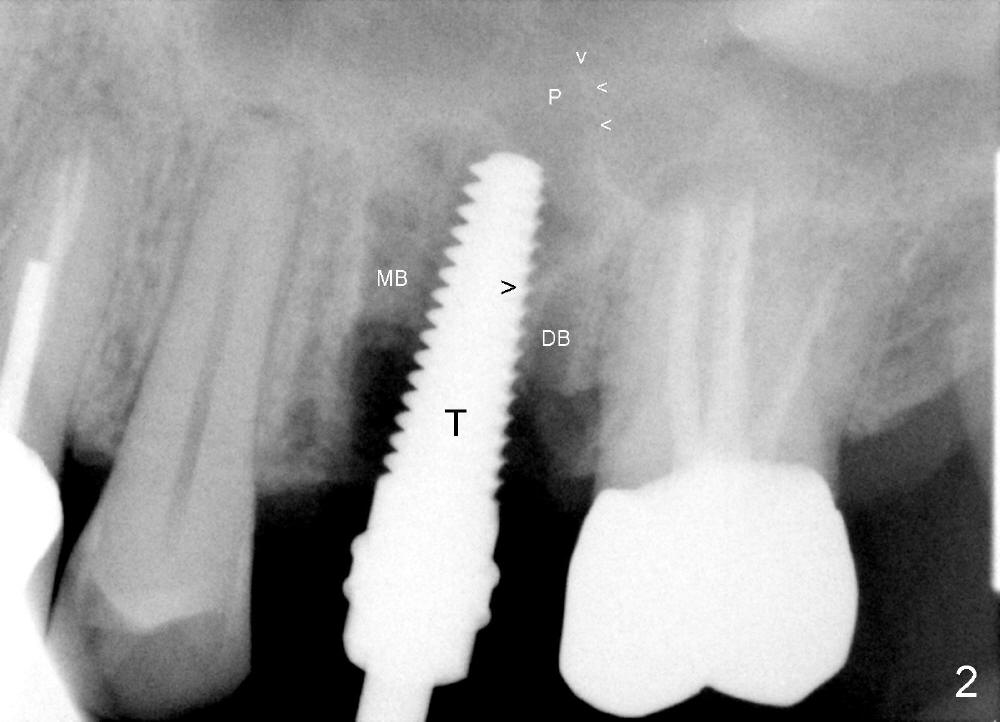
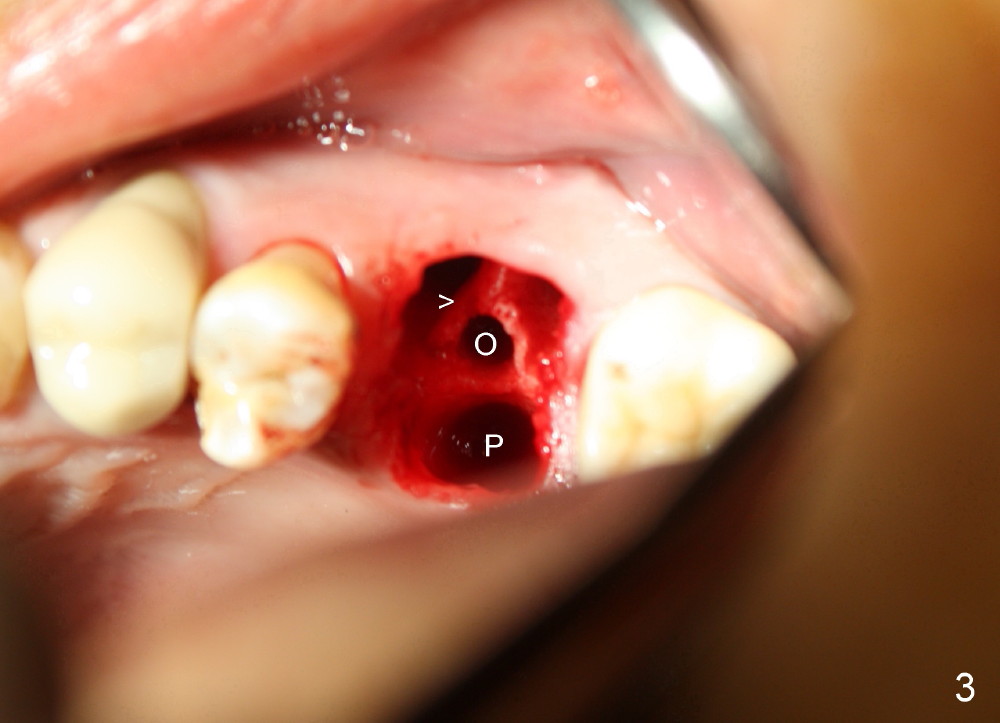
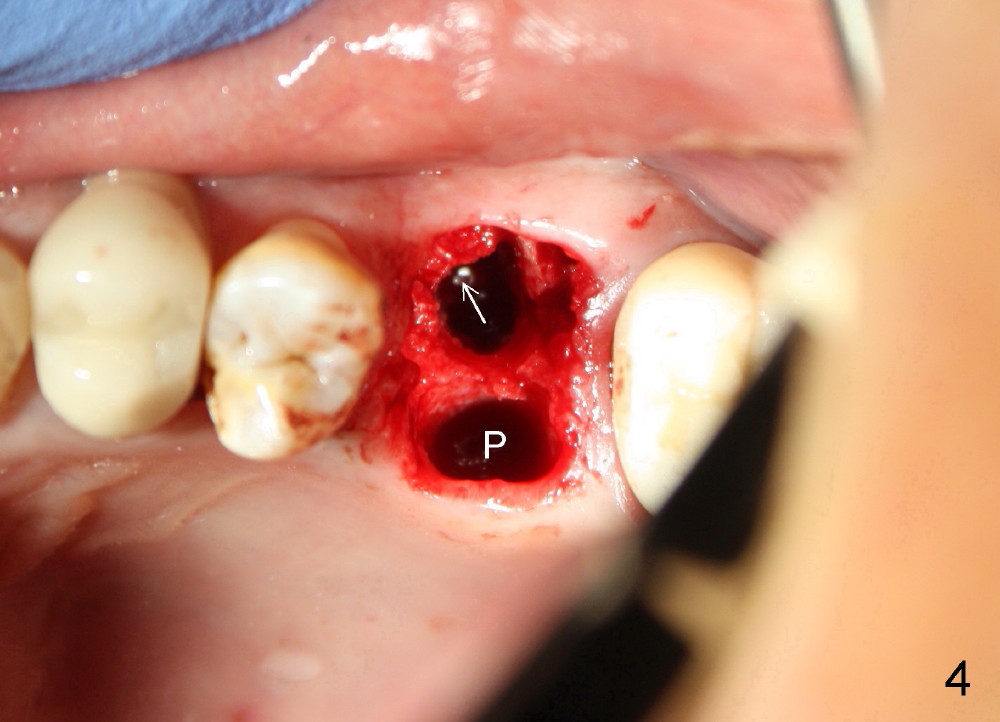
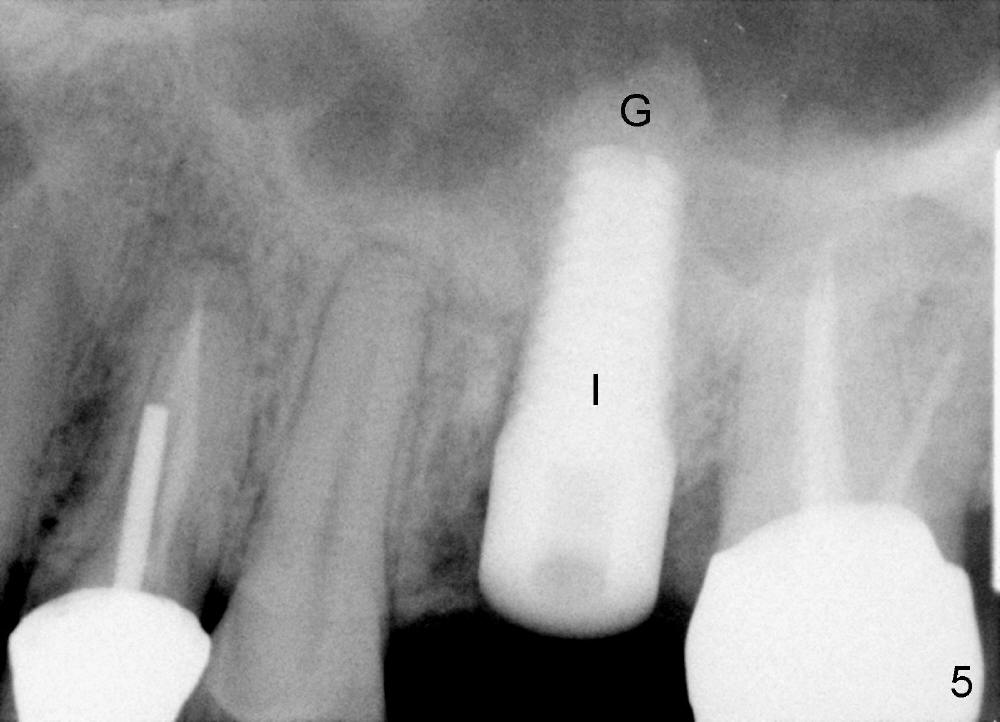
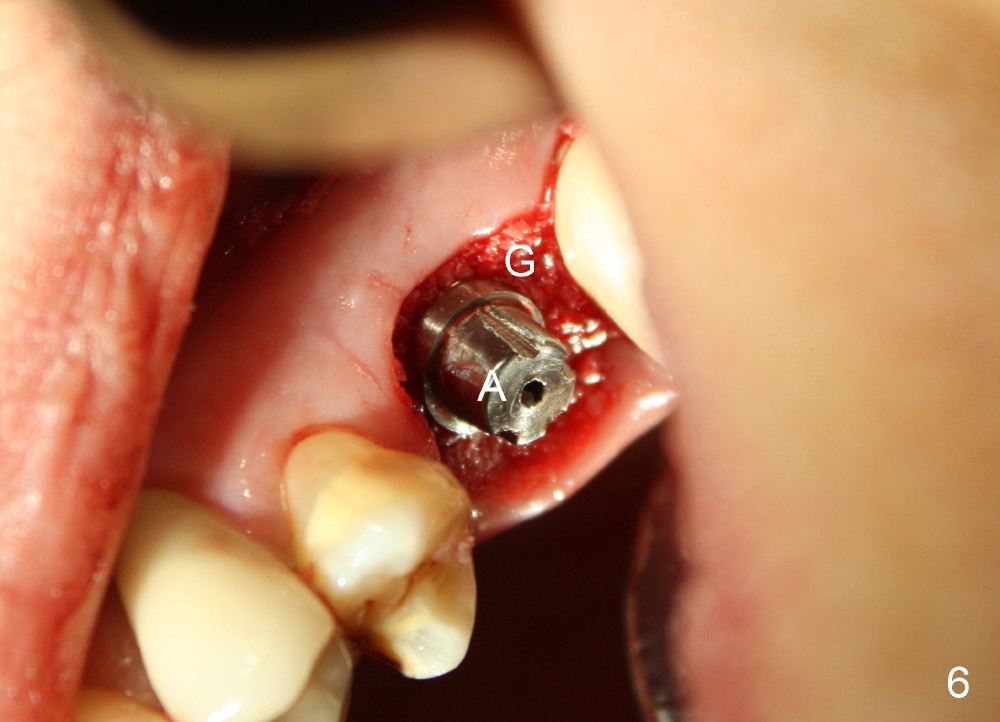
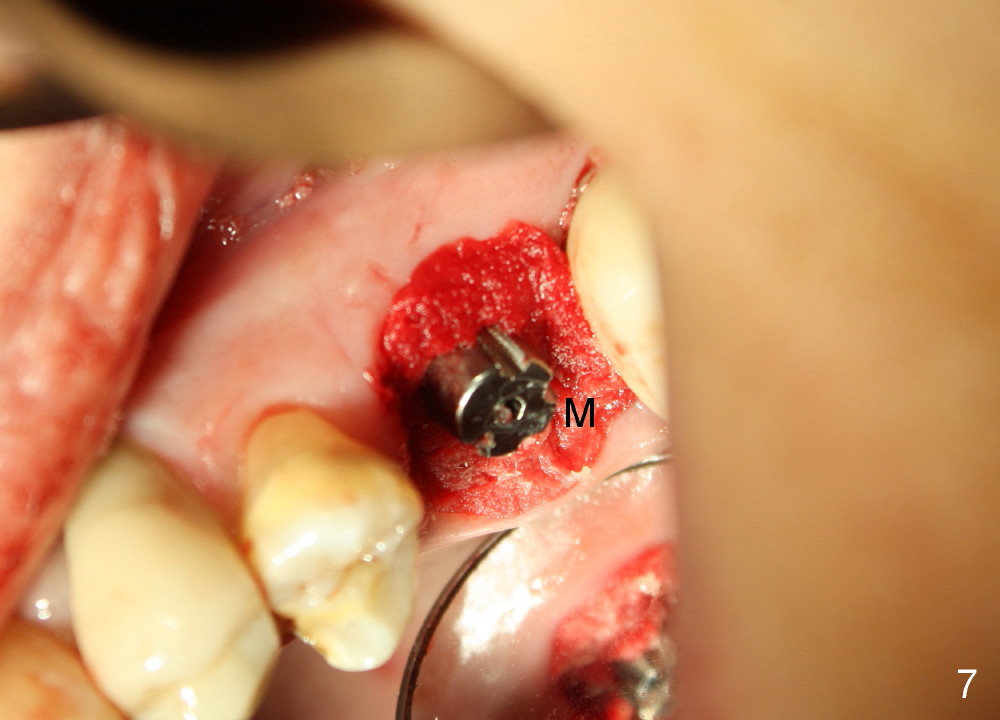
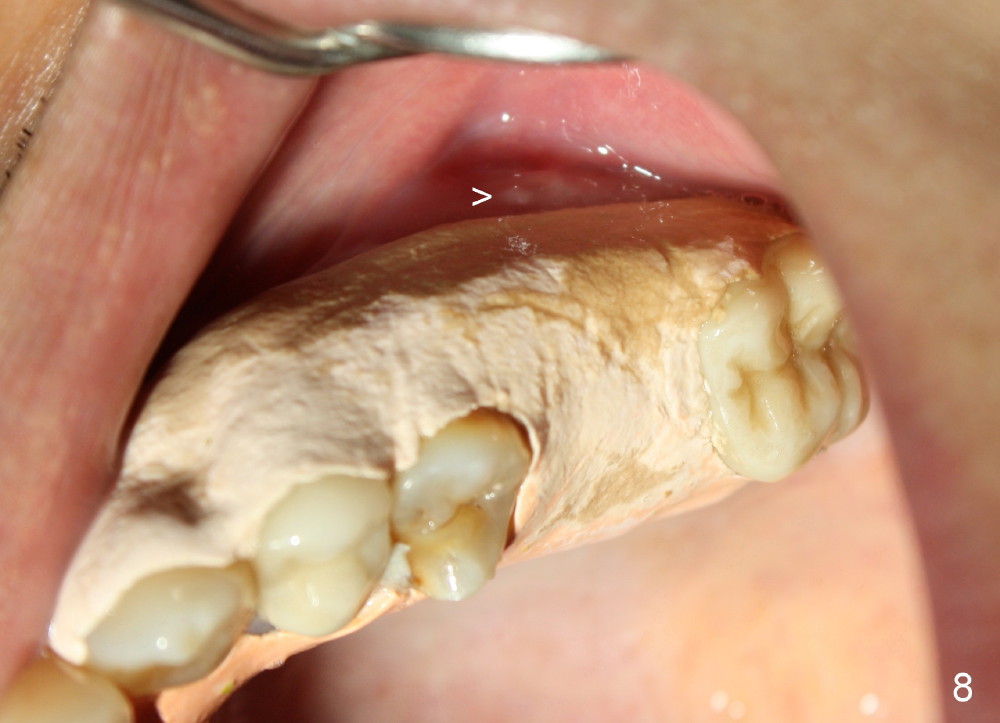
The upper left 1st molar is extracted with sectioning. The septum is large. A surgical fissure bur is used to initiate an osteotomy in the middle of the septum (Fig.1 <; P: palatal socket, MB: mesiobuccal socket), followed by tapping with resistance a 2 mm osteotome ~ 8 mm into the septum. It is tougher to drive 3 mm osteotomy. A 2.5 mm reamer is used to enlarge the osteotomy at 50 RPM at the same depth. Then it is relatively easy to tap 3 and 4 mm osteotomes at ~ 8 mm into the septum. A 4.5x17 mm tap is inserted 8 mm deep with binding to the septum. PA is taken (Fig.2). It appears that the sinus floor (black >) has been penetrated, but the osteotomy has not reached the apex (white >) of the palatal (P) socket. Then the tap is advanced ~ another 3 mm. When the tap is removed, the osteotomy (Fig.3 O) is slightly toward the buccal aspect of the extraction socket, but it has intact wall, including the mesiobuccal (>). The apex of the ostoetomy has no bone, but there is no air leakage. The next tap, 5x17 mm, is inserted shallower (~ 8 mm in the septum; to reduce potential trauma) with stability. However, 6x17 mm tap at the same depth does not obtain stability, since the osteotomy deviates severely mesiobuccally (Fig.4 arrow) with breakdown of the mesiobuccal wall. So the osteotomy has to be deeper in order to achieve stability of 6x17 mm tap (by engaging into more apical bone). A 7x17 mm tap is then intended to be inserted to close the socket as much as possible, but as it is being inserted, the osteotomy is more severely deviated and tilted mesiobuccally with the original mesiobuccal wall further being broken down (not shown). It appears to compromise stability. Mixture of autogenous bone from reamer, allograft and synthetic bone is placed in the mesiobuccal and palatal sockets before placement of the 6x17 mm implant (Fig.5 I). Unfortunately some of graft blocks the apical osteotomy. To clear the blockage, some of previous osteotome and taps are re-inserted. The result is in fact beneficial, as bone graft (G) is pushed upward. Prior to implant placement, nose blowing test does not produce air leakage. More allograft is placed in the coronal portion of the sockets (Fig.6 G); an abutment with precut slots is placed (A) with intention of better holding perio dressing in place after placement of a collagen dressing (Fig.7 M). A temporary crown may be placed when the perio dressing is dislodged. The provisional is to keep the membrane and bone graft in place. The patient returns for follow up 1 week postop. He is symptom free. The abscess appears to be resolving (Fig.8 >); the perio dressing remains in place.
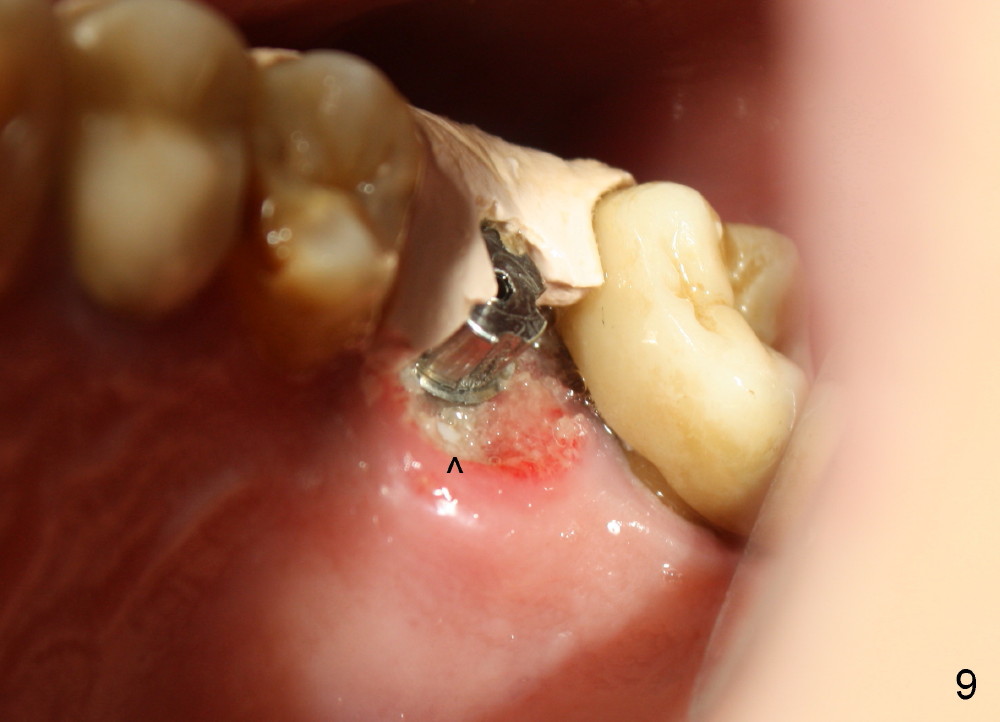
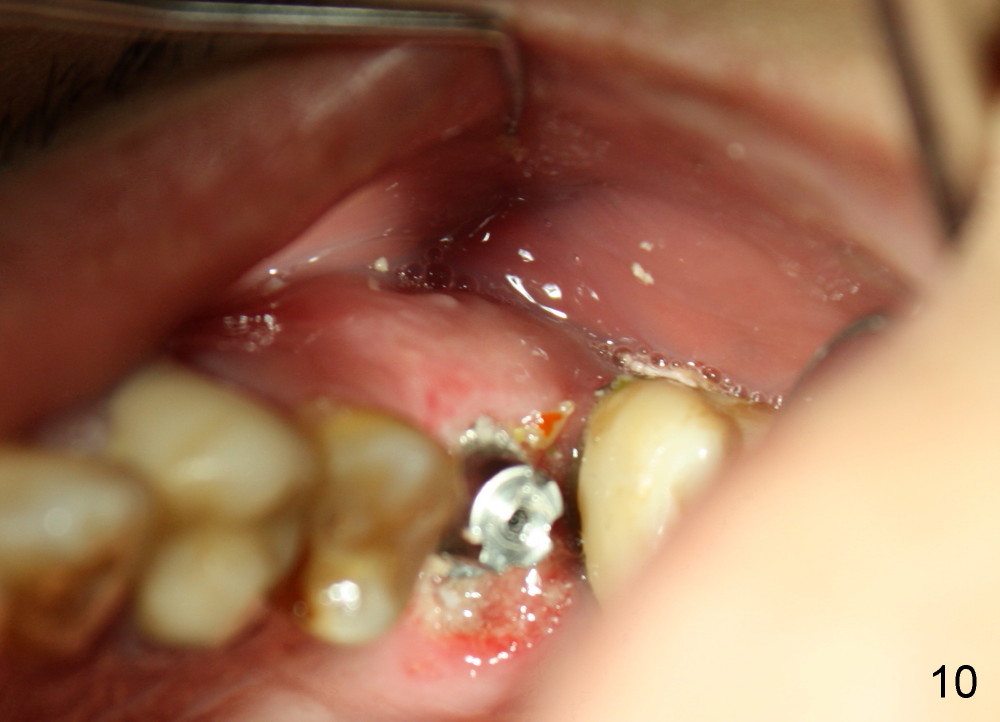
One week later, the lingual portion of the perio dressing is dislodged. The wound is healing, while part of bone graft is exposed (Fig.9 ^). The remaining perio dressing is removed before repacking (Fig.10): it appears that the buccal fistula has disappeared, as compared to preop.
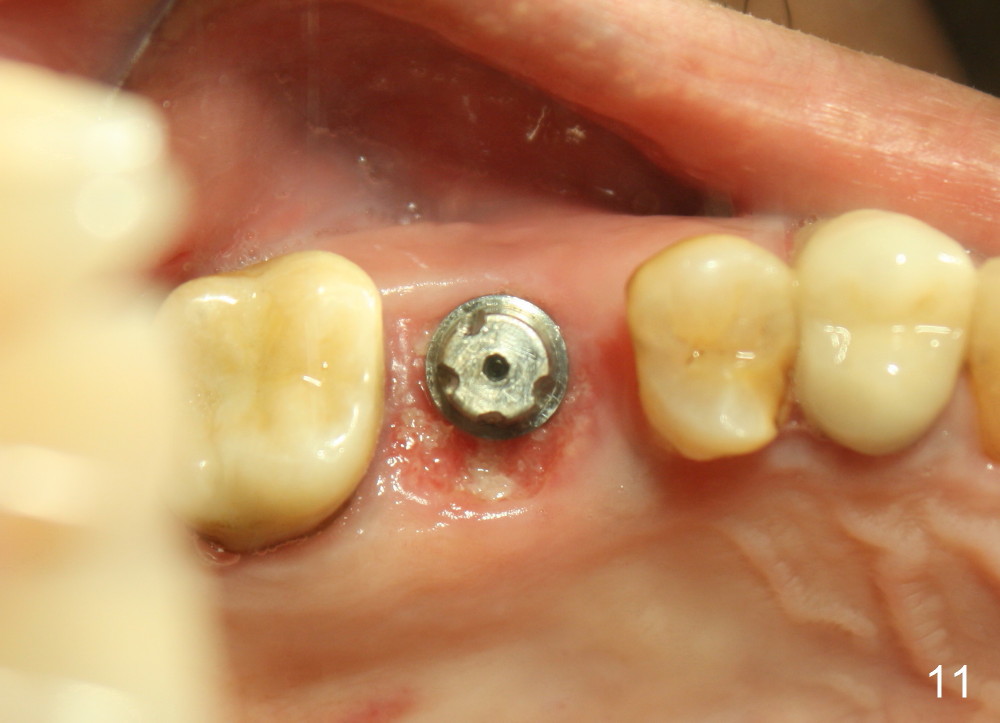
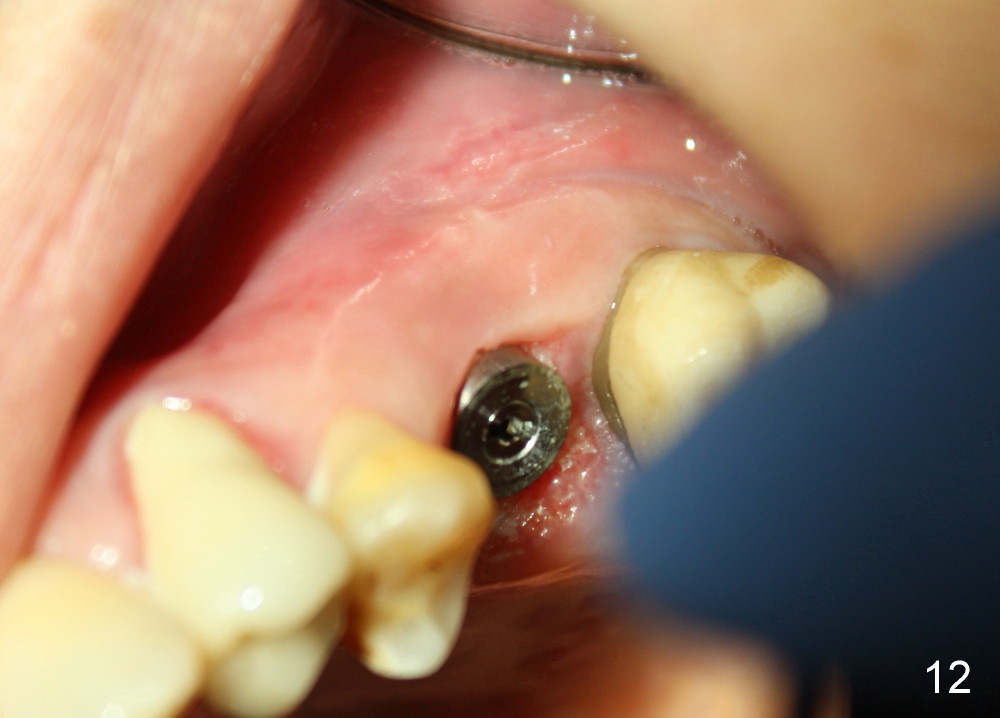
The 2nd perio dressing lasts for another two weeks. When it is removed in clinic, the wound heals; the implant is shown placed slightly buccally (Fig.11, occlusal mirror image). Buccal view shows that the fistula dissolves (Fig.12).
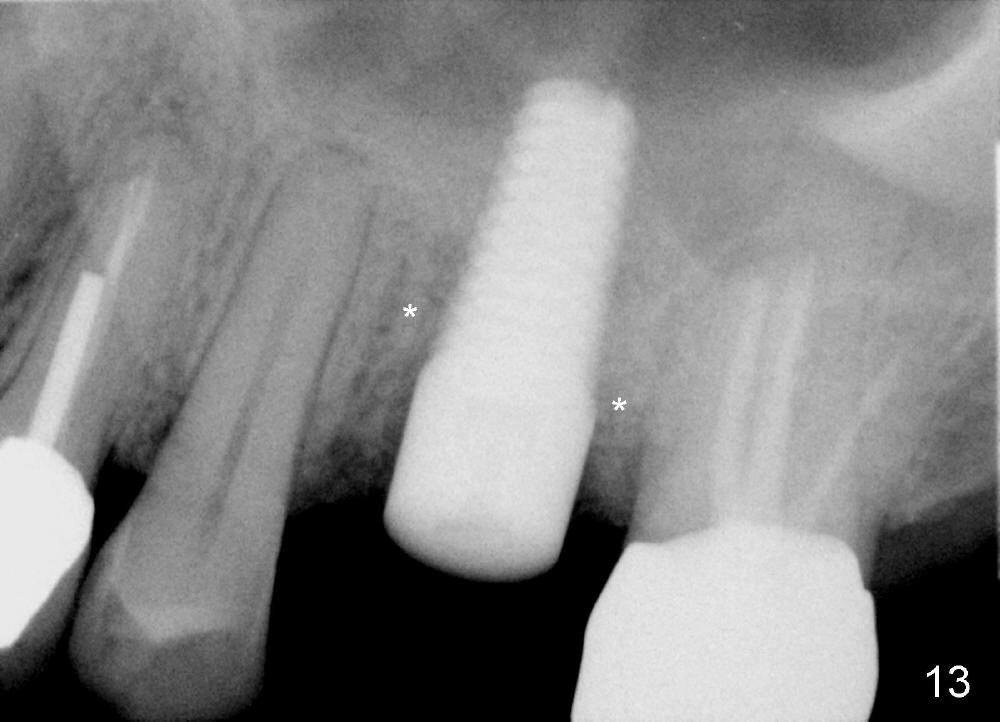
Four months postop, bone around the implant looks consolidated (Fig.13 *, compare to Fig.2,5).
Return to Sinus Lift
Xin Wei, DDS, PhD, MS 1st edition 05/28/2014, last revision 10/02/2014