

|
|
|
|
|
|
|
|
|
|||
|
|
|
|||
|
|
|
|
||
|
|
|
|
||
|
|
|
|
||
|
|
|
|||
How does Molar Immediate Implant Get Primary Stability and Why is Immediate Provisional Required?
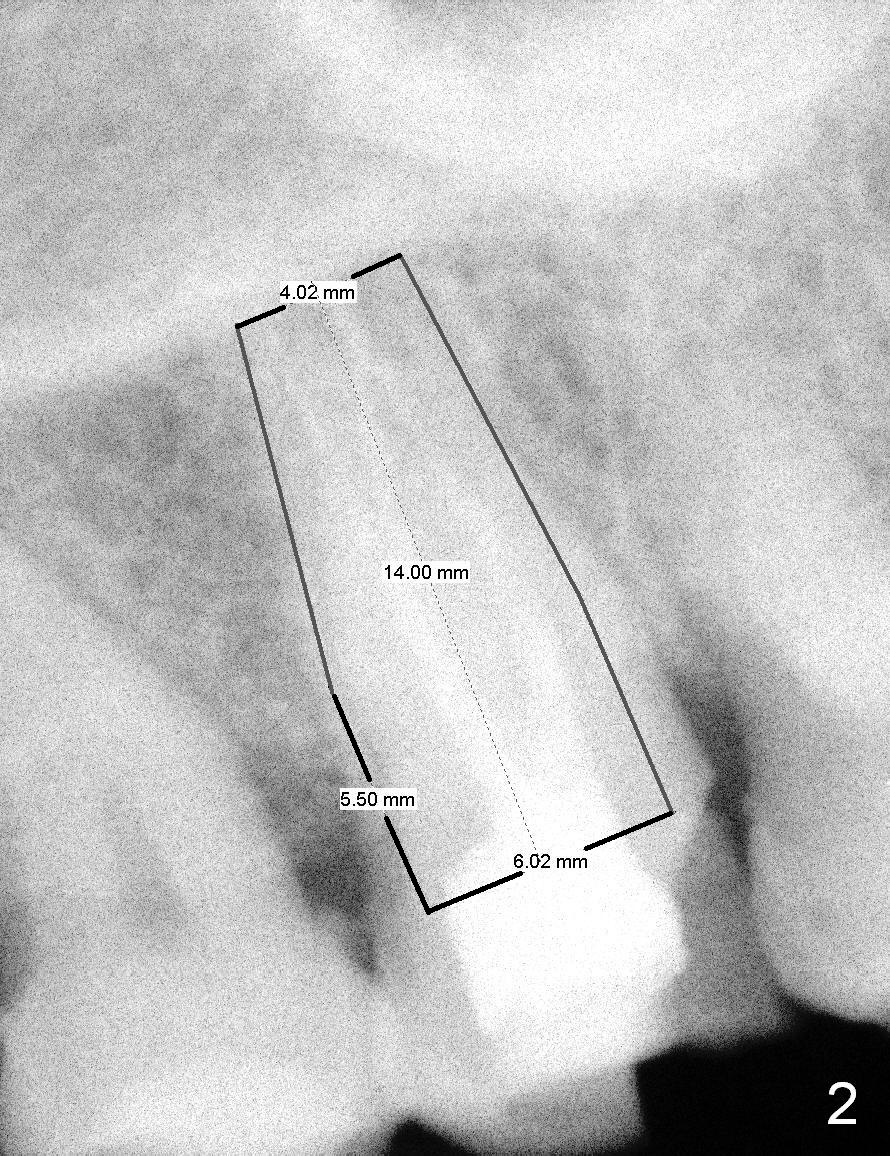
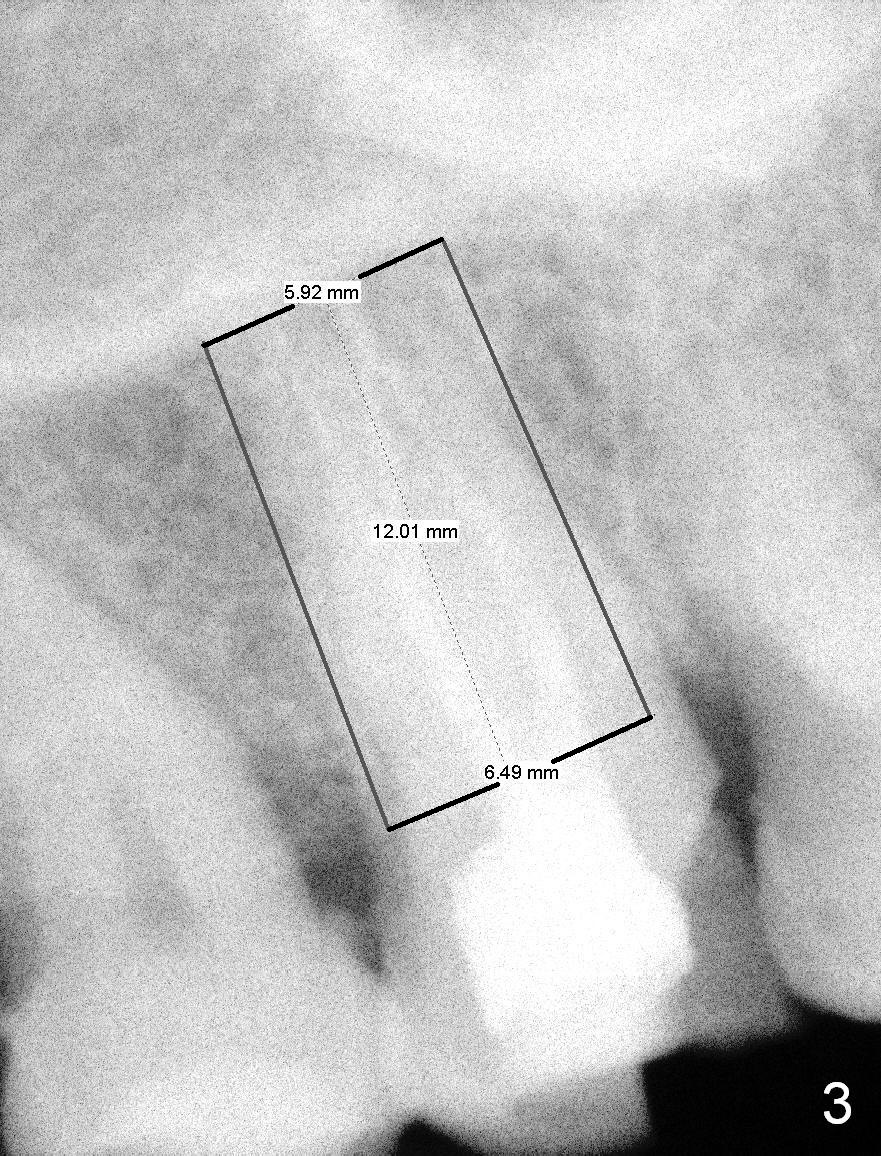
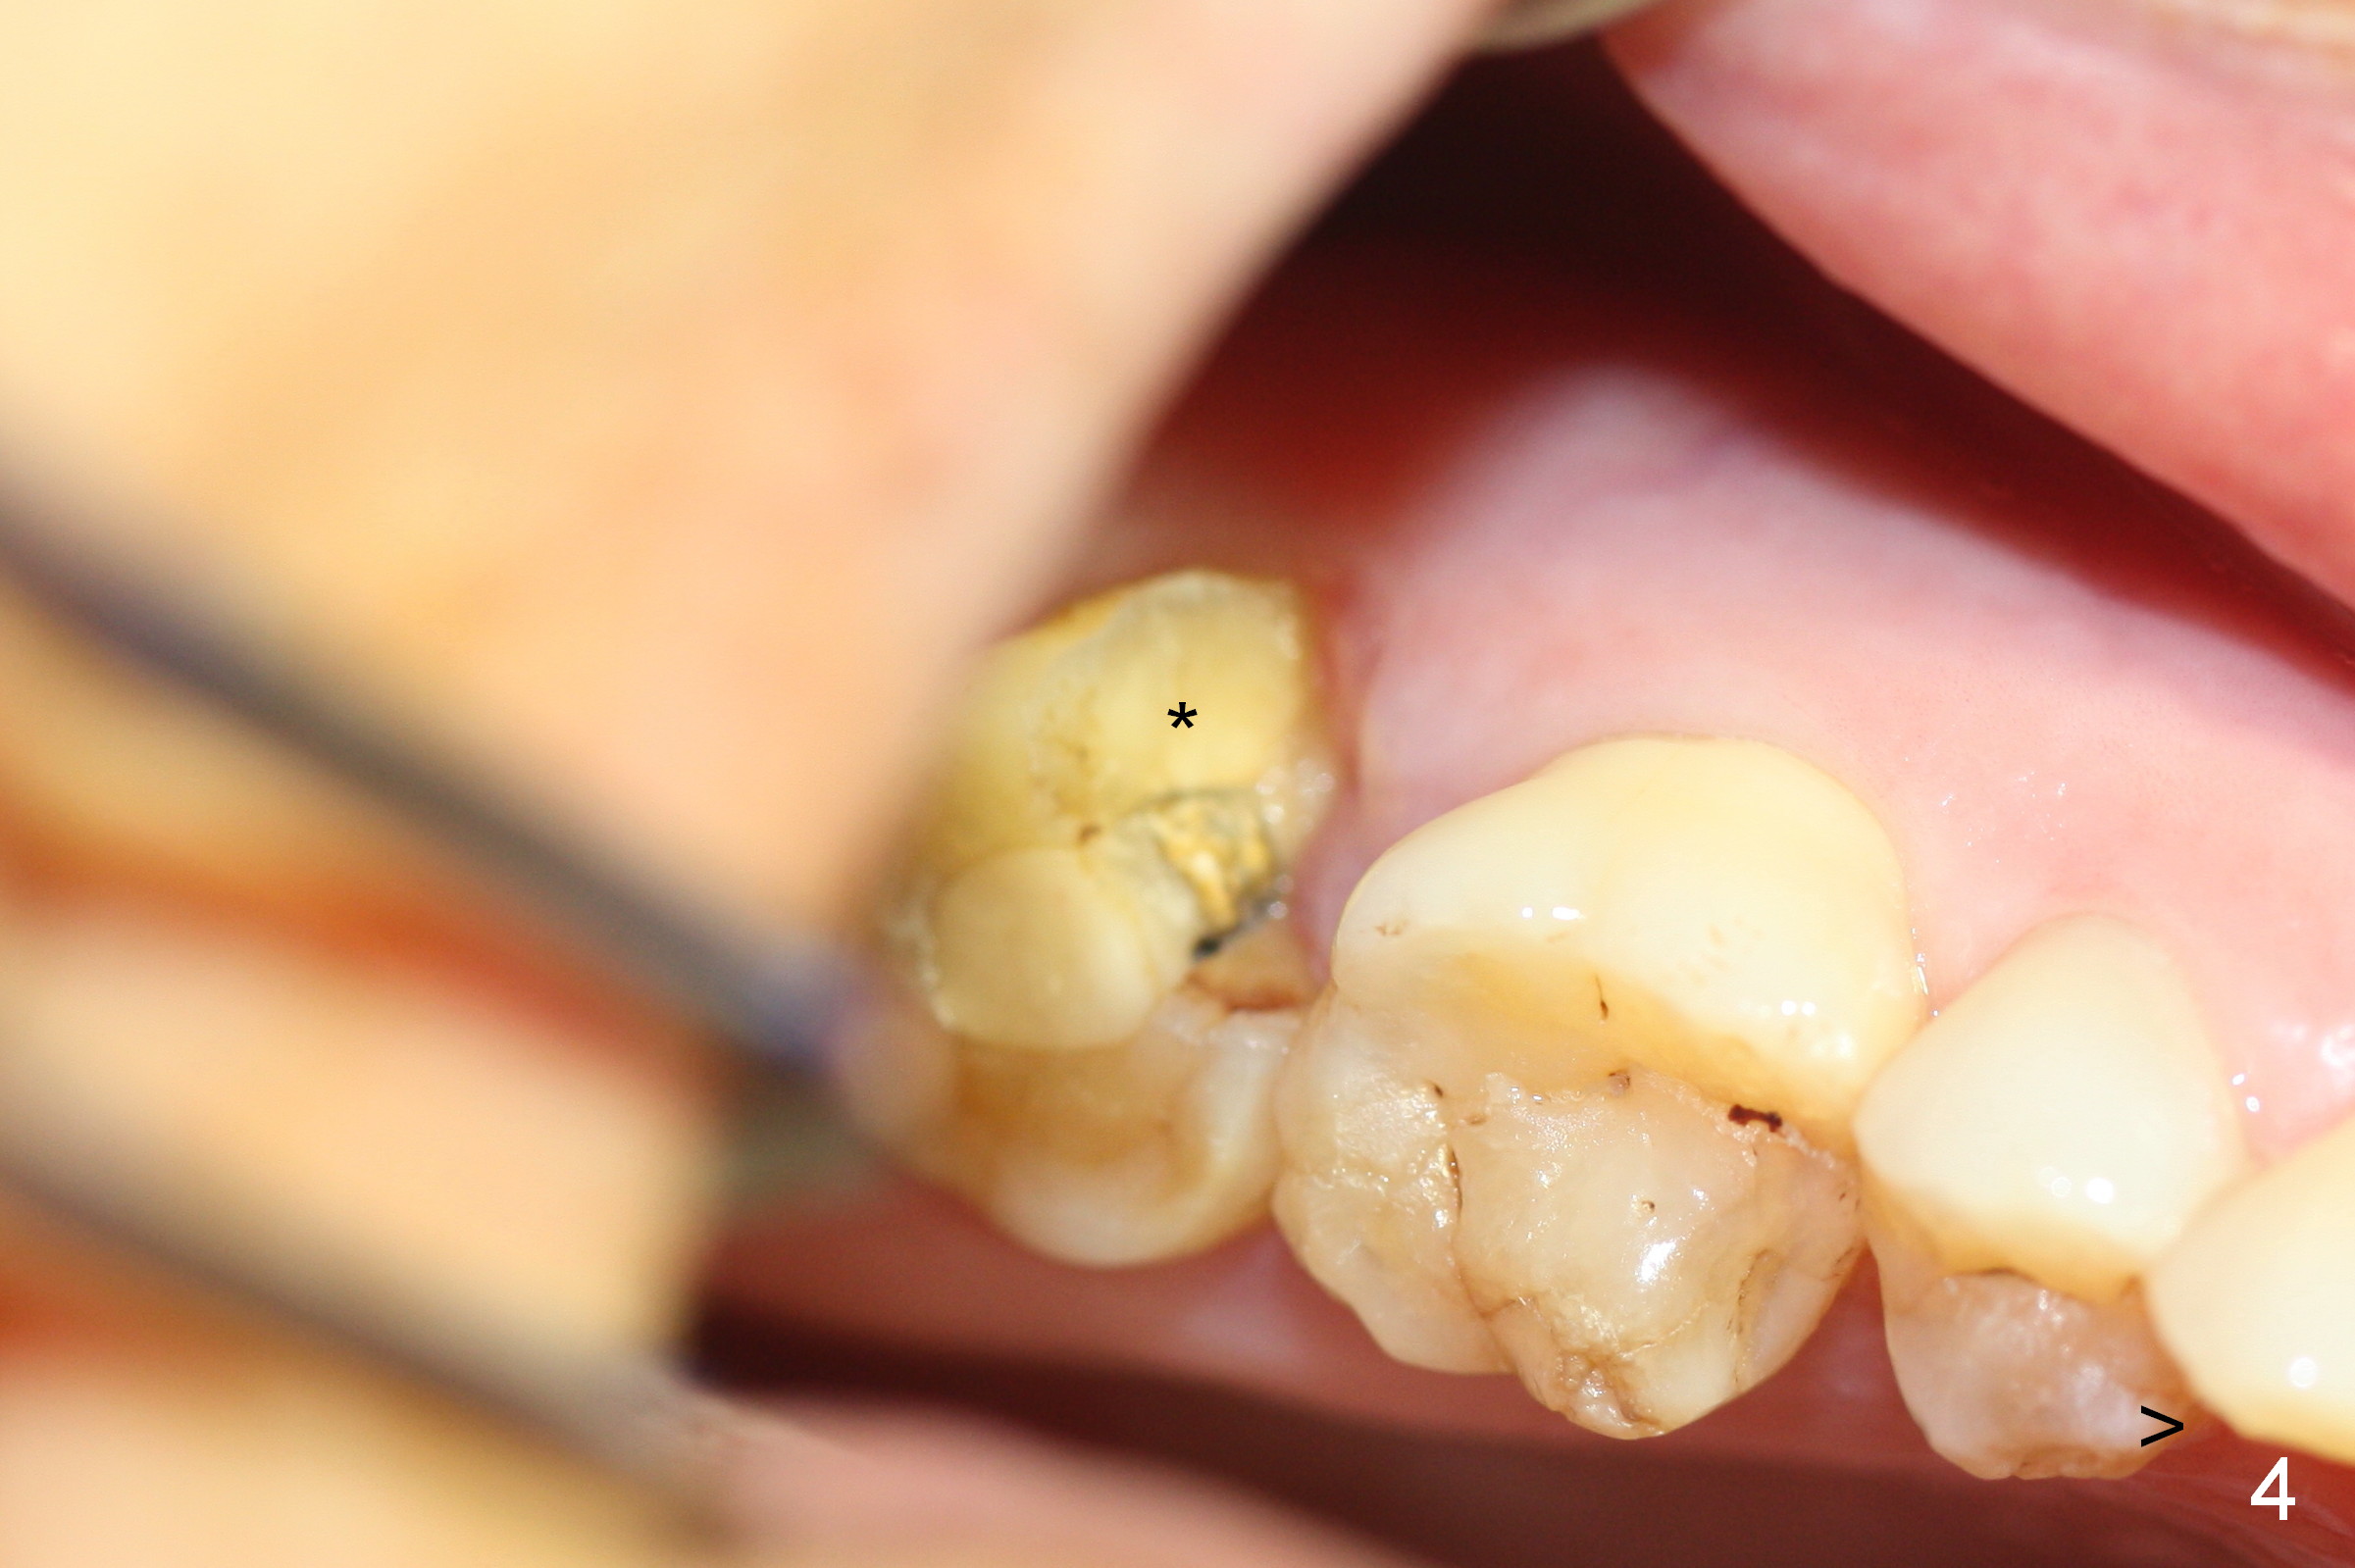
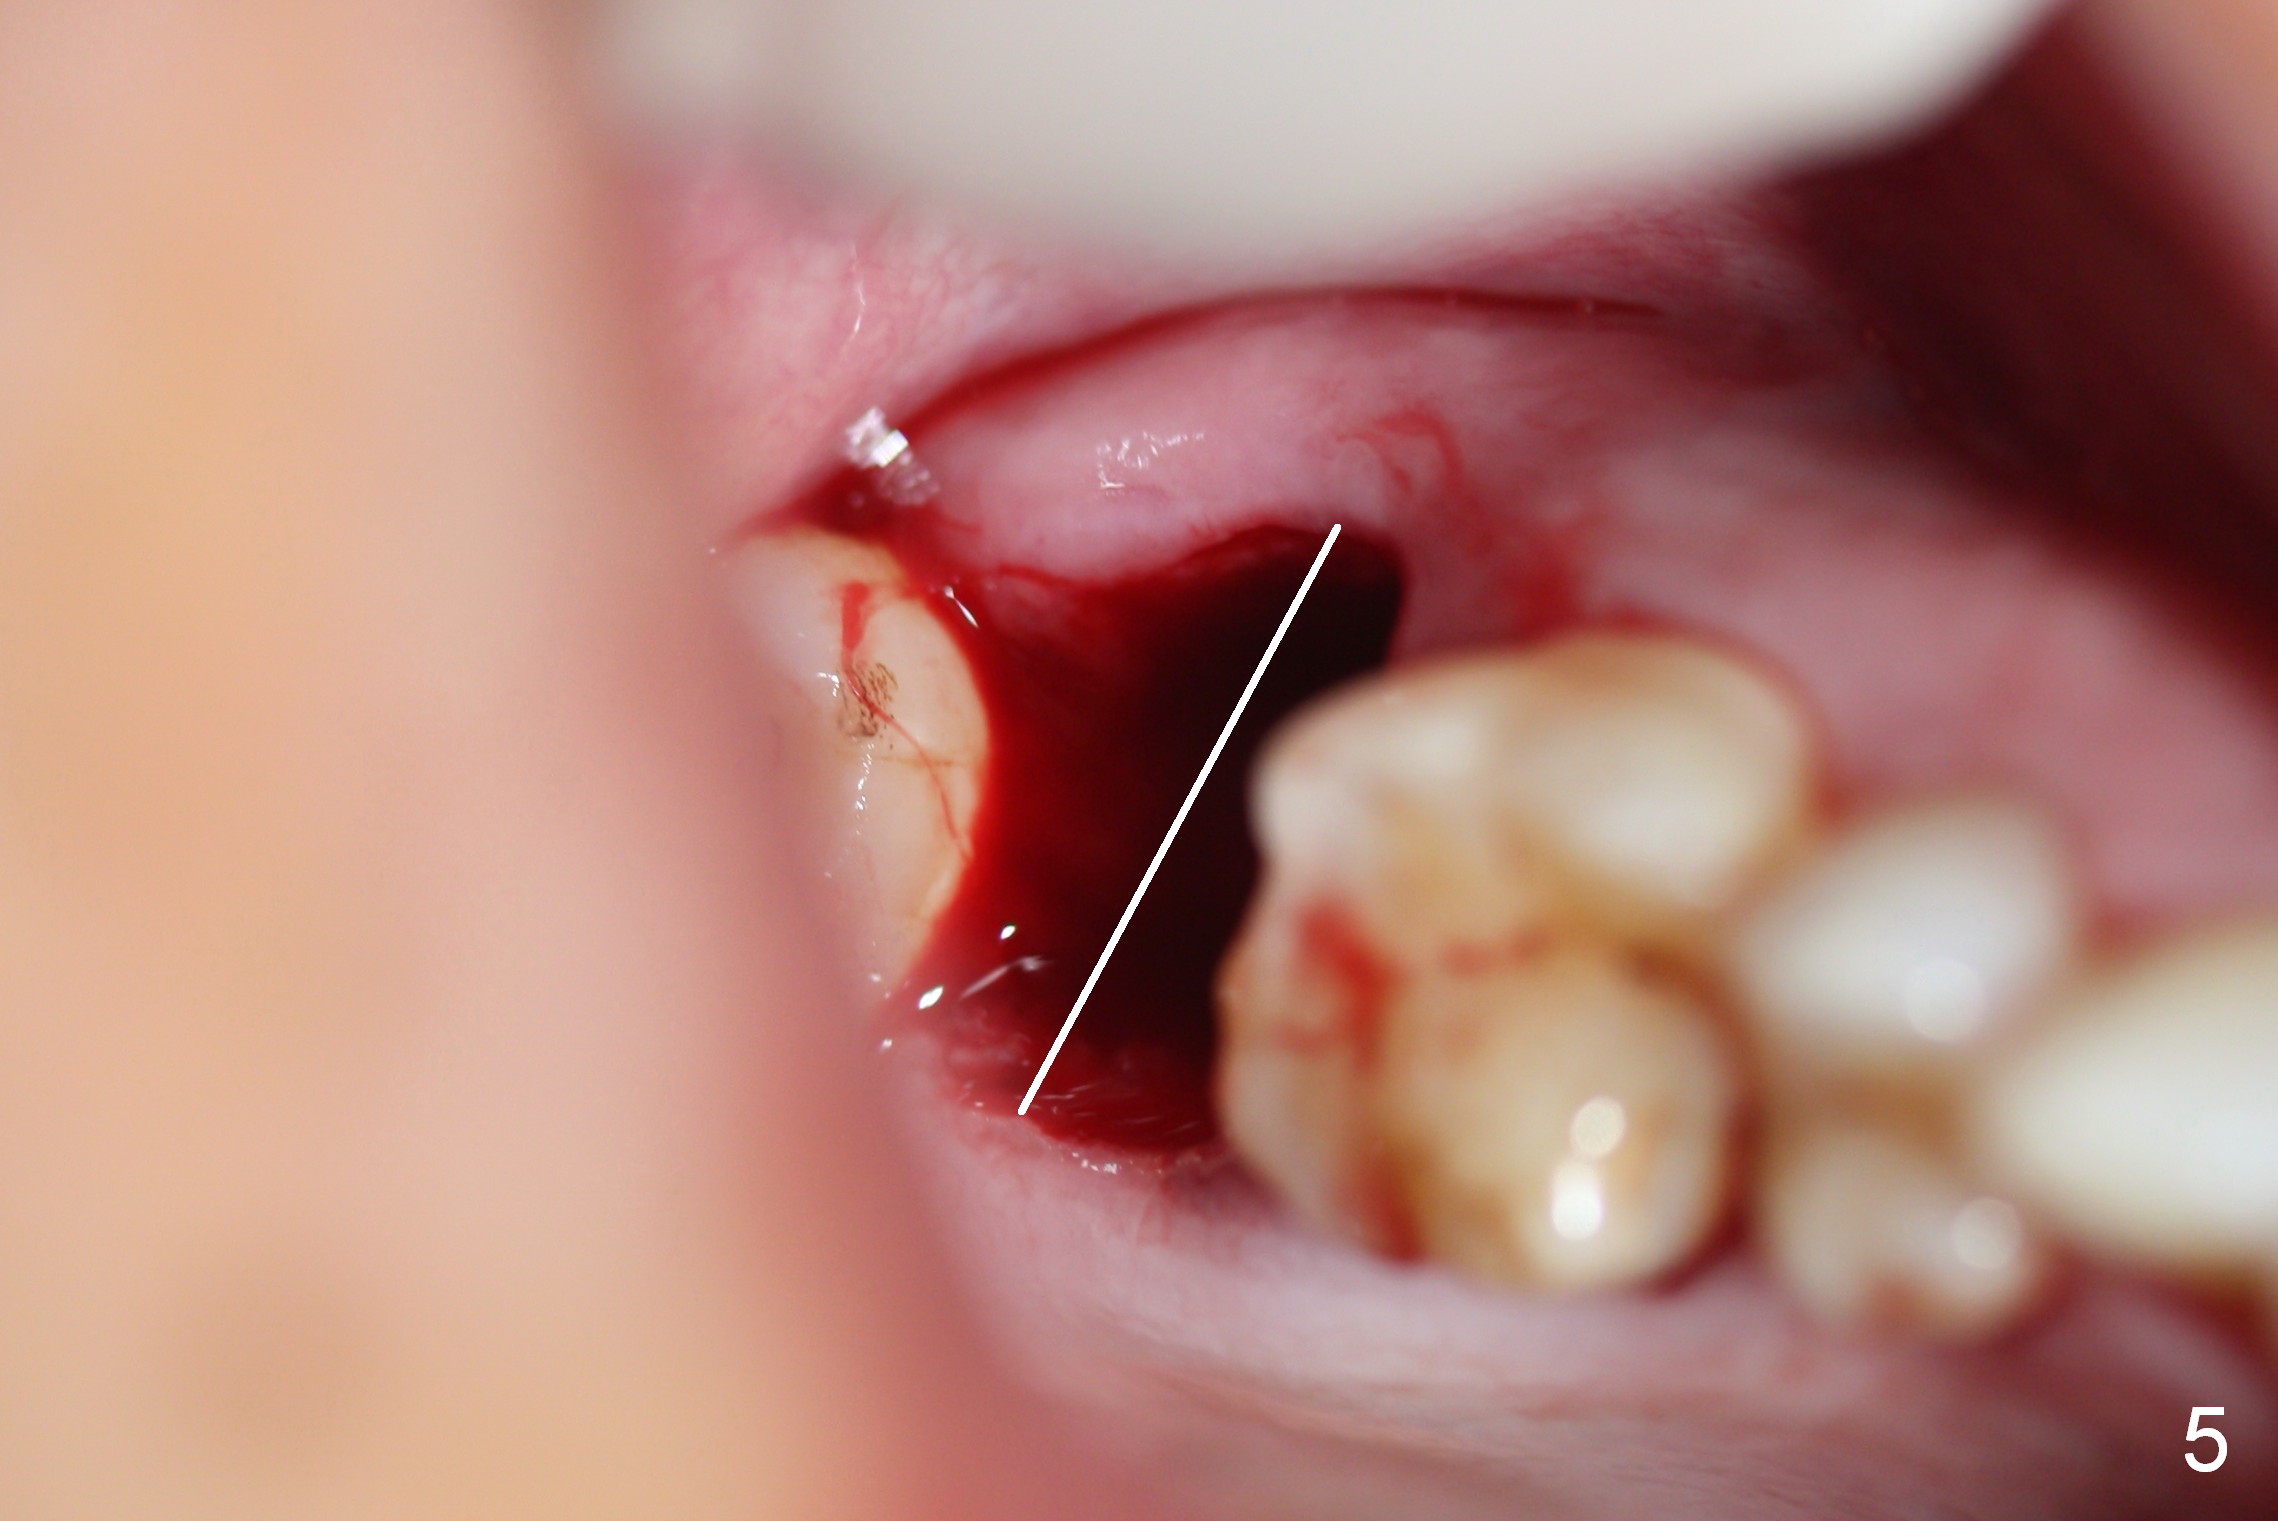
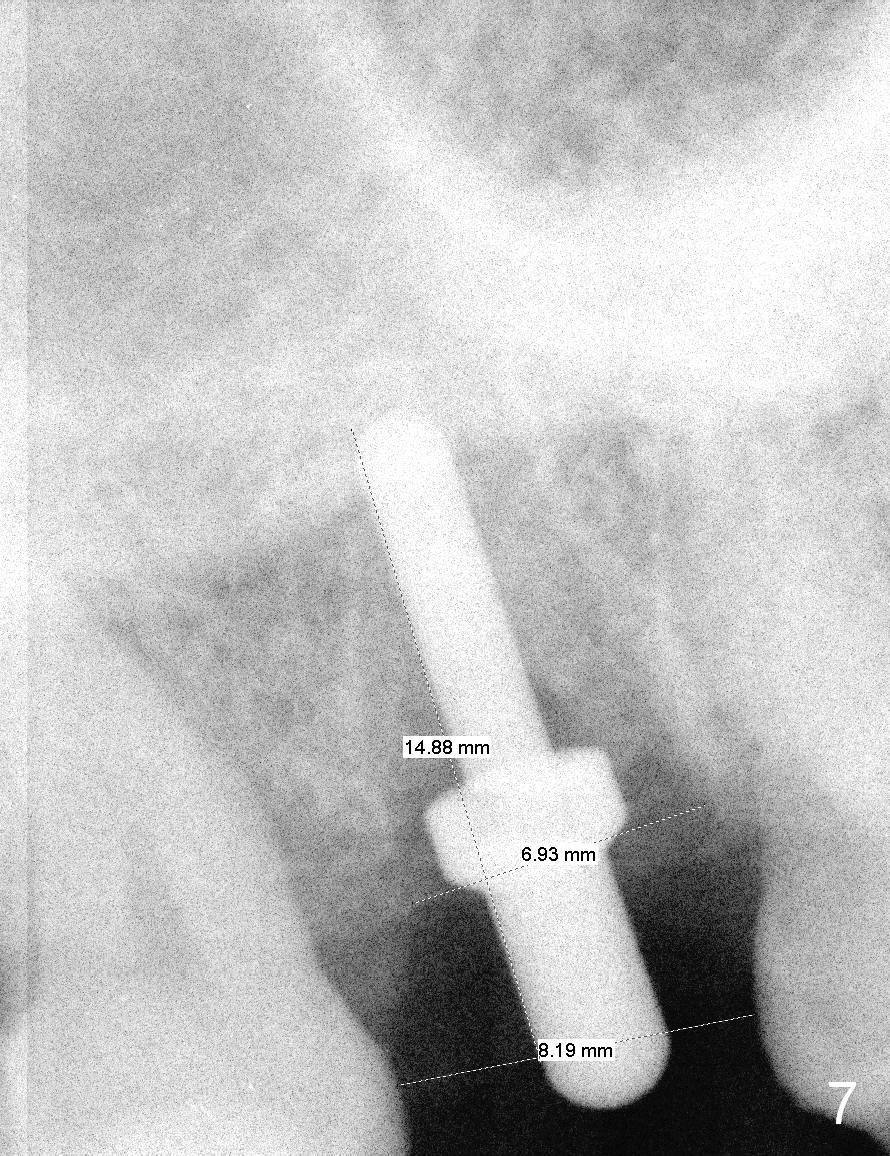
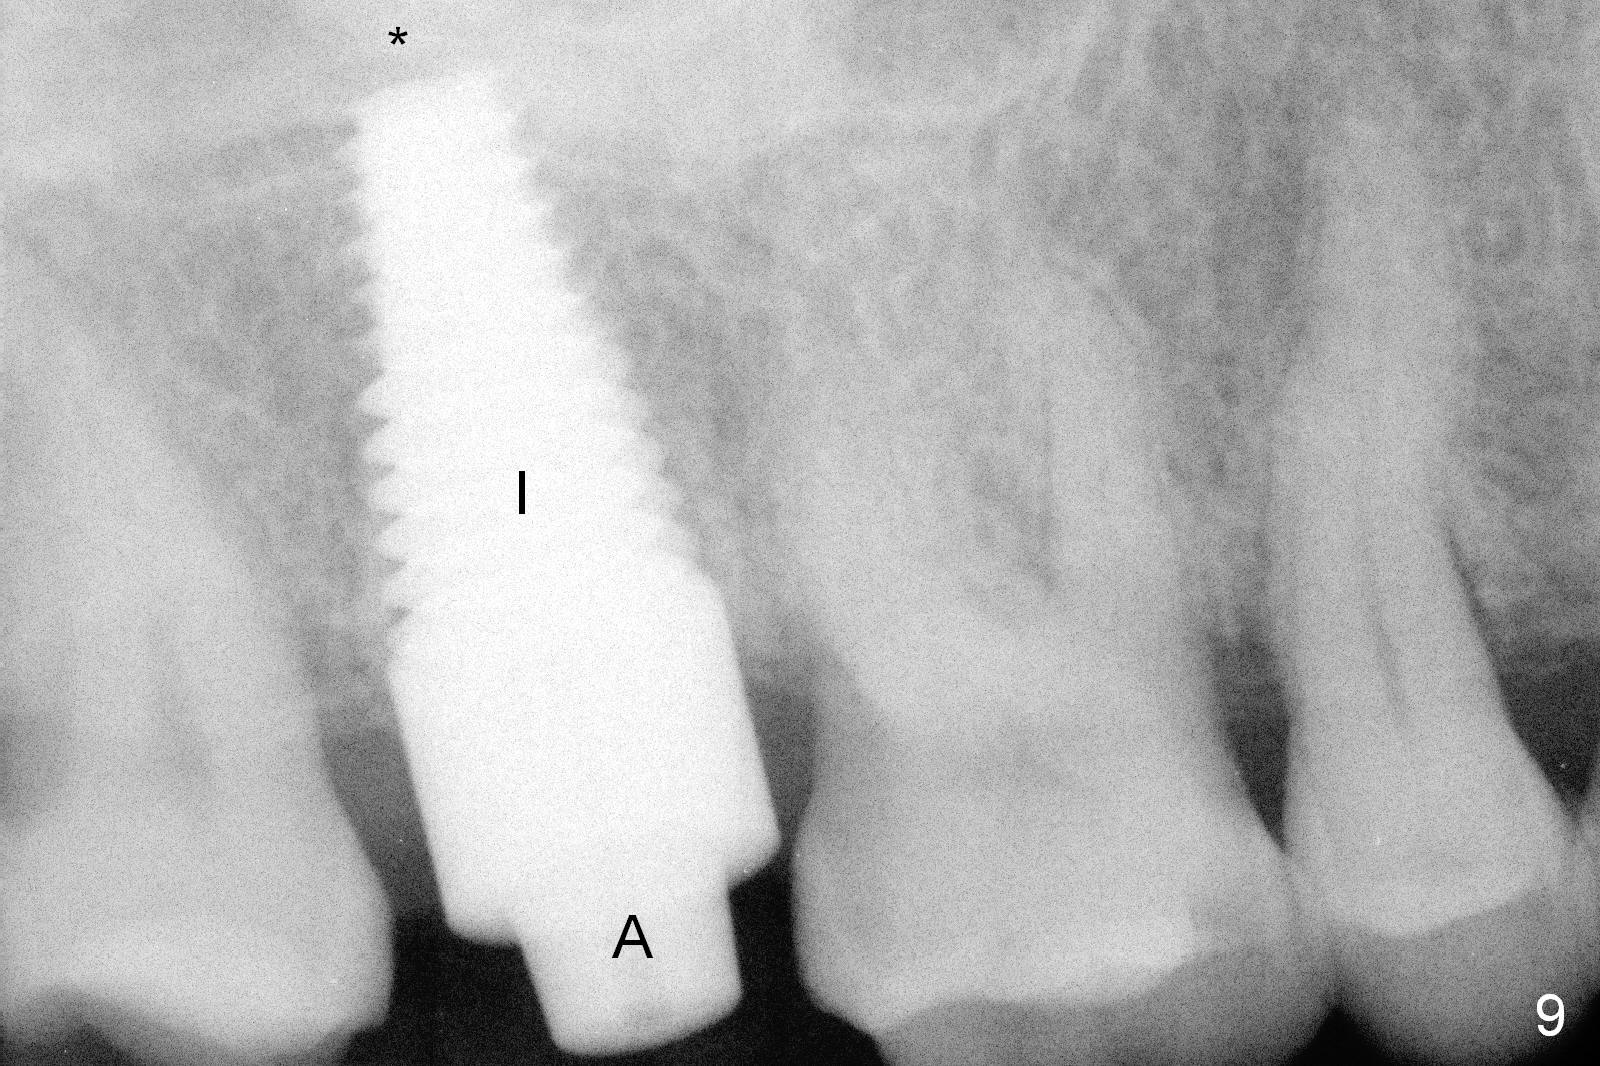
A 65-year-old lady is at early stage of Parkinson's disease and appears to be a bruxer. There are multiple chipped teeth, including #2 (Fig.1,4 *). She chooses implant over RCT retreat. A tissue-level implant (Fig.2) matches the root shape of the affected tooth better than a bone-level one (Fig.3), because of taper. The buccopalatal and mesiodistal dimensions of the extraction socket are 11 and 8 mm, respectively (Fig.5,7).
The buccal roots are fused. The buccal socket (BS) seems to be larger than the palatal one (PS). There is a septum (S) between the 2 sockets. Both the buccal and palatal plates (BP, PP) are intact. The anatomy is illustrated in Fig.6a (buccopalatal section) with the same abbreviations, mentioned above. SF: sinus floor.
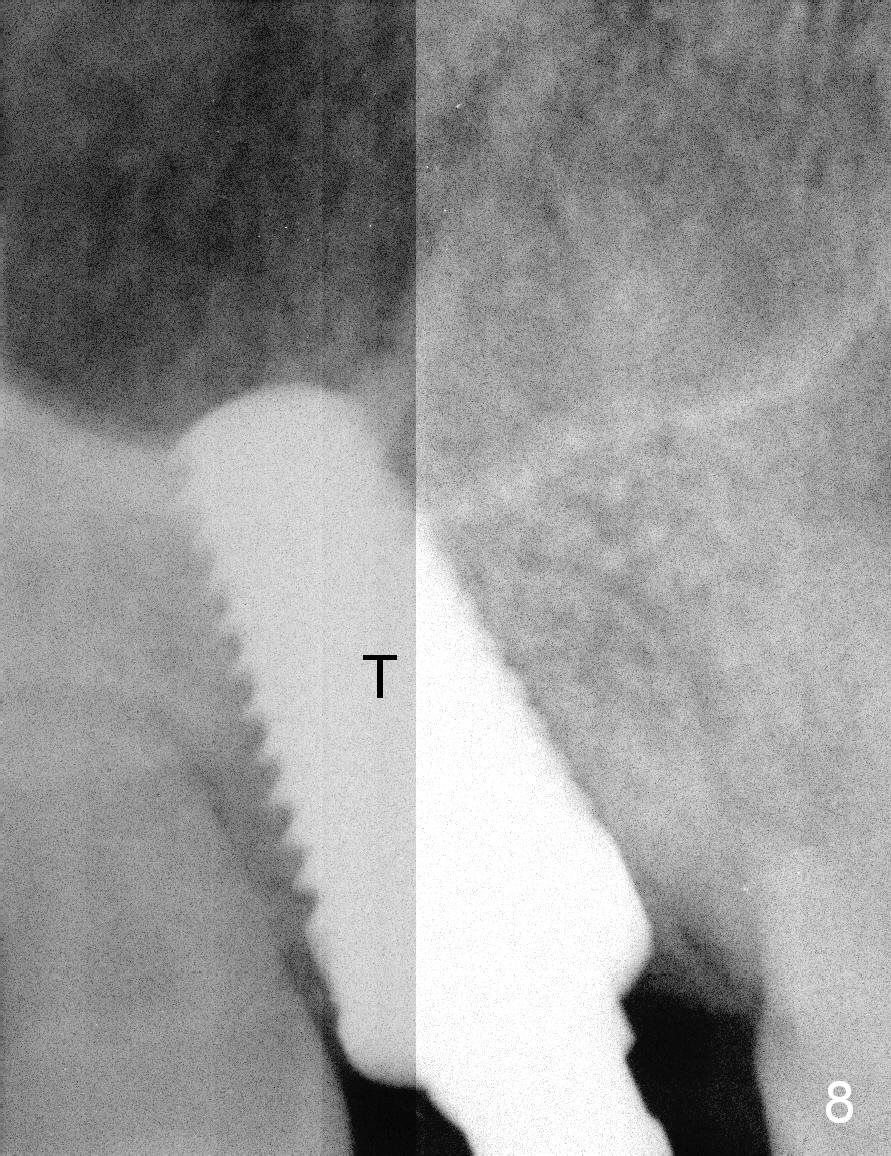
Osteotomy for immediate implant is initiated with a 2 mm pilot drill (Fig.6b red arrow) in the coronal end of the buccal slope of the septum (center of the socket). Once the drill gets initial penetration, the trajectory changes to the long axis of the tooth (Fig.6c). Then PA is taken with a parallel pin (Fig.7). It appears that the depth is not enough; there is bone apical to the pin. As osteotomy increases in diameter, burs may be deviated buccally due to the septal buccal slope (to be discussed below). With longer osteotomy, the deviation may be less. Osteotomy is deepened (Fig.6d). From this moment on, nose blowing test is done after each step. The result is all negative. As drill diameter increases, they do deviate buccally (Fig.6e arrow), since there is less bone contact buccally than lingually (compare Fig.6e,f). With the same reason, smaller tapered taps (Fig.6g pink, 5 and 6 mm) tend to be mobile buccally (arrow). When a large tap (7 mm) is inserted (Fig.8), there is no buccal mobility. It appears that the tap contacts more of the buccal plate (Fig.6h), but the coronal end of the tap is buccal (Fig.6i, pink circle). At each step of osteotomy, the coronal end of a bur or tap should be pushed as lingual as possible so that the final tap is favorable for restoration (Fig.6j). Sinus lift is done (Fig.6k red circle; Fig.9 *) before placement of 7x17 mm implant (I, >60 Ncm). Since the palatal socket is not associated with implant stability, it is closed by collagen plug (Fig.6l, blue area). As extra precaution, bone graft is placed around the coronal portion of the tissue-level implant (Fig.6l red circles), followed by collagen dressing.
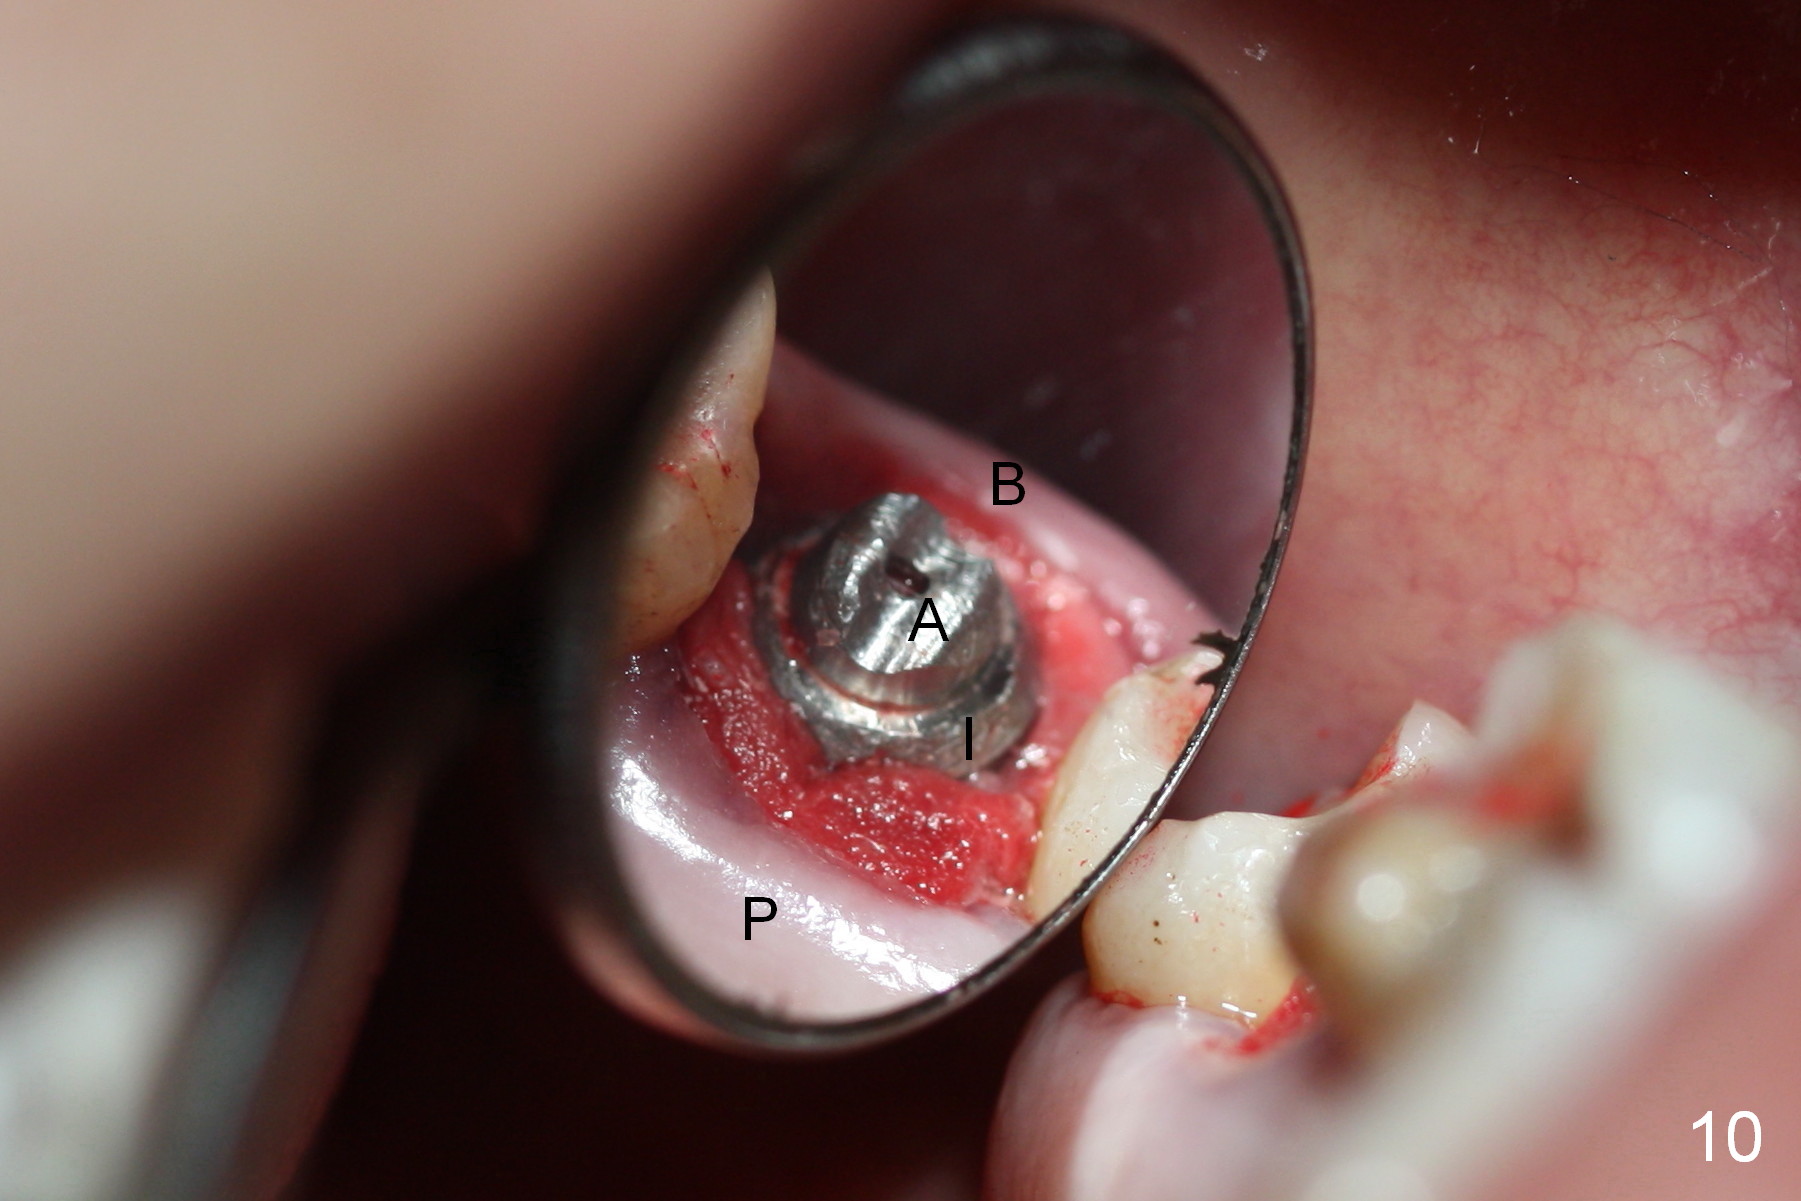
Probably due to bruxism, there is limited vertical restorative space. The margin is subgingival except buccal (Fig.10,11). An immediate provisional (Fig.12 P) appears to have to be fabricated to prevent soft tissue from covering the margin during osteointegration. It is our intention to make gingival envelop larger than the definitive crown cervix. It would be easier to remove a permanent cement later on for peri-implantitis prevention.
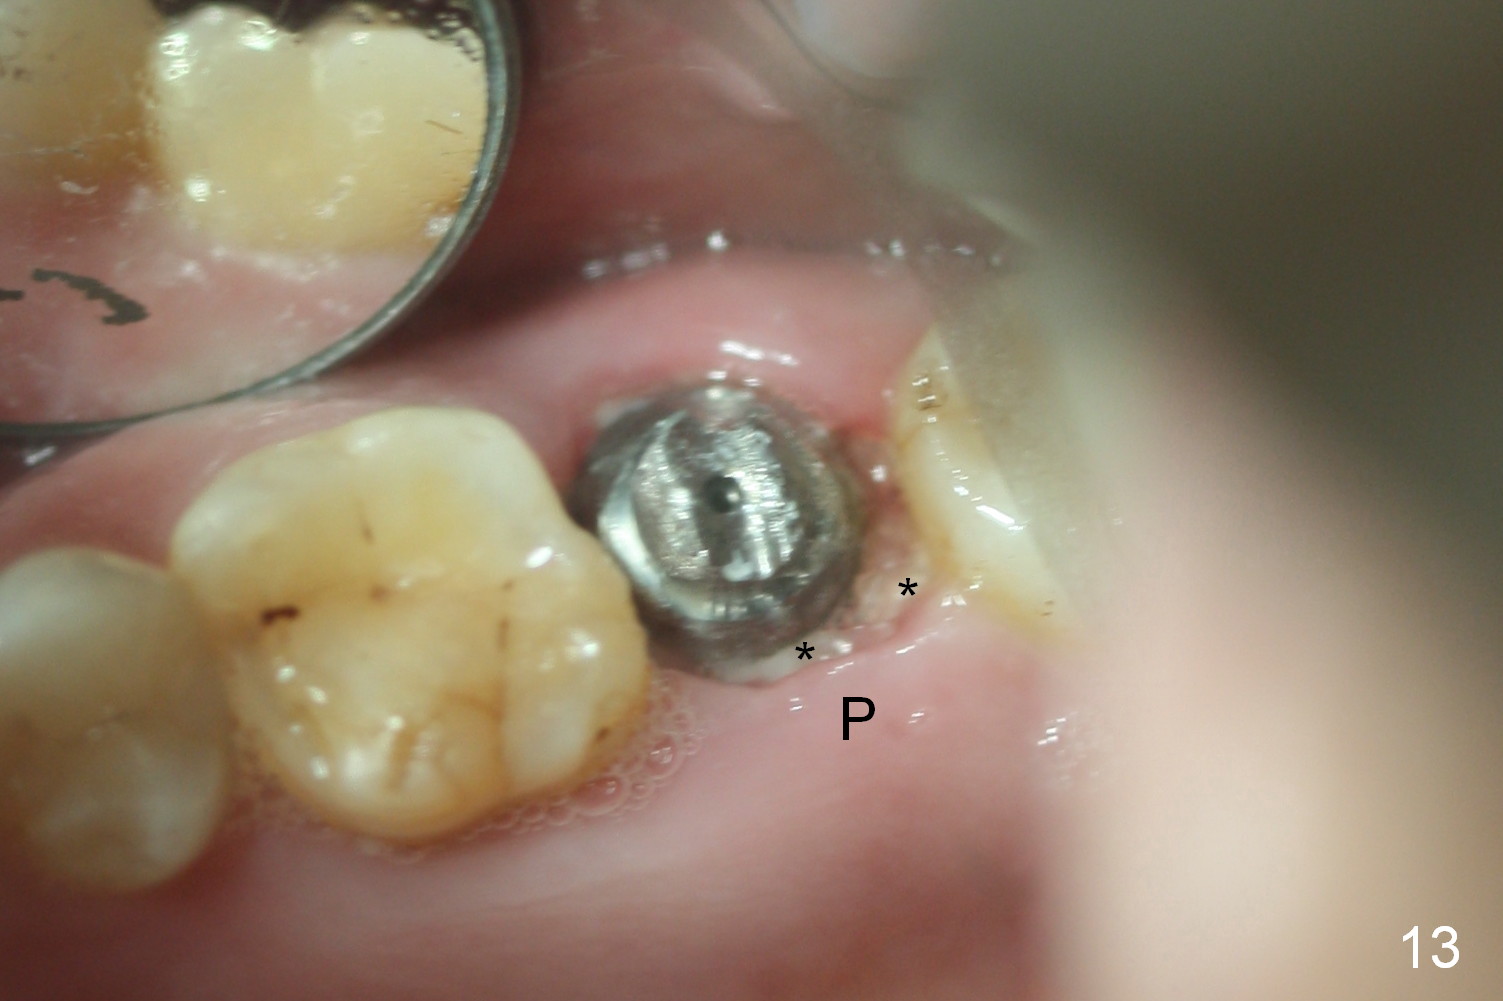
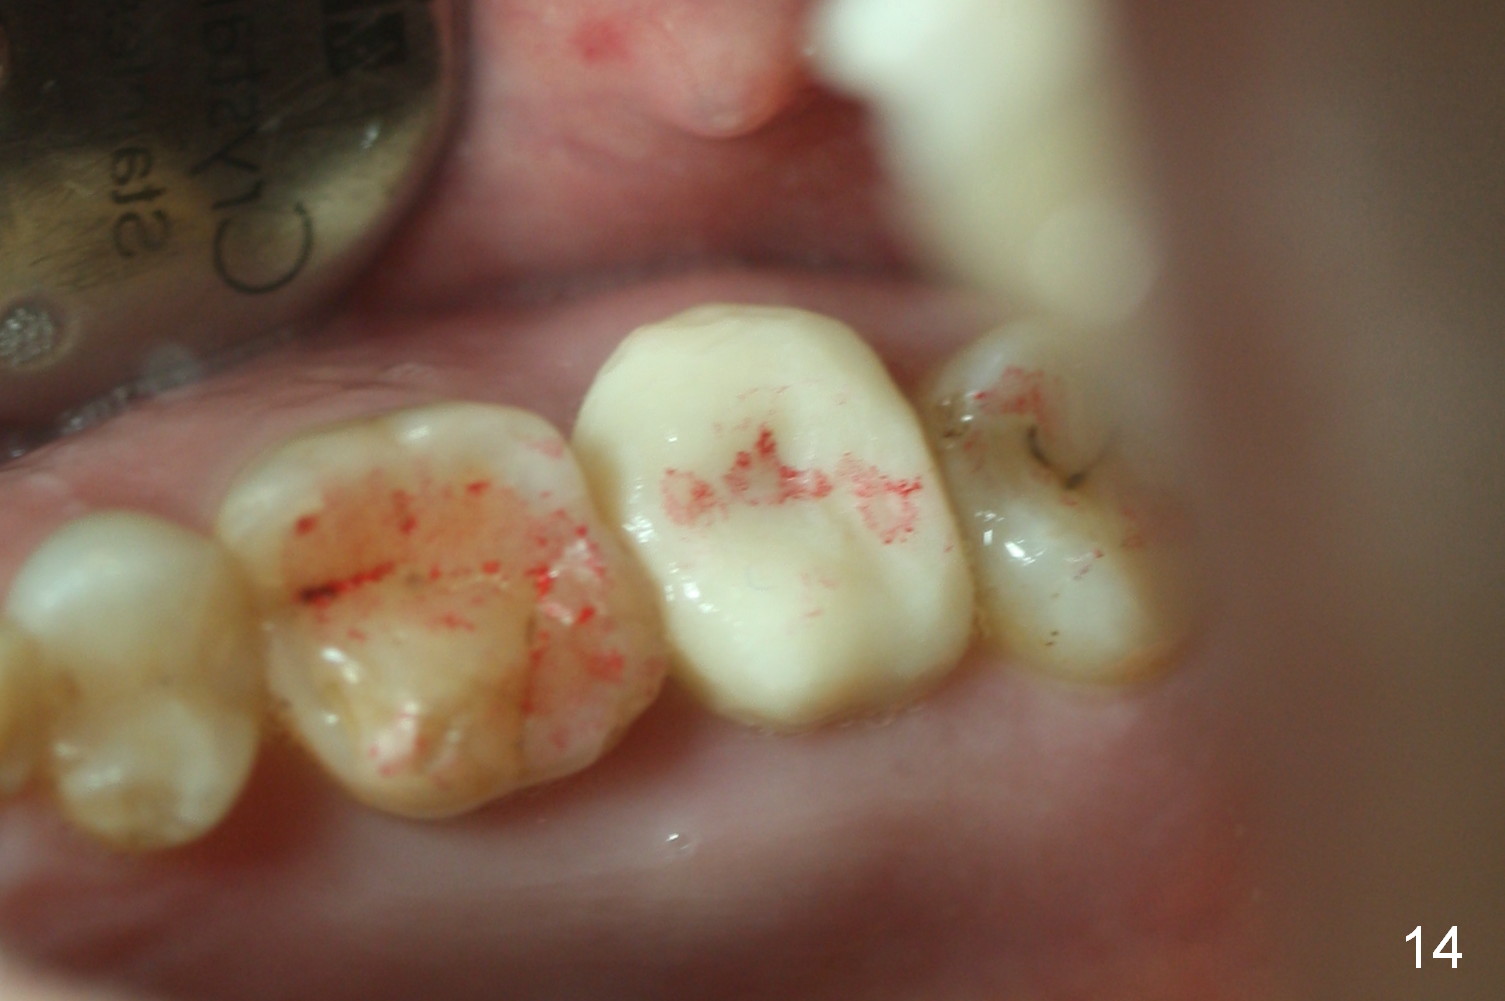
The patient returns because of provisional dislodgement 4 days postop. It appears that the socket shrinks (Fig.13 mirror view) with partial resolution of collagen dressing (*, as compared to Fig.10). The provisional is relined and reseated with occlusion checked (Fig.14). There is no sign or symptom of infection. The patient is pleased.
She returns for provisional reline and recementation 20 days later. The wound has healed further. It is easy to reprep the margin.
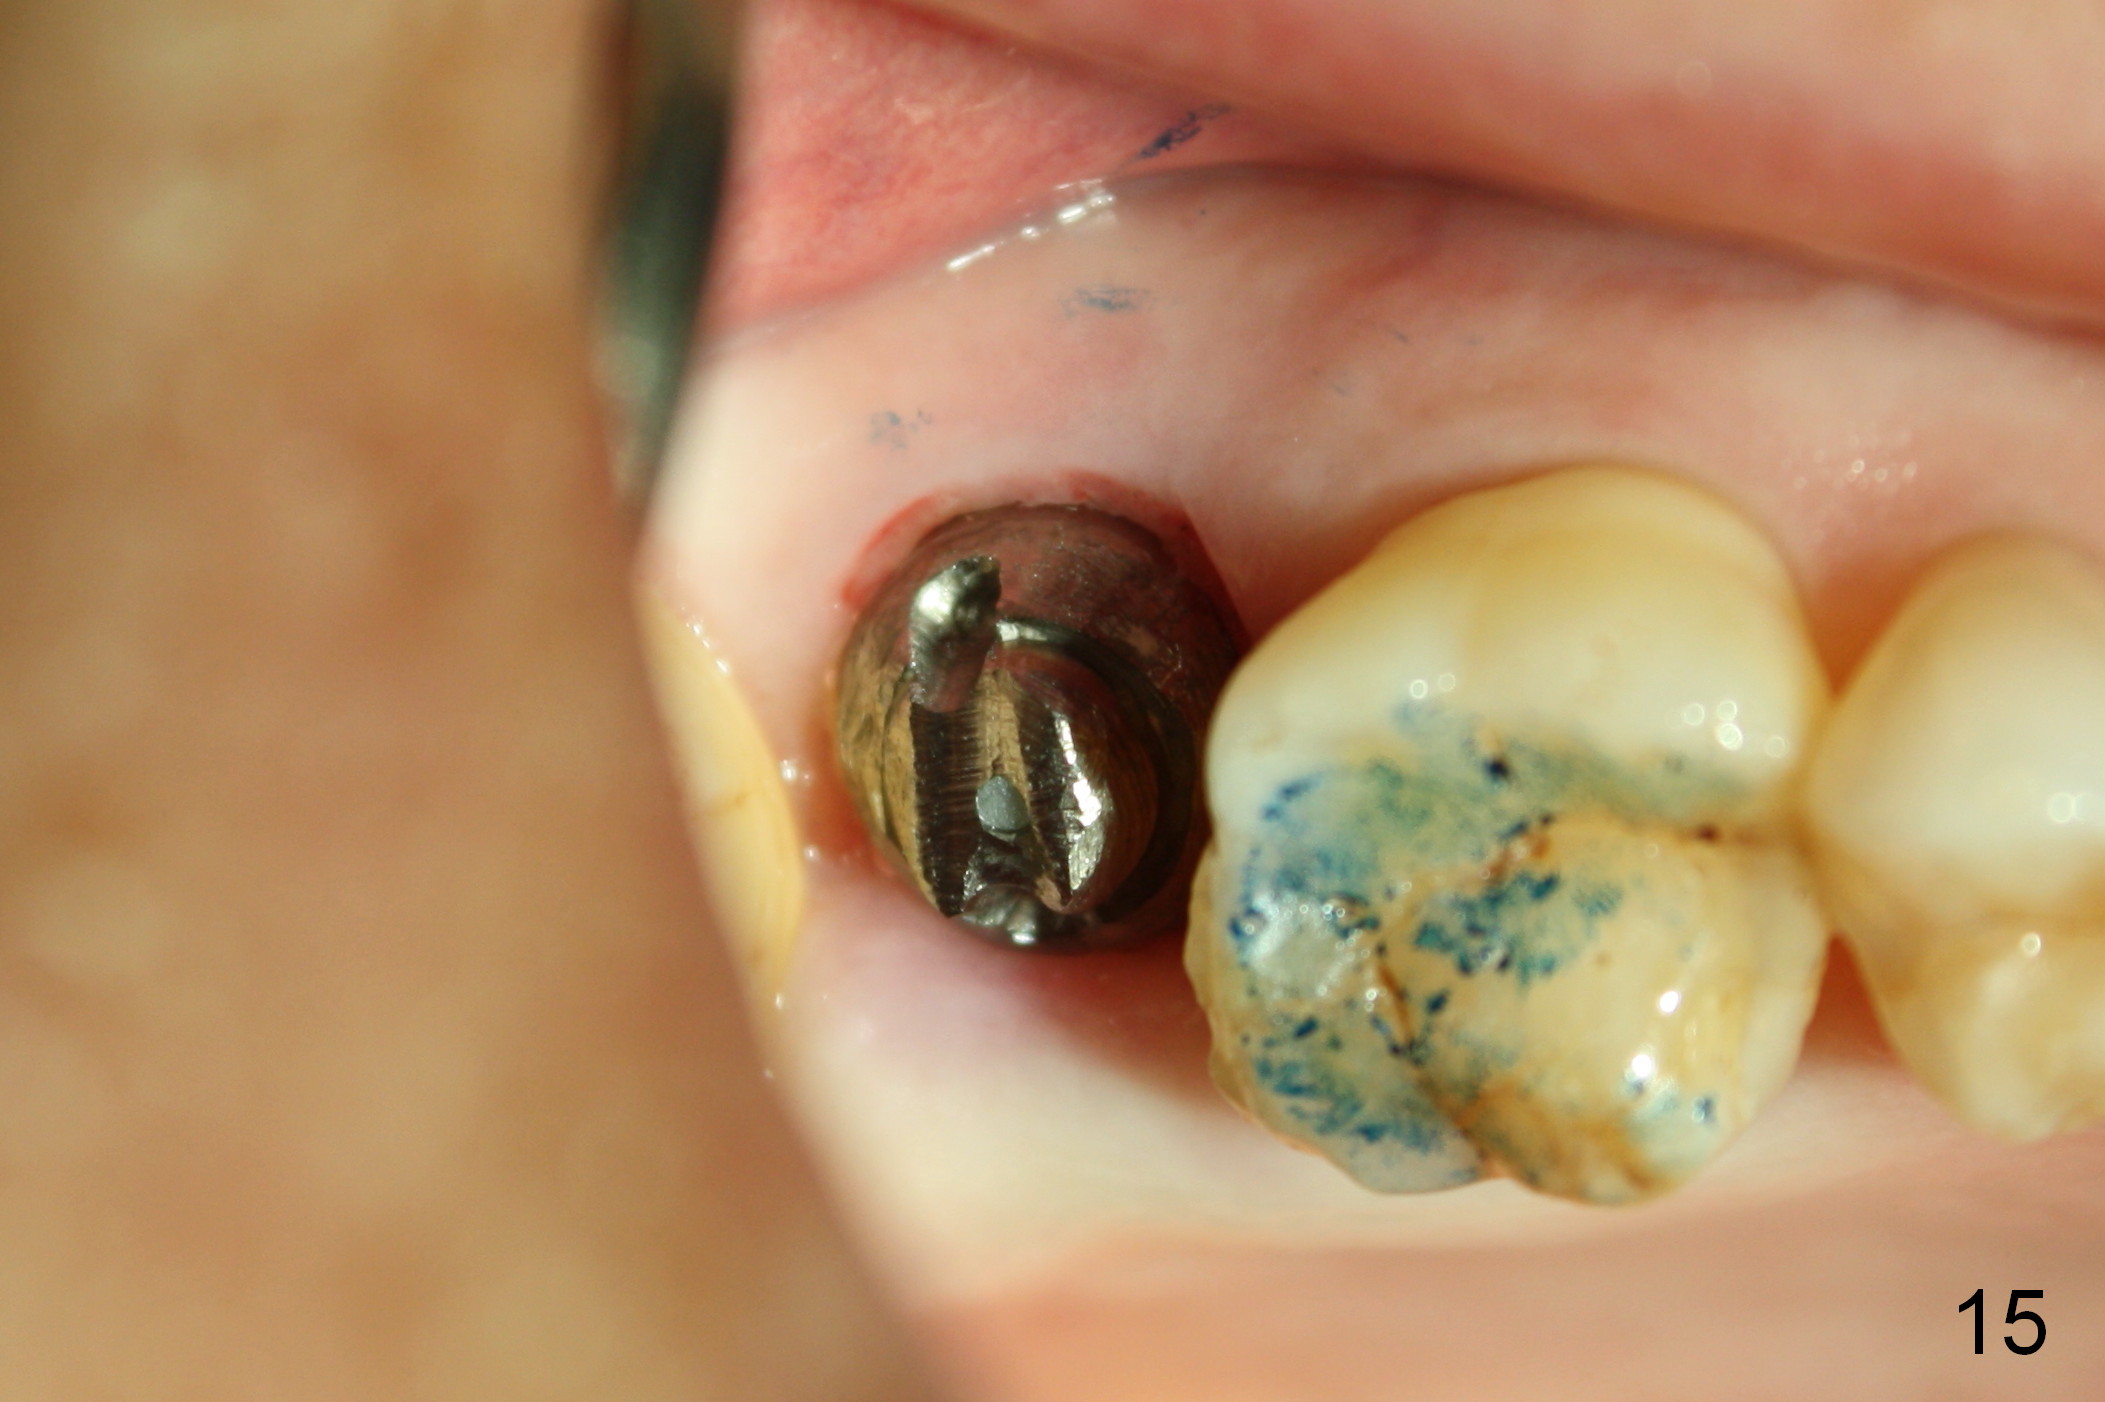
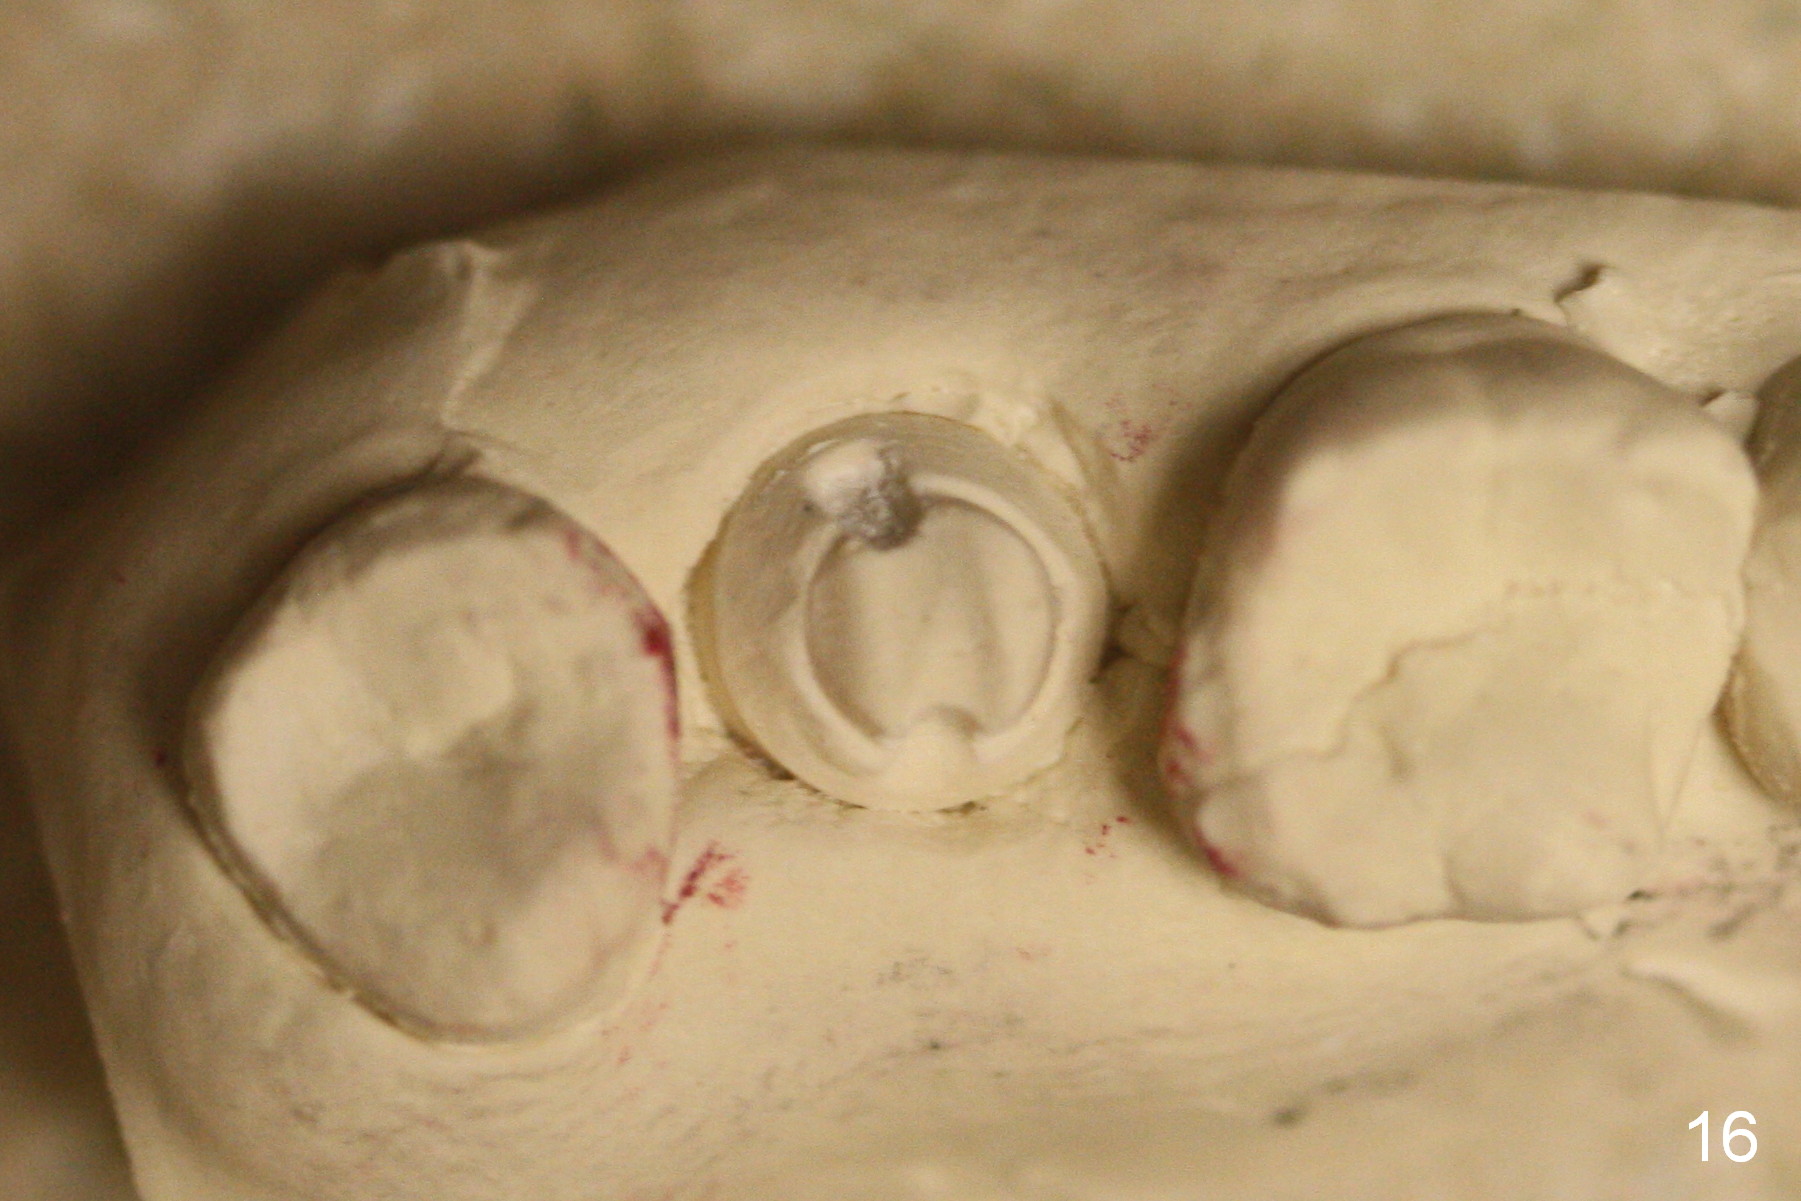
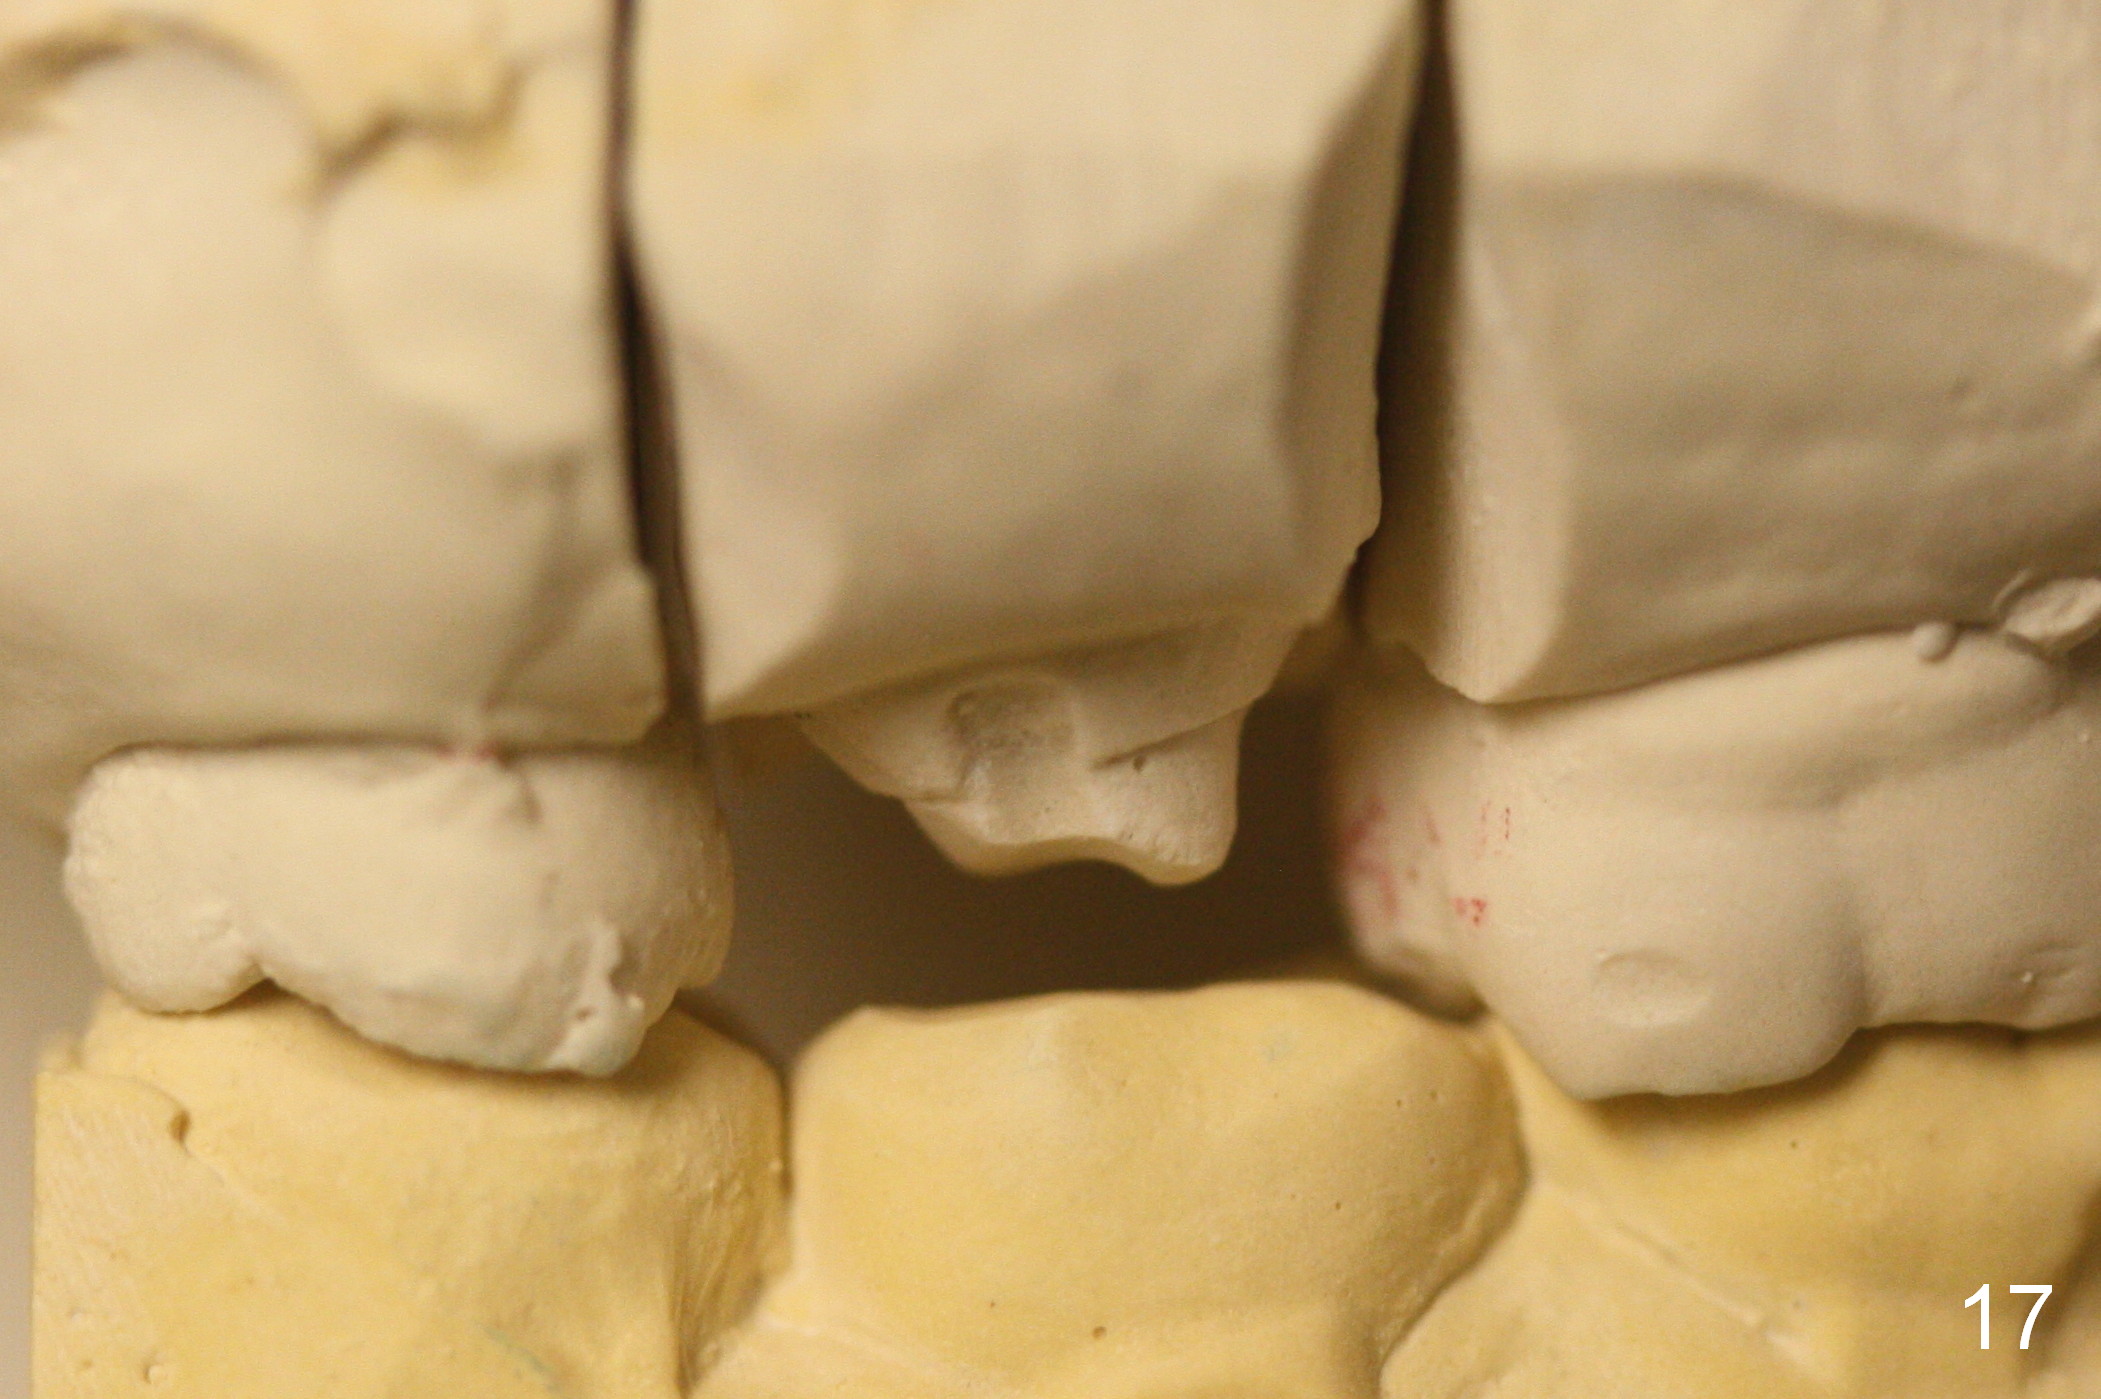
When the provisional dislodges for the 3rd time (2 months postop), the implant/abutment are re-prep for impression (Fig.15,16). Easy dislodgement is mainly due to short clinical crown (Fig.17)/bruxism.
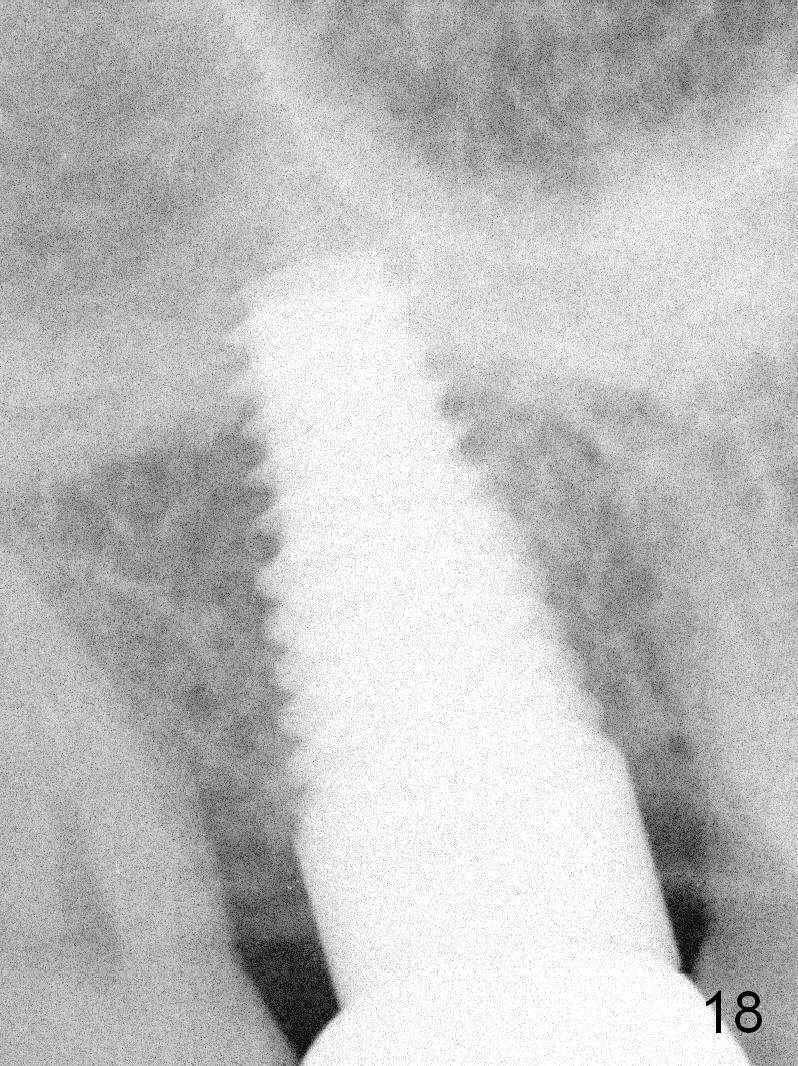
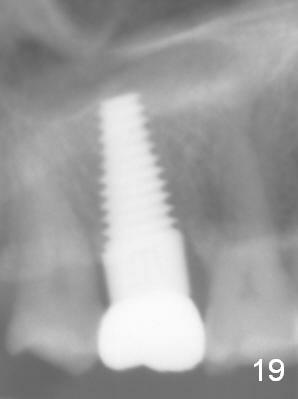
The patient returns for unknown pain on the right side 1.5 years post cementation (Fig.18,19). The gingiva is healthy. Two months later, the tooth #3 is found to have fractured.
Return to Professionals,
Upper Molar Immediate Implant,
Posterior Immediate Provisional,
Dr.
Wu
Xin Wei, DDS, PhD, MS 1st edition 02/20/2015, last revision 12/23/2016